Calgary Herald "Food Porn Friday" Featured Recipe
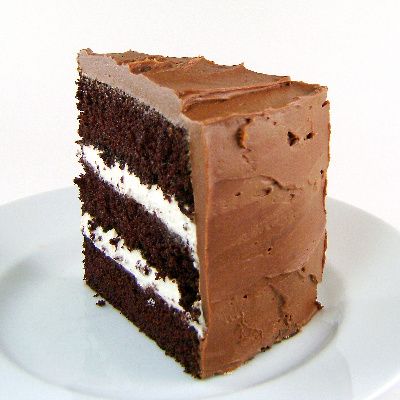
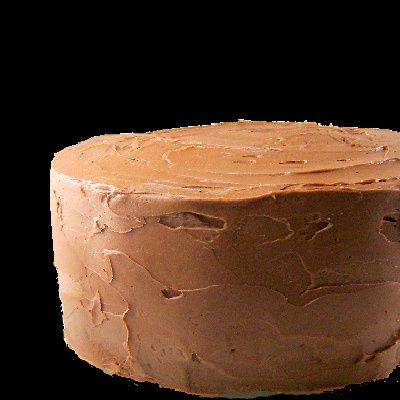
From the kitchen of One Perfect Bite...My Chicago homies, at least those of a certain age, will remember Dressel's Whipped Cream Cake. It was an uncommonly good dessert and one of the first quality cakes to appear in the freezer cases of local markets. It was, for good reason, enormously popular, and I'm not ashamed to admit that, frozen or not, it appeared more than once on my dinner table. I loved it and had it several times a year, but when we moved from Chicago to the East Coast, I learned that it was a regional product that had never made it to markets outside the Midwest. It was soon clear that if I wanted a whipped cream cake, I'd have to make it for myself. Fortunately, McCall's Cookbook came to my rescue with a recipe for what they called The Perfect Chocolate Cake. It was pretty aptly named. The cake was light and rich and made with cocoa, whipped cream and lots of chocolate. Purists could do away with the lovely chocolate icing and frost the layers with plain or cocoa flavored whipped cream and have a cake very much like the one that came from Dressel's bakery. I normally make this cake with whipped cream frosting, but the McCall's cake is so lovely I thought you'd like to see the cake the way its developers envisioned it. The cake is uncommonly good, and those of you who try it, will know how it got its name. Here's the recipe.
1 cup unsifted unsweetened cocoa
2 cups boiling water
2-3/4 cups sifted all purpose flour
2 teaspoons baking soda
1/2 teaspoon salt
1/2 teaspoon baking powder
1 cup butter or regular margarine, softened
2-1/2 cups granulated sugar
4 large eggs
1-1/2 teaspoons vanilla extract
Filling
1 cup heavy cream, chilled
1/4 cup unsifted confectioners' sugar
1 teaspoon vanilla extract
Frosting
1 package (6 oz.) semisweet chocolate pieces
1/2 cup light cream
1 cup butter or regular margarine
2-1/2 cups unsifted confectioner's sugar
Directions:
1) To make the cake: In medium bowl, combine cocoa with boiling water, mixing with wire whisk until smooth. Cool completely. Sift flour with soda, salt, and baking powder. Preheat oven to 350 F. Grease three 9 by 1-1/2 inch layer cake pans. Line with parchment paper. Grease paper and lightly flour pans. Set aside. In large bowl of electric mixer at high speed beat butter, sugar, eggs, and vanilla, scraping bowl occasionally, until light, about 5 minutes. At low speed, beat in flour mixture (in fourths), alternately with cocoa mixture (in thirds), beginning and ending with flour mixture. Do not overbeat. Divide evenly into pans; smooth top. Bake 25 to 30 minutes, or until surface springs back when gently pressed with fingertip. Cool in pans 10 minutes. Carefully loosen sides with spatula; remove from pans; cool on racks.
2) To make filling: Whip cream with sugar and vanilla; refrigerate.
3) To make frosting: In medium saucepan, combine chocolate pieces, cream, butter; stir over medium heat until smooth. Remove from heat. With whisk, blend in 2-1/2 cups confectioners; sugar. In bowl set over ice, beat until it holds shape.
4) To assemble and frost cake: On plate, place a layer, top side down; spread with half of cream. Place second layer, top side down; spread with rest of cream. Place third layer, top side up. With spatula, frost sides first, covering whipped cream; use rest of frosting on top, swirling decoratively. Refrigerate at least 1 hour before serving. To cut, use a thin edged sharp knife; slice with a sawing motion. Yield: 10 to 12 servings.
Cook's Note: The cake should be refrigerated, but to prevent the frosting from cracking when cut, let the cake sit at room temperature for about 30 minutes before slicing.
You might also enjoy these recipes:
Chocolate Oatmeal Cake - Taste of Home
Chocolate Overdose Cake - Confections of a Foodie Bride
The Best Chocolate Cake, Ever - Courtney's Sweets
Espresso Chocolate Cake with Mocha Mascarpone Frosting - Life's a Feast
Chocolate Cake with Coconut Icing - Chow and Chatter
Mexican Milk Chocolate cake - Sugar Plum
Mom's Chocolate Cake - Cookie Madness
Chocolate Guinness Stout Cake - The Recipe Girl