Showing posts with label buttermilk. Show all posts

Saturday, October 24, 2015

Soup's On - My Recipe Rotation - Cheesy Buttermilk Scones


From the kitchen of One Perfect Bite...These scones regularly appear on my table in the fall and winter months. I make a lot of soup during our rainy winter season and when I don't have freshly baked bread to pair with it, I fall back on this much used, tried and true recipe, and bake these wonderful savory scones. The scones are simple to make and so gorgeous to look at that they will put calorie watchers in harm's way. The only solace that I can offer to those I've tempted is that they are worth every last calorie. Do try them! Here is what I had to say when the recipe was first posted.

Tuesday, January 6, 2015

Buttermilk Corn Muffins with Honey Butter


From the kitchen of One Perfect Bite...Time was, my friends, when corn bread was a simple thing. There was a Southern corn bread and a less sweet Northern, or "Yankee", version. Somewhere along the way, folks started playing with this simple staple. To improve its appearance, the batter was moved to muffin cups and its humble ingredients were enhanced with more glamorous bits and bobs from the pantry or fridge. I'd like to blame food editors for the adulteration, but I can't bring myself to do that. Can you imagine the effort involved in trying to show old foods, the ones that everyone knows, in a new light? I'll wager it's exhausting when you get to the 103rd version of chocolate chip cookies and still have to find a new take on Thanksgiving turkey in the middle of a summer heatwave. So, I'll give them a pass on the proliferation of theme and variation recipes that appear in food magazines month after month, especially those for corn bread. Having said that, I'm going to take a stand here. I love the original Yankee corn bread and entertain other versions only because the Silver Fox likes things sweeter than I do. We've been having a lot of soup lately, and in order to avoid making yeast bread or rolls, I've made corn bread or corn muffins to accompany it. The Silver Fox really enjoys the taste of the double corn muffins I'm sharing with you tonight. I enjoy them because they are fast and simple to make. Does that make them a win win? I'll let you be the judge. At any rate, if you are looking for a new version of corn muffins to serve for breakfast or with your winter soups or stews you might want to give these a try. Here is how they are made.

Sunday, September 14, 2014

Table for Two - Buttermilk Waffles


From the kitchen of One Perfect Bite...Waffles have been a fixture on American tables for years. Thomas Jefferson so loved the waffles he had in France and Belgium that he had irons shipped to his home in Virginia, so he could continue to enjoy them. Pancakes remained more popular with most folks because no special equipment was needed to make them and recipes for their preparation were generally less involved. All that changed during the 1950's as wages and lifestyles improved. Small appliances and gadgets swept the nation and middle class kitchens proudly displayed a "wired" array that included electric mixers, frying pans and waffle irons. For a period of time, waffles were the craze for Sunday night supper. Folks who had a large meal at 1 or 2 in the afternoon still needed a light supper and waffles were a perfect and novel solution for many families. Perhaps it was too much of a good thing, but whatever the root cause, the waffle craze ran its course and irons fell into disuse and became found objects in most homes. There has been, of late, a rash of new recipes for waffles, and some of them are really marvelous. Unfortunately, they do not lend themselves to quick preparation and they are scaled to feed way more than two people. The Silver Fox and I are children of the 50's, so it is no surprise that we love waffles. I've developed this recipe so the two of us could enjoy them whenever we have the urge. It takes about 30 minutes to get these to the table. They are delicious and I know those of you who try the recipe will love the waffles, so, please dust off your irons and give them a try. Here is how they are made.

Sunday, August 31, 2014

An Easy Lemon Buttermilk Sheet Cake


From the kitchen of One Perfect Bite...Despite practicing polite refusals for most of the summer, I let my guard down, just for a moment mind you, and said "yes" to a request for cakes for a large holiday picnic. That would not have been so bad, but it also happens the picnic was scheduled for the same day I was having company of my own. Sheet cakes and freezers proved to be my salvation. Starting mid-week, I began my version of a baking marathon and by week's end I had made two Texas sheet cakes and four of the lemon buttermilk cakes I want to share with you today. I really think the lemon lovers among you are in for a treat. This is a wonderfully moist cake that has a rather remarkable sugar crust that sets it apart from other cakes of its type. It also happens to be remarkably easy to make. The recipe was developed for Cook's Country magazine and it is simple to follow, but I want to stress how important it is to use fresh lemon juice if you decide to make it. No substitutes, please. The cake, covered with plastic wrap, keeps well at room temperature for a day or two, but I don't think you'll have any problem with leftovers. If you are still looking for a holiday cake, why not give this treasure a try? It would be a wonderful way to end a barbecue. Here is how the cake is made. 

Tuesday, May 27, 2014

Beans, Biscuits and Bread Part Two - Cornmeal and Buttermilk Biscuits


From the kitchen of One Perfect Bite...I found the recipe for these biscuits on the Food Network website. It caught my eye because I was looking for something to serve with the bean trio that was being sampled for the holiday barbecue. I thought the touch of cornmeal would add some texture to the biscuits and go well with the spicy sweet flavor of the beans we were testing. I must tell you, these biscuits are lovely. I do want to clarify what I think was meant by the specification for "polenta-style" cornmeal. I think it is fair to categorize any medium to coarse ground cornmeal as "polenta-style" and if you avoid the really finely ground type you'll be fine. As with any biscuit, you'll want to use an easy hand and be sure not to overwork the dough. This recipe can be doubled if you have a gang to feed. Do give these biscuits a try. I really think you'll like them. Here is how they're made.

Monday, July 8, 2013

Buttermilk Cake with Blackberries


From the kitchen of One Perfect Bite...I found the original version of this recipe in Food and Wine magazine last year. I've held on to it because the cake is easy to make and it's a great way to use that last cup of berries I always seem to have in my refrigerator at this time of year. The cake originally caught my eye because I thought it would make a great breakfast coffeecake. That proved not to be the case because it is too sweet to serve so early in the day. It does, however, make a wonderful snack cake, especially when it is served with a dollop of cream and some extra berries on the side. There are no tricks to making this buttermilk gem, but I want to emphasize an instruction that is given in the recipe. Be sure to line the cake pan with parchment or waxed paper. The berries in this cake will sink to the bottom of the pan and cause the cake to stick like glue if you don't. The cake is light and moist but it has a crackly crust thanks to a sprinkling of sugar that goes over the batter just before the cake is baked. If youhave extra berries, why not give this cake a try. Here's how it is made.

Buttermilk Cake with Blackberries...from the kitchen of One Perfect Bite courtesy of Food and Wine magazine

Ingredients:

4 tablespoons unsalted butter, softened, plus more for greasing
1 cup all-purpose flour
1/2 teaspoon baking powder
1/2 teaspoon baking soda
1/4 teaspoon salt
2/3 cup plus 1 1/2 tablespoons sugar
1 large egg, at room temperature
1 teaspoon pure vanilla extract
1/2 cup buttermilk, at room temperature
1 1/4 cups blackberries, plus more for serving
Sweetened whipped cream, for serving

Directions:

1) Preheat ovento 400 degrees F. Butter a 9-inch round cake pan and line bottom with parchment paper. Butter e parchment liner.
2) In a small bowl, whisk flour, baking powder, baking soda and salt. In a large bowl, using a handheld electric mixer, beat butter with 2/3 cup of sugar at medium-high speed until fluffy, 3 minutes. Beat in egg and vanilla. At low speed, beat in buttermilk and dry ingredients in 3 alternating batches, ending with dry ingredients. Do not overbeat. Gently fold batter just until blended, then scrape into prepared baking pan and smooth the top.
3) Scatter 1 1/4 cups of blackberries over batter and lightly press them in. Sprinkle remaining 1-1/2 tablespoons of sugar over cake. Bake for about 30 minutes, or until a cake tester inserted in center comes out clean.
4) Transfer cake to a rack to cool for 10 minutes, then turn cake out of pan and remove paper. Turn cake right side up and let cool completely. Serve the buttermilk cake with whipped cream and more blackberries. Yield: 8 servings.

If you have enjoyed your visit here, I hope you'll take a minute to...

Follow Me on Pinterest      


One Year Ago Today: Overnight Blueberry French Toast


Two Years Ago Today: Bucket Bread


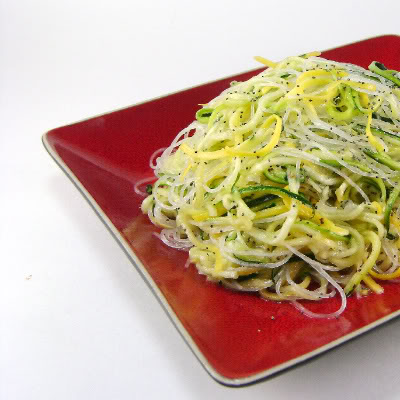
Three Years Ago Today: Courgette and Noodle Salad with Poppy Seed Dressing


Four Years Ago Today: Banh Mi

Tuesday, May 28, 2013

Fast and Easy Whole Wheat and Molasses Quick Bread


My Thought for the Day can be found, here. If you like it, give us a thumbs up and share it with your friends.

From the kitchen of One Perfect Bite..."Home again, home again, jiggety jig." Just in time to learn that rain, which admitably was fierce, caused our block party to be cancelled. While I was sorry I wouldn't be able to touch base with the neighbors, I was awfully glad I could take another day to become reacquainted with my kitchen. The Silver Fox volunteered for dinner duty, so while he pulled the elements of our dinner from the freezer, I put my feet up and relaxed. He chose some chili and a lovely quick bread that works well with any dish you that you might normally serve with cornbread. The bread is a Mark Bittman creation and I originally found the recipe in the New York Times. If you enjoy quick breads and are not put off by the flavor of molasses, I hope you'll give this recipe a try. The loaf is sliceable and many like to use it for sandwiches. I find that the flavor of molassses overwhelms the innards of most sandwiches, so I don't use the bread in that way. I do, however, like to eat it out of hand with butter or cream cheese, and have found that leftovers make fabulous toast. I prefer to use the more subdued flavor of light molasses when I make this bread, but if you enjoy the full-bodied flavor of molasses, by all means, use the darker varieties. Here is how this simple substitute for cornbread is made.

Fast and Easy Whole Wheat and Molasses Quick Bread...from the kitchen of Onee Perfect Bite courtesy of Mark Bittman and the New York Times

Ingredients:
Oil or butter for greasing pan
1-2/3 cups buttermilk or plain yogurt, or 11/2 cups milk and 2 tablespoons white vinegar (see Step 2)
2-1/2 cups (about 12 ounces) whole wheat flour
1/2 cup cornmeal
1 teaspoon salt
1 teaspoon baking soda
1/2 cup molasses

Directions:
1) Heat oven to 325 degrees. Grease an 8-by-4-inch or 9-by 5-inch loaf pan, preferably nonstick.
2) If you're using buttermilk or yogurt, ignore this step. Make soured milk by warming milk gently - 1 minute in microwave is sufficient, just enough to take chill off - and add vinegar. Set aside.
3) Mix together dry ingredients. Stir molasses into buttermilk, yogurt or soured milk. Stir liquid into dry ingredients (just enough to combine) then pour into pan. Bake until firm and a toothpick inserted into center comes out clean, 45 minutes to 1 hour. Cool on a rack for 15 minutes before removing from the pan. Yield: 1 loaf.

Suggested Variations:
Lighter Whole Wheat Quick Bread: Use 1-1/2 cups whole wheat and 11/2 cups all-purpose flour; omit cornmeal. Substitute honey for molasses. Beat 1 egg into wet ingredients in Step 3. Proceed with recipe.

Follow Me on Pinterest


One Year Ago Today: Strawberry and White Chocolate Cream Cheese Dessert Squares


Two Years Ago Today: Spiked Pink Lemonade


Three Years Ago Today: Asparagus and White Bean Salad


Four Years Ago Today: Old-Fashioned Blueberry Crumb Bars

Monday, February 18, 2013

Cheesy Buttermilk Scones


From the kitchen of One Perfect Bite...While we are barreling towards spring here in the Pacific Northwest, I'm not quite ready to put my stockpot or Dutch oven away. The soups and stews I make will get lighter but they'll have a place on our table until the window boxes are blazing with my favorite red geraniums. Years ago, I didn't make soups for dinner because they seemed too light and I wanted to serve a more substantial meal to my family. As I became a better cook and ventured into soups made in other regions of the world, I became a convert. It was a slow process and one I wasn't completely comfortable with, until I had a bevy of recipes for salads and breads that would lend additional spine to a souper supper. While I prefer to serve freshly made and fragrant breads with soup, time does not always permit the slow rise a good bread requires. As a result, I'm always on the lookout for quick breads that can be made in their stead. I found these savory cheese scones on the Real Simple website and gave them a try several weeks ago. I made them again for our supper tonight and I've decided to move them into my recipe rotation. I never argue with simple and delicious and these scones win on both counts. I have one caution to share you regarding their preparation. This recipe is designed to make 12 thin wedges. If you choose to make only eight, it will affect the amount of time the scones need to cook. I like thicker wedges and my scones took 22 minutes to brown and cook through. The cheese makes these quite fragrant as they bake and when they are served warm they really are a perfect accompaniment for soup. I like this recipe. While it does not make my socks go up and down, it is very nice and I'll be making the scones more often. I think those of you try this recipe will also be pleased with these savory scones. Here's how they are made.

Cheesy Buttermilk Scones...from the kitchen of One Perfect Bite courtesy of Real Simple

Ingredients:
3 cups all-purpose flour
1 teaspoon baking powder
3 tablespoons cold unsalted butter, cut into small pieces
1 cup shredded Gruyere or Swiss cheese
1/2 cup grated Parmesan
1 tablespoon chopped fresh thyme or 1 teaspoon dried
1 teaspoon hot pepper flakes
1-1/4 cups buttermilk

Directions:
1) Heat oven to 400 degrees F. Lightly coat a baking sheet with vegetable cooking spray.
2) Combine flour, baking powder, and butter in a food processor and pulse until mixture resembles coarse breadcrumbs. Transfer to a large bowl and add both cheeses, thyme, hot pepper flakes, and buttermilk. Stir until mixture sticks together. (It will be slightly crumbly.)
3) Transfer dough to a work surface and knead gently until it comes together, about 30 seconds. Shape dough to form an even, flat round about 1 inch thick. Cut the dough into 12 wedges. Place them about 2 inches apart on a prepared baking sheet. Bake until scones are light golden brown, 18 to 20 minutes. Remove with a metal spatula. These are best served fresh but can be made up to 2 days ahead. Wrap in foil and reheat in a 250 degree F oven for 10 minutes. Store in an airtight container. Yield: 12 scones.


One Year Ago Today: Mardi Gras Hurricane Cocktail


Two Years Ago Today: Luscious Lemon Sauce


Three Years Ago Today: Truffled Mac n' Cheese

Monday, January 21, 2013

An Eggless Buttermilk Coffee Cake with Blackberries


From the kitchen of One Perfect Bite...The really simple recipe was developed by Julia Moskin for The New York Times. It is a riff on the buttermilk cake that is sold by Cranberry Island Kitchens in Portland, Maine. The original version of the cake was baked in individual mussel-like molds. The Times riff was baked in loaf pans, while mine baked in a 13 x 9-inch cake pan. Can there be a riff of a riff? I clipped this recipe last fall to use for our next family vacation. We inevitably find ourselves in huge old houses that have scads of bedrooms but kitchens in which only Wilma Flintstone would be comfortable. This recipe caught my eye because it requires only a bowl and spoon to prepare and it sounded perfect for summer breakfasts. I gave the cake a try and was happy enough with the results to save the recipe in my vacation file. I hadn't planned on making it again until the gang was assembled, but this weekend we had a breakfast guest who is allergic to eggs. I remembered the cake and pulled out the recipe to serve for breakfast on Sunday morning. I thought this cake would be perfect for her. Oregonians are a bit like squirrels, but we stash blackberries as well as hazelnuts for winter use. I used them in the cake, but I doubled the amount the recipe called for. Because I used a baking pan, I had more surface area to cover and a cup of blackberries looked pretty foolish sitting on the cake batter. The blackberries added a lovely nip that helped balance the sugar in the cake, and my friend, who generally has tea, toast and orange for breakfast, loved having something different for a change. I wanted to share it with you, because there are not a lot of recipes for eggless cakes floating through cyberspace. I thought you might like to add this one to your files. Please make a mental note that the flour is sifted before measuring and then sifted again when it is combined  with the baking soda. This is a nice, almost effortless cake that I think your family will enjoy. Here is how it is made.

Eggless Buttermilk Coffee Cake with Blackberries...from the kitchen of One Perfect Bite courtesy of The New York

Ingredients:
1 tablespoon butter, for greasing the pans
1 cup vegetable or canola oil
1-3/4 cups sugar, plus 2 tablespoons for sprinkling
2 teaspoons nutmeg
1 teaspoon salt
4 cups sifted flour, plus extra for dusting pans
1 teaspoon baking soda
1-1/3 cups buttermilk
1 cup ripe blueberries, raspberries, or blackberries (optional)

Directions:
1) Heat oven to 325 degrees. Grease and lightly flour two 9-by-5-inch loaf pans or a 9-by-13-inch rectangular pan.
2) In a bowl, mix oil, 1-3/4 cups sugar, nutmeg and salt. Sift flour and baking soda together and add to bowl. Mix in buttermilk and pour batter into prepared pans. If using berries, pour in half of batter, sprinkle on berries and pour remaining batter on top.
3) Sprinkle the 2 tablespoons sugar over the surface and bake 30 to 40 minutes, or until a tester comes out clean. Let cool in the pan. Yield: 12 servings.


One Year Ago Today: Round-Up of Food to Celebrate the Year of the Dragon


Two Years Ago Today: Spaghettini with Garlic and Lemon


Three Years Ago Today: Black Bread

Sunday, January 20, 2013

Orange-Scented Buttermilk Cake


From the kitchen of One Perfect Bite...I must start by telling you that this cake is as delicious as it sounds, but then I quickly have to add that the devil is lurking in the details. I found the recipe in the December issue of Food and Wine magazine. It caught my eye, so I scanned the recipe, but as I read it I found a discrepancy in the amount of an ingredient that was to be used. I went to the online version of the recipe seeking clarification, but that just muddied the water. The problem centered on the amount of liquid to be used in preparation of the cake. Both versions of the recipe specified 1-1/4 cups of buttermilk, but the magazine version used just 3/4 cup of it. I decided to proceed using quantities based on standard cake formulations that I learned years ago for recipe competitions. A little food science never hurts, and if ever someone asks you to make a cake without a recipe it can be a life saver that's worth a buck or two. The trick lies in the weight of ingredients rather than their volume. When the weight of flour equals the weight of sugar, and the weight of the eggs equals the weight the fat, and the total weight of all liquid ingredients, including eggs, equals the weight of sugar, you'll have a cake, if you remember to add some baking powder, soda and salt. Based on that, I decided to use the magazine quantities and the recipe below reflects that choice. The original version of the recipe can be found here. I must warn you that this is not a pretty cake, but it is light and moist and delicious. It is important to line the pans you use to make the loaves. The large amount of sugar used in this recipe makes the cakes prone to sticking, but a parchment liner makes easy work of removal. I hope you'll give this recipe a try. This is a perfect dessert for a large group. Here is how the cakes are made.

Orange-Scented Buttermilk Cake...from the kitchen of One Perfect Bite courtesy of Food and Wine magazine

Ingredients:

3-1/4 cups cake flour, sifted, plus more for dusting
1 tablespoon baking powder
1/2 teaspoon baking soda
1 teaspoon salt
1/2 teaspoon ground cinnamon
2 sticks unsalted butter, softened
2 cups granulated sugar
1-1/2 teaspoons finely grated orange zest
4 large eggs, at room temperature
1/2 cup sour cream, at room temperature
1-1/2 teaspoons pure vanilla extract
3/4 cup buttermilk, at room temperature
Confectioners’ sugar, for dusting

Directions:

1) Preheat oven to 350 degrees F. Generously coat three 8-by-4-inch loaf pans with butter. Line bottom of pans with parchment paper. Butter parchment paper and dust pans with flour. Arrange pans on a baking sheet.
2) In a medium bowl, whisk cake flour with baking powder, baking soda, salt and cinnamon.
3) In bowl of a stand mixer fitted with paddle attachment, beat butter with sugar and orange zest at medium-high speed until fluffy, about 4 minutes. Add eggs one at a time, beating well between additions and scraping down the sides of bowl. Beat in the sour cream and vanilla.
4) At low speed, beat in dry ingredients in 3 additions, alternating with buttermilk and beginning and ending with dry ingredients; gently fold just until blended.
Scrape batter into prepared pans and smooth tops; gently tap once to release any air. Bake loaves for about 45 minutes, rotating the baking sheet halfway through, until a cake tester inserted in the center of each loaf comes out with a few moist crumbs attached.
5) Transfer the loaves to a rack for 20 minutes, then turn them out onto rack and set them right side up to cool. Dust with confectioners’ sugar, slice and serve. Yield: 3 loaves (21 slices).


One Year Ago Today: Pork and Fennel Meatballs


Two Years Ago Today: Lemon Pound Cake


Three Years Ago Today: Mexicalli Pizza

Sunday, October 7, 2012

Grape Harvest Cake


From the kitchen of One Perfect Bite...I have fallen head-over-heels in love with grape desserts. They are relatively new to me, but I am making a determined effort to make up for years of lost time. A few months ago,  I featured a Vintner's Grape Cake that was made with olive oil. It was so good, that it had my socks going up and down. Shortly after sharing it with you, I came across another cake on the Whole Foods website. I was drawn to their cake because it  omitted the citrus flavors found in the cake that I had already published and I was curious to see if I would like it as well.  It, obviously, was time for some comparison testing and a definitive  selection of best of class was in order. As it turns out, I was unable to do that. The first cake was a clear winner in the dessert category, but this tender harvest cake took honors in the tea and breakfast category where the intensity of the citrus was deemed to be off putting  so early in the day. We'll have to leave the final judgment up to you.  I hope you will give both these recipes a try. In the great scheme of things, they are easy to make and I suspect you'll love them both. Here is how the Grape Harvest Cake is made.

Grape Harvest Cake ...from the kitchen of One Perfect Bite courtesy of Whole Foods Recipes

Ingredients:
5 tablespoons unsalted butter, at room temperature, plus more for buttering the pan
2/3 cup plus 1 tablespoon cane sugar
2 large eggs and 1 large egg yolk
3 tablespoons extra-virgin olive oil
1-3/4 cup unbleached all-purpose flour, plus more for flouring the pan
1 teaspoon baking powder
1/4 teaspoon fine sea salt
3/4 cup lowfat buttermilk
2-1/4 cups (3/4 pound) red seedless grapes

Directions:
1) Preheat oven to 350 degrees F. Butter a 9-inch metal cake pan and line bottom with a round of parchment paper. Butter paper and then coat pan with flour.
2) In bowl of an electric mixer, cream together butter and 2/3 cup sugar until light and fluffy, stopping to scrape down sides of bowl frequently. Beat in eggs one at a time. Beat in yolk, followed by olive oil.
3) Sift together flour, baking powder and salt in separate bowl.
4) On low speed, beat in flour mixture in three additions, alternating with additions of buttermilk and scraping down sides of the bowl frequently. Stir in half the grapes and pour batter into prepared pan. Sprinkle top with remaining grapes and remaining 1 tablespoon sugar.
5) Bake until cake is browned on top and springs back when pressed lightly with your finger, 50 to 60 minutes. Cool the cake in the pan 15 minutes. Run a knife around the edges of pan, then invert, peel off paper and cool cake upright on a rack. Serve warm or room temperature. Yield: 12 servings.


One Year Ago Today: Blueberry Yogurt Cake


Two Years Ago Today: Georgia-Style Brunswick Stew


Three Years Ago Today: Pumpkin Roll

Wednesday, July 18, 2012

Oven-Barbecued Buttermilk Pork Chops


From the kitchen of One Perfect Bite...While this is a ridiculously easy recipe, it's surprisingly tasty and everyone who has tried these chops really seems to enjoy them. The base recipe feeds 6 people. If you need more than six chops, the recipe directions will remain the same, but you will need a second heavy skillet in which to cook the overflow. I use an Asian barbecue sauce to glaze our chops, but any sauce, including a commercially prepared one, can be used to finish them.  Buttermilk should be the star here. It makes the chops remarkably tender and moist, and the sauce is almost superfluous if you keep the pork on the rare side.  Please don't overcook it.  When we are home, I serve the chops  with cheese scalloped potatoes, but limitations of the kitchen I'm working in, make mac n' cheese a better choice for dinner tonight. I really like chops cooked in this fashion. The technique is interesting and much like the one I use for thick-cut beef filets. It works for beef and it works for pork as well.  I think it is a great way to assure that meat is not overcooked. I hope you try these. Here's the recipe.

Oven-Barbecued Buttermik Pork Chops...from the kitchen of One Perfect Bite

Ingredients: 
Chops
6 to 12 (1-1/4 inch thick) boneless pork chops
1 quart lowfat butter milk
Salt and freshly cracked pepper
2 to 4 tablespoons extra-virgin  olive oil
Barbecue Sauce
1/3 cup miso
1/3 cup sugar
1/3 cup toasted sesame oil
1/4 cup Asian fish sauce
1/4 cup rice wine vinegar
1/3 cup Korean chile paste (gochujang)
1 tablespoon minced garlic
2 tablespoons minced fresh ginger

Directions:
1) Lightly salt and pepper pork chops. Place chops in a single layer on bottom of a large, shallow baking pan. Cover chops with buttermilk and refrigerate over night, turning chops once or twice.
2) To make barbecue sauce: Whisk  miso, sugar, sesame oil, fish sauce, vinegar, chile paste, garlic and ginger together in a bowl. Transfer to a small pan and boil to thicken slightly. Cool to room temperature. Cover and refrigerate sauce until needed.
3) Preheat oven to 425 degrees F. Drain chops and pat dry. Season both sides well with salt and pepper. Heat olive oil in a large ovenproof skillet until it shimmers. Add 6 pork chops to pan and cook over high heat until browned on bottom, turn chops and immediately transfer skillet to oven. Bake for 10 minutes, or until instant read thermometer registers 135 degrees F. Brush chops with sauce and glaze under broiler for a minute or two to set. Serve immediately, passing extra sauce at the table. Yield: 6 servings.


One Year Ago Today: Butter Pecan Ice Cream


Two Years Ago Today: Coconut Bubble Tea


Three Years Ago Today: Pink Lemonade

Sunday, May 1, 2011

Strawberry Panna Cotta with Strawberry Compote


From the kitchen of One Perfect Bite...Mother's day is just a week away and I wanted to present a few dessert recipes for you to consider before the day is here. The first of the entries is figure friendly and designed for health and diet conscious eaters. It's a panna cotta, and when it's made with small field ripened strawberries, only the cook will know the dessert has been lightened. The key to the success of this dessert, however, lies in the flavor of the berries, and, to be honest, I wouldn't bother with it when local berries are less than prime. Even then, I enhance its flavor with a berry extract, that can be found at the sources listed at the end of the recipe. The recipe for the panna cotta first appeared in Gourmet magazine and can now be found on the Epicurious website. Comments associated with the recipe indicate that some readers had problems getting the panna cotta to stiffen enough for unmolding. To avert that problem, I've increased the amount of gelatin in my version of the recipe and recommend it be made a full 24 hours before you plan to serve it. While I make and serve the fruit compote that accompanies the recipe, I also like to use a bit of melted strawberry jam as a sauce for the panna cotta. This is not necessary, but it adds wonderful color to the finished dessert. This is really easy to make and I think those of you who try it will enjoy it. Here's the recipe.

Strawberry Panna Cotta...from the kitchen of One Perfect Bite inspired by Gourmet Magazine and Epicurious

Ingredients:

Panna Cotta
3 cups sliced strawberries (1 pound)
1-3/4 cups well-shaken low-fat buttermilk
1/2 teaspoon strawberry flavoring (optional)
Pinch of salt
1/2 cup granulated sugar
3 teaspoons unflavored gelatin
1/4 cup whole milk
1/4 cup heavy cream
Compote
2-1/2 cups strawberries (preferably small; 3/4 pound), trimmed
1/4 cup fresh orange juice
2 teaspoons superfine granulated sugar

Directions:
1) To make panna cotta: Blend strawberries, buttermilk, strawberry flavoring, salt and sugar in a blender until very smooth, then pour through a very fine sieve into a medium bowl, pressing hard on solids. Discard solids. Sprinkle gelatin over milk in a small bowl and let stand 1 minute to soften. Bring cream to a boil in a small saucepan. Remove from heat and add gelatin mixture, stirring until dissolved. Whisk gelatin-cream mixture into strawberry purée and pour into 6 (6-oz.) molds. Chill molds, covered, until firm, at least 24 hours. To unmold, dip molds in a small bowl of hot water 2 or 3 seconds, then invert panna cottas onto dessert plates and remove molds. Let stand at room temperature 20 minutes to soften slightly.
2) To make compote: While panna cottas stand at room temperature, halve strawberries lengthwise if small or quarter if larger. Whisk orange juice and superfine sugar together in a bowl until sugar dissolves. Add strawberries and toss to coat. Serve panna cottas with compote. Yield: 6 servings.

Source for strawberry extract can be found here.


One Year Ago Today: Spinach and Pancetta Strata


Two Years Ago Today: Coq au Vin


You might also enjoy these recipes:
Strawberry Rhubarb Compote - Gina's Skinny Recipes
Fresh Strawberry Pie - Sing for Your Supper
No Bake Strawberry Yogurt Cheesecake - Little Corner of Mine
Strawberry Shortcakes - The Flourishing Foodie
Strawberry Cake - Petit Foodie
Strawberry Cupcakes - Sugar Plum
Strawberry Swirl Cheesecake Bars - Sugar Crafter
Strawberry Linzer Cookies - Beach Lover Kitchen
Strawberry-Sour Cream Ice Cream - Confections of a Foodie Bride
Strawberry Sherbet - Shih's Cooking


Sunday, February 27, 2011

The Real McCoy - Wholemeal Irish Soda Bread


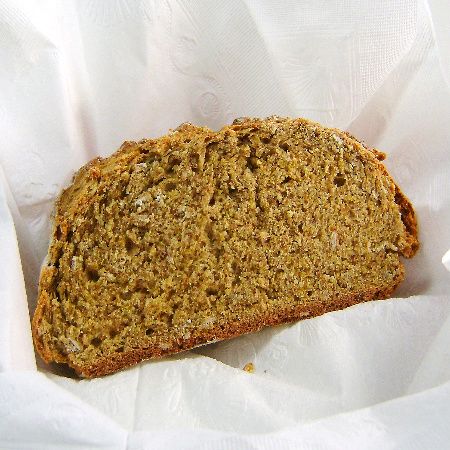
From the kitchen of One Perfect Bite...I know St. Patrick's Day is still weeks away, but I wanted to make sure that those of you who are tempted to try a real soda bread, have plenty of time to test recipes before selecting the one you'll finally use. I know it's hard to believe, but this is what a true Irish soda bread should look like. The addition of raisins, sugar and caraway is an English embellishment that produces a bread that should, more correctly, be called Spotted Dog. Irish peasants lived, for the most part, on a diet of potatoes, grains and milk. Bread appeared on their tables only during the summer, or "meal months", when potato stores had been exhausted. The bread was typically made in a lidded cast iron pot called a bastible, but in Northern Ireland it was shaped into a disk, called a farl, and scored with a cross to "let the devil out" as the bread rose and cooked. Our bread is devilishly good. This simple loaf is delicious when made with Irish wholemeal flour. Unfortunately, our (U.S.) whole wheat flour lacks the flavor of its Irish cousin and we have to fiddle and fudge to make a loaf that is anywhere near as flavorful. The good news is that it can be done by using a combination of flours, and boosting their flavor with oatmeal and wheat germ. The recipe I'm passing on to you was developed by Jeanne Lemlin and she has come up with a combination of grains that result in a typically Irish loaf. You'll find it to be wonderful, if you can clear your head and palate of long held notions of what a soda bread should be. There is nothing here but the flavor of the grain. One bite, and a slow and deliberate chew will convince you that nothing else is necessary. I love this and make it often. When we have guests, I serve it with Irish butter or a whipped cream cheese and a small platter of thinly sliced smoked salmon. I have, however, come to enjoy it completely unadorned. Plain or fancy, the bread should sit for 2 hours before slicing. It crumbles easily in the early stages of cooling, so it really needs this time to firm up. I really hope you'll try this bread. It is really wonderful. Like all soda breads, it stales quickly and is best enjoyed the day it is made. Here's the recipe.

Wholemeal Irish Soda Bread ...from the kitchen of One Perfect Bite courtesy Of Jeanne Lemlin

Ingredients:

1-1/4 cups unbleached all-purpose flour plus additional for sprinkling
1 cup whole-wheat flour
1/2 cup old-fashioned rolled oats
1/4 cup toasted wheat germ
1-1/2 teaspoons baking soda
1 teaspoon salt
1/2 stick (4 tablespoons) cold unsalted butter, cut into bits
1-1/3 cups well-shaken buttermilk or plain yogurt

Directions:
1) Move rack to center of oven and preheat to 425 degrees F.
2) Whisk together flours, oats, wheat germ, baking soda, and salt in a large bowl. Add butter and toss to coat with flour. Then blend in butter with your fingertips until mixture resembles coarse meal. Add buttermilk and stir until dough is evenly moistened, but still lumpy.
3) Knead dough on a lightly floured surface, dusting with flour to prevent sticking, 1 minute (dough should remain soft and slightly sticky). Shape dough into a ball. Pat out dough on a lightly floured baking sheet into a 7-inch round. Dust dough with flour and spread lightly over round with your fingertips. Cut a 4- to 5-inch X (1/2 inch deep) in top of dough.
4) Bake in middle of oven until bread sounds hollow when tapped on bottom, 35 to 35 minutes. Cool on a rack 2 hours before slicing. Yield: 1 loaf.

You might also enjoy these recipes:
Chocolate Soda Bread - Real Epicurean
Browned Butter Soda Bread - Vanilla Sugar
Authentic Irish Soda Bread - Confessions of a Kitchen Witch
Oat Soda Bread - 101 Cookbooks
Irish Soda Bread - The English Kitchen
Brown Bread - David Lebovitz
Soda Bread - Farmersgirl Kitchen
Irish Soda Bread Scones - Brown Eyed Baker
Irish Soda Bread Scones - Smitten Kitchen
Caraway Soda Bread - Simply Recipes
Oats and Honey Irish Soda Bread with Raisins - Baking Bites

Friday, August 27, 2010

Buttermilk Buns, Barbecue Sauce and the Remains of the Day


From the kitchen of One Perfect Bite...Try though I might, I can't ignore the siren's song that screams, "Eat me!", each time the refrigerator door is opened. My leftovers are demanding attention. Given the number of meals that have been made lately, the status of the remains is really not too bad. The problem is that I'm not fond of leftovers and dislike repetition in my meals. Like it or not, those remains must be dealt with or tossed and I don't toss food. I had a goodly sized piece of roast pork that was sliced and warmed in a thick, but quick barbecue sauce. I made this everyday sauce from a few simple ingredients and served some of the warmed pork on homemade sandwich buns. The unused portion of the sauced pork and sandwich buns have been frozen to use for lunch on other days. Neither the sauce nor the buns are fancy and aren't meant for those seeking designer fare, but if you're looking for a fast and easy way to deal with leftover pork or beef, stay right where you are. This quick homemade barbecue sauce is my way of waging war on the condiments that clutter my refrigerator shelves. Bottles of sauce and salad dressings tend to gang up on me - much as cereal boxes do in the pantry - and to prevent that from happening I prefer to make as many of my own condiments and dressings as I can. While it sounds very dramatic, I also make my own sandwich buns. This is not a big deal. I can't find decent ones, so I prefer to make and freeze my own. I usually make three dozen at a time and that one-time effort holds us for several months. The recipe is super-simple but produces delicious rolls that you can shape as you please. Today's feature is a twofer that I think you'll enjoy. Here are the recipes for buttermilk buns and barbecue sauce.

Buttermilk Sandwich Buns...from the kitchen of One Perfect Bite

Ingredients:
1 cup warm water
2-1/2 teaspoons active dry yeast
2 to 3 tablespoons sugar
2 tablespoons canola oil
1 large egg
3-1/4 cups all-purpose flour
1/4 cup buttermilk powder
1 teaspoon salt

Directions:
1) Combine water, yeast and sugar in the bowl of an electric stand mixer fitted with a dough hook. Whisk in canola oil and egg. Add flour, buttermilk powder and salt. Mix on low-speed until dough forms a ball and pulls away from side of bowl, about 6 to 8 minutes. Cover bowl with plastic wrap and let dough rise in a warm place until doubles in size, about 1 hour.
2) Grease one or two large baking sheets. Turn dough onto a floured surface. Divide dough into 8 portions. Slap or roll each piece into desired shape and place on prepared pan leaving enough space between them to allow them to rise. Cover with plastic wrap and allow to double in size, about 30 to 40 minutes.
3) While dough rises preheat oven to 375 degrees F. Bake rolls until golden, about 12 to 15 minutes. Transfer to a wire rack for cooling. Yield: 8 sandwich buns.

Everyday Barbecue Sauce
...from the kitchen of One Perfect Bite

Ingredients:
1 cup ketchup
1 cup water
3 tablespoons cider vinegar
3 tablespoons Worcestershire sauce
1/4 cup brown sugar
1 teaspoon sweet smoked paprika
1 teaspoon chili powder
1/2 teaspoon freshly ground pepper
1/8 to 1/2 teaspoon cayenne pepper
1/2 teaspoon kosher salt
1 teaspoon minced garlic

Directions:
1) Combine ketchup, water, vinegar,Worcestershire sauce, sugar, paprika, chili powder, black pepper, cayenne pepper, salt and minced garlic in a saucepan.
2) Place saucepan over medium heat and bring contents of pan to a simmer. Cook until sauce thickens and is reduced by 1/4 in volume, about 5 minutes. Use immediately or allow to cool and refrigerate. Yield: 2 cups.

You might also enjoy these recipes:
Ellen's Famous Hamburger Buns - Home Cookin' from Ellen's Kitchen
Honey-Oatmeal Dinner Rolls - Salad in a Jar
Buttermilk Dinner Rolls - Michael Ruhlman
Honey Yeast Rolls - Plain Chicken
Kaiser Rolls - One Perfect Bite
Torpedo Rolls - One Perfect Bite
Related Posts with Thumbnails

Printfriendly