Monday, February 28, 2011

Spotted Dog


From the kitchen of One Perfect Bite...If my mail is any indication, many of you are curious as to how the English version of Irish soda bread came to be called Spotted Dog. Surprisingly, no one seems to know for sure. My research came up with a lot of guesses, some educated, others not. We know for certain that a staple of old English kitchens was a steamed pudding that, when made with raisins, was called a Spotted Dick. While many are offended by the name, linguists seem to agree that it really was derived from the word pudding. According to Dex at The Straight Dope, over the course of time, pudding became puddink, puddink became puddick and puddick , finally shortened, became dick. Fortunately, there was another version of the pudding whose name could offend no one. It was made with plums and suet and it was called a Spotted Dog. Why? From this point forward all the information you receive will be the product of my, as yet, undocumented imagination.


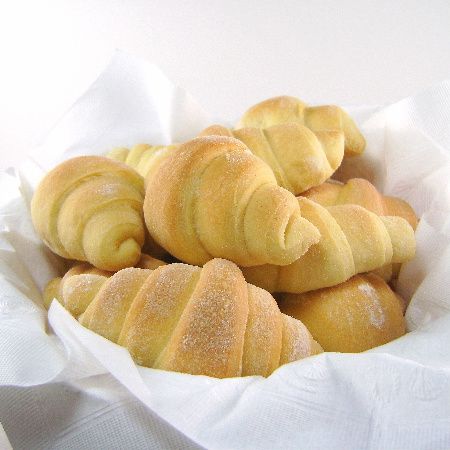
The pudding, and later the bread of the same name, bear spots like those found on a Dalmatian. Looking at these photos I have no trouble understanding why the bread, too, was called Spotted Dog. I personally think Dalmation Bread would have been a better, more expressive name, but then no one ever listens to me and, as a result, we still have these awkward language situations that must be dealt with. More's the pity :-). Today's recipe is for an embellished Irish soda bread. It contains raisins and caraway seeds, but it is less rich than many of the versions that are popular today. I like to view it as a historical footnote that falls somewhere between yesterday's wholemeal bread and the lovely cake-like loaf that Ina Garten makes here. Here's the recipe for those of you who are curious.


Spotted Dog...from the kitchen of One Perfect Bite
Ingredients:
4 cups all-purpose flour
1-1/2 teaspoons baking soda
1 teaspoon salt
1 tablespoon sugar
1-1/2 tablespoons caraway seeds
1 cup golden raisins
1-3/4 cup well-shaken buttermilk
2 tablespoons unsalted butter, melted

Directions:
1) Place rack in middle of oven and preheat to 375 degrees F. Butter and Flour a large baking sheet. Set aside.
2) Combine flour, baking soda and salt in a large bowl. Whisk in sugar, caraway seeds and raisins. Add buttermilk and stir until dough is moistened, but still lumpy.
3) Turn dough onto a lightly floured work surface and knead with floured hands until dough is less sticky but still soft, about 8 times. Divide dough into two pieces and form each piece into a ball. Pat each ball into a domed 6-inch round on prepared baking sheet, spacing them about 4-inches apart. Cut a large 1/2-inch deep x in top of each loaf with a sharp knife or razor blade. Brush both loaves with melted butter.
4) Bake until golden brown and bottom of loaves sound hollow when tapped, about 35 to 45 minutes. Cool on wire rack for at least 2 hours before slicing. Yield: 2 6-inch loaves.

You might also enjoy these recipes:
Chocolate Soda Bread - Real Epicurean
Browned Butter Soda Bread - Vanilla Sugar
Authentic Irish Soda Bread - Confessions of a Kitchen Witch
Oat Soda Bread - 101 Cookbooks
Irish Soda Bread - The English Kitchen
Brown Bread - David Lebovitz
Soda Bread - Farmersgirl Kitchen
Irish Soda Bread Scones - Brown Eyed Baker
Irish Soda Bread Scones - Smitten Kitchen
Caraway Soda Bread - Simply Recipes
Oats and Honey Irish Soda Bread with Raisins - Baking Bites

This post is being linked to:
Smiling Sally - Blue Monday

Sunday, February 27, 2011

The Real McCoy - Wholemeal Irish Soda Bread


From the kitchen of One Perfect Bite...I know St. Patrick's Day is still weeks away, but I wanted to make sure that those of you who are tempted to try a real soda bread, have plenty of time to test recipes before selecting the one you'll finally use. I know it's hard to believe, but this is what a true Irish soda bread should look like. The addition of raisins, sugar and caraway is an English embellishment that produces a bread that should, more correctly, be called Spotted Dog. Irish peasants lived, for the most part, on a diet of potatoes, grains and milk. Bread appeared on their tables only during the summer, or "meal months", when potato stores had been exhausted. The bread was typically made in a lidded cast iron pot called a bastible, but in Northern Ireland it was shaped into a disk, called a farl, and scored with a cross to "let the devil out" as the bread rose and cooked. Our bread is devilishly good. This simple loaf is delicious when made with Irish wholemeal flour. Unfortunately, our (U.S.) whole wheat flour lacks the flavor of its Irish cousin and we have to fiddle and fudge to make a loaf that is anywhere near as flavorful. The good news is that it can be done by using a combination of flours, and boosting their flavor with oatmeal and wheat germ. The recipe I'm passing on to you was developed by Jeanne Lemlin and she has come up with a combination of grains that result in a typically Irish loaf. You'll find it to be wonderful, if you can clear your head and palate of long held notions of what a soda bread should be. There is nothing here but the flavor of the grain. One bite, and a slow and deliberate chew will convince you that nothing else is necessary. I love this and make it often. When we have guests, I serve it with Irish butter or a whipped cream cheese and a small platter of thinly sliced smoked salmon. I have, however, come to enjoy it completely unadorned. Plain or fancy, the bread should sit for 2 hours before slicing. It crumbles easily in the early stages of cooling, so it really needs this time to firm up. I really hope you'll try this bread. It is really wonderful. Like all soda breads, it stales quickly and is best enjoyed the day it is made. Here's the recipe.

Wholemeal Irish Soda Bread ...from the kitchen of One Perfect Bite courtesy Of Jeanne Lemlin

Ingredients:

1-1/4 cups unbleached all-purpose flour plus additional for sprinkling
1 cup whole-wheat flour
1/2 cup old-fashioned rolled oats
1/4 cup toasted wheat germ
1-1/2 teaspoons baking soda
1 teaspoon salt
1/2 stick (4 tablespoons) cold unsalted butter, cut into bits
1-1/3 cups well-shaken buttermilk or plain yogurt

Directions:
1) Move rack to center of oven and preheat to 425 degrees F.
2) Whisk together flours, oats, wheat germ, baking soda, and salt in a large bowl. Add butter and toss to coat with flour. Then blend in butter with your fingertips until mixture resembles coarse meal. Add buttermilk and stir until dough is evenly moistened, but still lumpy.
3) Knead dough on a lightly floured surface, dusting with flour to prevent sticking, 1 minute (dough should remain soft and slightly sticky). Shape dough into a ball. Pat out dough on a lightly floured baking sheet into a 7-inch round. Dust dough with flour and spread lightly over round with your fingertips. Cut a 4- to 5-inch X (1/2 inch deep) in top of dough.
4) Bake in middle of oven until bread sounds hollow when tapped on bottom, 35 to 35 minutes. Cool on a rack 2 hours before slicing. Yield: 1 loaf.

You might also enjoy these recipes:
Chocolate Soda Bread - Real Epicurean
Browned Butter Soda Bread - Vanilla Sugar
Authentic Irish Soda Bread - Confessions of a Kitchen Witch
Oat Soda Bread - 101 Cookbooks
Irish Soda Bread - The English Kitchen
Brown Bread - David Lebovitz
Soda Bread - Farmersgirl Kitchen
Irish Soda Bread Scones - Brown Eyed Baker
Irish Soda Bread Scones - Smitten Kitchen
Caraway Soda Bread - Simply Recipes
Oats and Honey Irish Soda Bread with Raisins - Baking Bites

Saturday, February 26, 2011

Lemon Chicken with Capers or Olives and Penne Pasta


From the kitchen of One Perfect Bite...This is a quick and simple recipe that's nice to have on hand when you want something hot and hearty for dinner. It was developed by Rachael Ray and my version of it closely resembles hers. I had originally intended to have a light supper tonight, but it appears that winter missed the memo regarding the arrival of spring, and, as the day turned stormy and cold, a heavier meal seemed more appropriate. So, water for pasta was put to boil, and chicken, originally intended for the grill, was chopped, and then sauteed with lemons and capers to form a light pasta sauce. This truly is a 30 minutes meal and the recipe is structured to allow you a couple of options. Lemon can be adjusted to personal taste and olives can be swapped for capers if you prefer them. While I used penne this evening, any pasta clearly will work here. Leftovers, while problematic, require special handling. The pasta absorbs the sauce, so, I add a can of mushroom soup when I reheat it. It really works quite well and day two pasta , while slightly different, is as tasty as the original meal. This is simple, hearty and a great fall back recipe. It won't appear on anyone's bucket list or be your final meal request, but it is nice to have on hand for dinner when you are very busy. Here's the recipe.

Lemon Chicken with Capers or Olives and Penne Pasta...from the kitchen of One Perfect Bite courtesy of Rachael Ray

Ingredients:
2 tablespoons extra-virgin olive oil
6 boneless, skinless chicken thighs cut into 1-inch pieces
Salt and pepper
1-1/2 tablespoons butter
2 tablespoons chopped garlic
1/4 cup finely chopped scallions
2 tablespoons all-purpose flour
1/2 cup white wine or dry white vermouth
2 to 4 tablespoons fresh lemon juice
1 cup chicken broth or stock
3 tablespoons capers or coarsely chopped kalamata olives, drained and rinsed
1/2 cup + 2 tablespoons flat-leaf parsley, chopped
12 ounces penne rigate pasta, cooked to al dente

Directions:
1) Heat a deep nonstick skillet over medium high heat. Add a tablespoon of extra-virgin olive oil and chicken to the pan. Season chicken with salt and pepper. Brown chicken until lightly golden all over, about 5 to 6 minutes. Remove chicken from pan. Set aside.
2) Return skillet to heat. Reduce heat to medium. Add another tablespoon extra-virgin olive oil and 1 tablespoon butter, garlic and scallions to skillet. Saute garlic and scallions 3 minutes. Add flour and cook 2 minutes. Whisk in wine and reduce liquid, about 1 minute. Whisk lemon juice and broth into sauce. Stir in capers or olives and 1/2 cup parsley. When liquid comes to a bubble, add remaining 1/2 tablespoon butter to sauce to give it a little shine. Return chicken to pan and heat through, about 1 to 2 minutes. Toss hot pasta with chicken and sauce and serve. Adjust salt and pepper, to your taste. Sprinkle with reserved 2 tablespoons chopped parsley. Yield: 4 servings.

You might also enjoy these recipes:
Pasta with Chicken and White Sauce - Jamie Oliver
Chicken and Bacon Pasta - Anne's Food
Bruschetta Chicken Pasta - Erin's Food Files
Chicken Spaghetti - The Pioneer Woman
Cajun Chicken Pasta - Dinah's Dishes
Chicken Pasta - Tastydays
Lemon Chicken Pasta - Everyday Cookin'
Easy Lemon Chicken with Pasta - Food Network
Lemon Chicken Pasta Salad - Food for My Family
Creamy Chicken and Mushroom Pasta - My Halal Kitchen
Pasta with Chicken and Asparagus - Simply Recipes

Friday, February 25, 2011

Peas with Onions and Mint


From the kitchen of One Perfect Bite...and because man cannot live by bread alone, it's time to feature a vegetable or two. I've been testing vegetable recipes for our Easter dinner. I found one in The Gourmet Cookbook that I really like. It's easy to do and it uses ingredients that can be found in any grocery store. It may surprise you to learn that the recipe calls for frozen, rather than fresh, peas. Those of you who are gardeners know that peas, particularly English peas, become starchy if they are not used shortly after they are picked. If you're not using peas freshly plucked from the garden, it is much better to go with the frozen variety. The Gourmet recipe produces a lovely side dish. I've altered it slightly because I think the ratio of onions to peas was too high. When you glance through the recipe you will see that the quantity of onions is given as a range. This is a case when I think less is more and I use the smaller amount. Be forewarned, that fresh mint is essential to the success of this recipe. I love the color this dish adds to the table. This recipe is so easy and inexpensive that there is no reason not to make it on a regular basis. I think those of you who try this dish will love it. Here's the recipe, which can, by the way, be doubled.

Minted Peas and Onions...from the kitchen of One Perfect Bite, adapted from The Gourmet Cookbook

Ingredients:

2 tablespoons unsalted butter
8 to 12 ounces sweet onions, halved lengthwise and thinly sliced crosswise
2 cups frozen green peas, thawed
2 tablespoons finely chopped mint
1/2 teaspoon salt
1/8 teaspoon pepper

Directions:
Heat butter in a 12-inch skillet over moderately low heat until foam subsides. Add onions, cover, and cook, stirring occasionally, until soft, about 8 minutes. Add peas, mint, salt and pepper and cook, stirring, until peas are heated through. Yield: 4 servings.

You might also enjoy these recipes:
Snap Pea Salad - Sense and Sensibility
Peas with Lettuce - Never Enough Thyme
Sauteed Peas with Mint - Chantel's Cooking Blog
Sugar Snap Peas with Mint Oil - One Perfect Bite
Simple Pleasures-English Peas - Bunky Cooks
Three Types of Peas with Bacon and Leeks - Sara's Kitchen

Thursday, February 24, 2011

Rue Tatin Sweet Crescent Rolls


From the kitchen of One Perfect Bite...Every year at this time, I renew my search for the perfect cinnamon roll. I've been looking for decades now and still come up short. I've finally decided that the only way I'll ever find my golden fleece, is to rob elements of existing recipes, and combine them in such a fashion that they can be called my own. Tonight's post is not about cinnamon rolls, it is, rather, about an outstanding sweet dough that I think will work very nicely as a base for them. I know most of you have read the charming memoir, On Rue Tatin, written by Susan Loomis. Tucked between its covers is a lovely recipe called Les Pains De Rapprochement or The Rolls That Brought us Together. That dough is the one I'll be using next week when I feature the world's ultimate cinnamon roll. They are really good and I think you forgive my modest brag when you taste them. Anyway, I tested Susan's recipe exactly as it was written before forging the path that will lead all of us to those very special rolls. The Silver Fox loved the basic recipe and was charmed by the shape and color of the rolls. It is at his urging that I'm sharing the original recipe for her crescent rolls with you. These are really easy to do, especially if you have a large stand mixer to do the work for you. The dough requires a bit of kneading, but it is so velvety in hand that that is a pleasure to do. These are really nice. They are meant to be served warm from the oven, but they can be reheated in a microwave if needs be. There are no tricks here. Follow the recipe and you have gorgeous crescent rolls to serve your family and friends. I hope you'll come back next week when we feature them with added bells and whistles. Here's the basic recipe.

Sweet Crescent Rolls...from the kitchen of One Perfect Bite courtesy of Susan Herrmann Loomis

Ingredients:
1 cup whole milk
8 tablespoons (1 stick) unsalted butter, at room temperature
2-1/4 teaspoons (1 package) active dry yeast
1/2 cup granulated sugar
4-1/2 cups all-purpose flour
2 large eggs, room temperature
1 teaspoon table salt

Directions:
1) Scald milk over medium-high heat. Pour it into large bowl of an electric mixer. Add butter and stir until butter has melted. Set aside until mixture is lukewarm.
2) Stir yeast and sugar into milk. Add 1 cup flour and mix well. Add eggs, one at a time, beating well after each addition. Add salt and 1 more cup of flour. Mix vigorously until dough is smooth and elastic, about 3 minutes on medium speed.
3) Add reserved 2-1/2 cups flour and mix just until incorporated. Turn dough onto a lightly floured surface. Continue kneading by hand until it is smooth.
4) Place dough in a bowl, cover with a towel or plastic wrap and set aside until it has doubled in size, about 2 hours.
5) Lightly flour 2 baking sheets.
6) Turn dough onto a well-floured surface, divide it in half, and roll each half to form a circle that is 1/8-inch thick and 16-inces in diameter. Cut each circle into quarters, and cut each quarter into 4 wedges, Roll edges up, beginning at the wide end, to form crescents.
7) Place rolls on prepared sheets, leaving 2-inches between them and arranging them with tips tucked underneath. Cover rolls with a kitchen towel and let rise until they have doubled in size, at least 4 hours.
8) Preheat oven to 350 degrees F.
9) Bake rolls in center of oven until they are golden, 10 to 15 minutes. Remove and serve immediately. Yield: 32 crescent rolls.

You might also enjoy these recipes:
Dark and Soft Restaurant Dinner Rolls - Handle the Heat
Olive and Asiago Rolls - Cookie Madness
Soft Whole Wheat Rolls - One Perfect Bite
90 Minute Dinner Rolls - Drick's Rambling Cafe
Sour Dough Dinner Rolls - Phoo-d
Potato Dinner Rolls - Sweet and Savory Tooth
Parker House Rolls - The Pioneer Woman
Soft Dinner Rolls - Inspired2Cook

This post is being linked to:
Wild Yeast - Yeast Spotting

Wednesday, February 23, 2011

Fried Onion Rings


From the kitchen of One Perfect Bite..."Take it outside." While these words usually preclude a bar brawl, they were meant only to clear the kitchen and get the steaks on the grill so our annual steakhouse dinner could proceed apace. We are generally cautious eaters, but tonight's meal centered on thick, aged sirloins, steakhouse fries, creamed spinach and the meal's highlight, deep fried onion rings. The steakhouse dinner is really an excuse to serve these extraordinarily good onions. They are simple in the extreme, and once you've had them, you'll view all other versions as poorly executed pretenders. Save for the onions and the oil in which they fry, there are only three ingredients in this recipe, those being milk, flour and salt. The instructions are equally simple and can be summarized as a process of dipping, dusting, dunking and draining. If there is a drawback to this recipe, it's that the onions must be fried just before serving. They lose their crispness as they sit and cool, but they will make your socks go up and down when they are served hot. The predominant flavor is that of a sweet onion and the coating is just thick enough to provide a little crunch. I do hope you try these. They are delicious. Here's the recipe.

Fried Onion Rings...from the kitchen of One Perfect Bite inspired by Gormet Magazine

Ingredients:
6 cups vegetable oil for deep frying
1 large (1 pound) sweet onion, cut crosswise into 1/4-inch thick slices
1 cup whole milk
2 cups all-purpose flour
1 teaspoon salt

Directions:
1) Heat oil in a 4 to 5-quart heavy pot or a wok set over moderate heat until oil temperature is 370 degrees F.
2) While oil heats, divide onion slices into rings. Pour milk into a bowl and combine flour and salt in a pie plate. Working in small batches of three, dip rings into milk and then into flour; repeat for a double coating. Transfer rings to hot oil and fry, stirring, until rings are golden brown, about 2 minutes. Carefully transfer rings to paper towels to drain. Coat and fry remaining rings in same fashion. Serve immediately. Yield: 4 servings.

You might also enjoy these recipes:
Roasted Onions Momofuku Style - Momofuku for 2
Trencherman's Onions - One Perfect Bite
Cheese Scalloped Onions - The English Kitchen
Sweet and Sour Onions - Simply Recipes
Baked Barbecued Onion Rings - Recipe Girl
Roasted Cipollini Onions - White on Rice Couple
Onion Gratin with Rosemary and Thyme - Kalyn's Kitchen

Tuesday, February 22, 2011

Fast and Easy Filipino-Style Chicken Adobo


From the kitchen of One Perfect Bite...I probably should issue a blanket apology to the immediate world for my "-style" recipes. I've been experimenting again and have another to add to the list, this time it's a Filipino-like Chicken Adobo. The recipe is my interpretation of a signature dish much loved by the Filipino people. Adobo was part of their cuisine long before the arrival of the conquistadors. While other Spanish speaking countries prepare adobo dishes, those made in the Philippines are unique. Adobo, here, refers to a cooking process in which food is stewed in vinegar. Over time, dishes cooked in this manner came to be known as adobo as well. I first tried chicken prepared in this manner out of curiosity. I generally don't enjoy dishes that are cooked in vinegar, but I put my prejudice aside and decided to give this a try. I did, however, make some major changes to the classic recipes when I began to experiment with mine. As I read through the old recipes, I was struck by how similar these dishes were to the red-cooked meats of China. That resulted in a strange fusion. I decided to use the ingredients of the classic recipes, but to braise them in a Chinese manner. That allowed me to make a guest-worthy dinner in about 30 minutes. It also assured that the chicken would be moist and tender rather than stringy. I really like this recipe and have moved it to my permanent rotation. I hope you will try this. It is as close to effortless as a meal can get and it really is delicious. Here's the recipe.

Filipino-Style Chicken Adobo...from the kitchen of One Perfect Bite

Ingredients:
2 pounds boneless, skinless chicken thighs, trimmed
1 cup water
1/2 cup rice vinegar
1/2 cup soy sauce
1 teaspoon brown sugar
8 cloves garlic, crushed
1 teaspoon whole black peppercorns
3 bay leaves
2 teaspoons cornstarch dissolved in 2 teaspoons cold water

Directions:
1) Combine all ingredients in a 3-quart saucepan. Bring to a simmer over moderate heat. Cover pan and continue to cook until meat is cooked and tender, about 10 minutes. Transfer chicken to a serving bowl.
2) Remove solids and skim fat from sauce. Bring to a boil and cook until sauce is syrupy and reduced by half, about 15 to 20 minutes. Stir cornstarch mixture and whisk into sauce, stirring until sauce thickens and is shiny, about 1 minute. Return chicken to pan and toss with sauce to coat and warm. Transfer chicken to a serving bowl or platter. Serve with rice. Yield: 4 servings.

You might also enjoy these recipes:
Quick and Easy Chicken Piccata - Barbara Bakes
Chicken Fried Rice - My Finds Online
Easy Chicken Fajitas - Floptimism
Easy Chicken Hash - The Perfect Pantry
Easy Chicken Teriyaki - Home Cooking and Baking
Soy and Garlic Chicken - Ang Sarap
Lumpia - The Average Foodie

Monday, February 21, 2011

Lemon Bavarian Cream Cake


From the kitchen of One Perfect Bite...This is a lovely dessert with potential that's yet to be realized. I was drawn to the cake by this photo, and it led me to the recipe for a Lemon Curd Mousse Cake that you can find here. The cake first appeared in Bon Appetit magazine, and if you read the reviews that accompany the recipe, you'll find that while most people like the cake, they had some reservations about the way it was constructed. I, too, like the cake, and plan to make it for our dessert on Easter Sunday, but only if I can do more testing and correct the problems I've encountered with it this week. I want to start my critique with an observation. This cake is far more like a Bavarian cream than a mousse. The filling lacks the velvety smoothness that's associated with mousse, and while its frothy lightness is quite pleasant, the cake is poorly named. The original recipe includes instructions for making lemon curd. If you purchase commercial curd or already have a recipe that makes one that you trust and enjoy, there is no reason to use the developer's recipe. It makes a nice, not exceptional filling. Whatever its source, you'll need at least 3-1/2 cups of lemon curd to make the cake filling. You'll also want to take a look at pan size and the type of crumbs you use to make the bottom crust. I suggest you use a 9 or 10-inch springform pan. The 8-inch pan that is recommended is way too small to handle all the filling the recipe will produce. Unless you are particularly fond of shortbread, use graham cracker or gingersnap crumbs to make the crust. There is nothing exceptional about the shortbread crust and the cookies are an unnecessary expense. You might also want to use pasteurized egg whites for the filling. While the yolks are cooked long enough to kill bacteria, the whites are not. If you cook for the very young or very old or any member of your family has a compromised immune system, pasteurized eggs are worth every cent they cost. The cake sounds more involved than it actually is. There are several steps needed to make it, but none of them are difficult. Time may be a problem. If you make your own curd, you'll need two days to make the cake table ready. Most of that time is passive chilling and final assembly is relatively easy to do. It is very important to serve this at room temperature. The texture of the cold cake is almost rubbery, but if it can sit for 30 to 45 minutes before serving, you'll have a confection that is light and frothy and melt-in-your-mouth good. Here's the recipe.

Lemon Bavarian Cream Cake...from the kitchen of One Perfect Bite courtesy of Bon Appetit magazine

Ingredients:
Curd
2-1/3 cups sugar
4 teaspoons cornstarch
1 cup fresh lemon juice
4 large eggs
4 large egg yolks
3/4 cup (1 1/2 sticks) unsalted butter, cut into 1/2-inch cubes
Crust
Nonstick vegetable oil spray
2 cups shortbread cookie crumbs (about 7 1/2 ounces)
1/4 cup (1/2 stick) unsalted butter, melted
Mousse
5 tablespoons water
4 teaspoons unflavored gelatin
6 large egg whites (pasteurized if possible)
3/4 cup sugar
1 -1/2 cups chilled heavy whipping cream
Garnish
Lemon slices, cut into quarters

Directions:
1) To make the curd: Mix sugar and cornstarch in heavy large saucepan. Gradually add lemon juice, whisking until all cornstarch dissolves. Whisk in eggs and yolks. Add butter. Stir over medium heat until curd thickens and boils, about 12 minutes. Transfer to medium bowl. Chill until cold, at least 6 hours. (Can be made 1 week ahead. Press plastic wrap onto surface of curd and keep chilled.)

2) To make crust: Preheat oven to 350 degrees F. Spray bottom of 8-inch-diameter springform pan with nonstick spray. Blend cookie crumbs and butter in small bowl. Press onto bottom of pan. Bake until golden, about 15 minutes. Cool.

3) To make mousse: Pour 5 tablespoons water into small saucepan. Sprinkle gelatin evenly over water. Let stand until gelatin softens, about 15 minutes. Meanwhile, place 1-3/4 cups lemon curd in large bowl. Stir 3/4 cup curd in another small saucepan over medium-low heat until very warm. Stir gelatin mixture over medium-low heat until dissolved and liquid is clear (do not boil). Whisk warm gelatin mixture into 3/4 cup warm curd. Gradually whisk gelatin-curd mixture into curd in large bowl. Remove 3/4 cup of curd and set aside for final assembly. Using electric mixer, beat egg whites in medium bowl until soft peaks form. Gradually add sugar, beating until whites are thick and glossy. Fold whites into curd mixture in 3 additions. Using same beaters, beat cream in another medium bowl until peaks form. Fold into egg white-curd mixture in 3 additions. Pour enough mousse over cooled crust to fill pan completely. Pour remaining mousse into small bowl and reserve. Cover and chill mousse cake, reserved mousse, and remaining curd overnight.

4) To serve: Using long thin knife, cut around cake to loosen. Remove pan sides. Gently spread 3/4 cup of remaining curd over cake. Transfer reserved mousse to pastry bag fitted with small star tip. Pipe rosettes of mousse around top edge of cake. Chill cake until ready to serve. (Can be made up to 8 hours ahead.) Arrange lemon slices between rosettes. Cut cake into wedges. Yield: 10 to 12 servings.

You might also enjoy these recipes:
Lemon and Poppyseed Cake with Yogurt Glaze - Kitchen Wench
Lightened Up Lemon Bars - Half Baked
Meyer Lemon Tart Topped with Lightened Lemon Cream - Food Lover's Odyssey
Lemon Cakes - Pastry Studio
Lemon Tart Brulee - Sticky Gooey Creamy Chewy
Lemon Gingersnap Icebox Cake - Bittersweet
Lemon Strawberry Ice Box Cake - Two Kitchens

This post is being linked to:
Smiling Sally - Blue Monday

Sunday, February 20, 2011

Lemon Thins


From the kitchen of One Perfect Bite...If you enjoy afternoon tea or coffee, I think you'll really like these lovely lemon cookies. They are ridiculously easy to make, though I have heard some complaints about the dough being difficult to work with. I have a "work around" that will put an end to that argument and allow you to enjoy these cookies anytime you have a yen for them. The original instructions for this recipe, which, by the way, comes from an old issue of Gourmet magazine, called for rolling the dough into a log and refrigerating it overnight prior to slicing cookies for baking. If you use a knife on the chilled dough, the slices end up looking like amoebae and you won't get the lovely slices you are looking for. Years after first working with this dough, I learned to avoid this problem by using buttonhole thread or dental floss to cut through the log. That, however, is not my work around. I generally don't bake cookies unless our grandsons are visiting. They like to help. I'll say no more because I'm sure you get the picture. In order for them to help, it was necessary to change the way these cookies were formed and I fell back on the old roll it and pat it of nursery rhyme fame. Everyone is given a teaspoon and, following an earnest discussion as to what constitutes a heaping teaspoon and how to form a ball, they roll and pat to their heart's content. It's not elegant, but it is efficient and it works beautifully if the dough is well-chilled. They really are delicious and if you are a lemon lover you'll really like these cookies. Here's the recipe.

Lemon Thins...from the kitchen of One Perfect Bite inspired by Gourmet Magazine

Ingredients

1/2 cup vegetable shortening, room temperature
2 tablespoons unsalted butter, softened
1 cup granulated sugar
1/2 teaspoon vanilla extract
1/2 teaspoon lemon extract
1-1/2 tablespoons freshly grated lemon zest
1/4 cup fresh lemon juice (from about 1 lemon)
1-1/2 cups all-purpose flour
1-1/2 teaspoons double acting baking powder
1/2 teaspoon baking soda
1/4 teaspoon salt
Confectioners' sugar for dusting the cookies

Directions:
1) In a bowl with an electric mixer cream together shortening, butter and the sugar. Add vanilla, lemon extract, lemon zest and the juice. Beat until mixture is smooth.
2) In a separate bowl, sift together flour, baking powder, baking soda and salt and blend well. Add to butter mixture and beat on low speed until well blended. Form mixture into a ball, wrap in plastic wrap and chill for 2 to 24 hours.
3) Preheat oven to 350 degrees F. Roll heaping teaspoons of dough into balls and place about 2-inches apart on ungreased cookie sheets. Flatten balls slightly with palm of your hand. Bake cookies in batches until edges are just golden, about 10 minutes per batch. Transfer cookies to racks to cool. Dust with confectioners' sugar before serving. Yield: 5 dozen cookies.

You might also enjoy these recipes:
Cinnamon Icebox Shortbread Cookies - Cook It Allergy Free
Toasted Coconut and Orange Icebox Cookies - Baking and Boys
Lemon Pecan Icebox Cookies - Wives with Knives
Chocolate Butter Refrigerator Cookies - Annmarie Kostyk
Cranberry Orange Icebox Cookies - Appetite for China
Coconut Oatmeal Refrigerator Cookies - Foodista
Lemon Icebox Cookies - Martha and Me

Saturday, February 19, 2011

Penne with Sausage Ragu and Sicilian Meatballs


From the kitchen of One Perfect Bite...Ladies and gentlemen, I regret to inform you that our on-going lemon extravaganza has been postponed for a day. That little thing called life has gotten in the way and my time was needed elsewhere today. I lost the light before I could photograph the last of my lemon treats, so I still have two outstanding recipes to share with you. On Sunday, I'll feature a wonderful tea cookie, called a Lemon Thin, and on Monday, the jewel in my crown, a Lemon Mousse Cake will take center stage. As for today, a friend needed help with a commitment she had made and asked for my assistance. So, on a very meatless Friday, I found myself knee deep in sweet sausage, Sicilian meatballs and a truly stellar ragu. This recipe was clipped from on old issue of Gourmet magazine and those of you who try it will not be disappointed. The sauce is thick and rich and is infused with the flavors of pork and beef and the barest hint of cinnamon and fennel (from the sausage). The meatballs are extraordinary and herein lies the problem. While adults will love their fine texture, children will spend the entire meal picking out the currents and pine nuts that contribute to their wonderful flavor. My job is merely to warn of such hazzards. Unfortunately, yours is to deal with them. In Sicily, this dish is served on Shrove Tuesday and it's an integral part of their Carnival celebration. Traditionally, this dish would be served in two parts. The pasta would be served as a first course and the meats would be piled on a platter and served as the second. Gourmet magazine recommended piling the meats on top of the pasta. You don't want to do that. While it may be authentic, it looks terrible. Instead, cut the sausage into pieces and toss it and the meatballs into the penne. This is lovely peasant food and it is perfect for cold weather. The trenchermen in your family will love this dish. Here's the recipe.

Penne with Sausage Ragu and Sicilian Meatballs...from the kitchen of One Perfect Bite courtesy of Gourmet Magazine
Ingredients:
Meatballs
3/4 cup fine fresh bread crumbs from Italian bread (crusts discarded)
1/4 cup whole milk
1/2 cup (2 3/4 oz) whole almonds with skin, toasted
1 1/2 teaspoons sugar
1 pound ground beef chuck
1/2 cup finely grated pecorino Romano or Parmigiano Reggiano
1/4 cup dried currants
1/4 cup pine nuts, lightly toasted
2 teaspoons salt
1/4 teaspoon ground cinnamon
1 large egg
Sausage Ragu
2 tablespoons extra-virgin olive oil
Sicilian Meatballs (above)
12 sweet Italian sausage links (2-pounds total)
1 large onion, finely chopped
1 large garlic clove, smashed
2 cups dry red wine (i.e. Chianti)
2 tablespoons tomato paste
1 (28-ounce) can crushed tomatoes in puree
1/2 bay leaf
Pasta
1-1/2 ponds ridged penne
1 cup frozen peas, thawed
Salt and freshly ground black pepper

Directions:
1) To make meatballs: Place bread crumbs and milk in a medium bowl. Stir to mix. Pulse almonds with sugar in a food processor until finely ground. Add to bread crumb mixture, along with remaining ingredients, and mix with your hands until just combined. Roll mixture into 1-inch meatballs and transfer to a plate. Refrigerate if not cooking immediately.
2) To make the sausage ragu: Heat oil in a large 8 to 9-quart pot until oil shimmers. Working in batches, brown meatballs, turning occasionally, about 4 minutes per batch. Transfer to a plate. Prick sausages with a fork and brown in the same pot, turning occasionally, about 5 minutes. Transfer to another plate. Reduce heat to moderate and cook onions, stirring occasionally, until softened, about 5 minutes. Add garlic and cook until fragrance is released, about 30 seconds. Stir in wine, tomato paste, crushed tomatoes and puree and bay leaf. Return sausages and meatballs, along with accumulated juices to center of pot. Cover and simmer for 1-1/2 hours.
3) To prepare pasta: Bring 6 to 8 quarts of water to a boil. Add 2 to 3 tablespoons of salt and return to a boil. Following package directions, add pasta and cook until al dente. Drain well and return to pot.
4) To serve: Add peas to ragu and simmer, covered, for 5 minutes. Adjust salt and pepper to taste. Add pasta. Cut sausage into 2-inch pieces. Add sausage and meatballs to pasta and toss to combine. Serve immediately. Yield: 8 to 10 generous servings.

You might also enjoy these recipes:
Baked Ziti with Mini Meatballs - Gonna Want Second
Baked Pasta with Chicken Sausage - The Sweet's Kitchen
Pasta Ponza - Playing House
Chicken Lasagna - The Brunette Foodie
Sausage and Mushroom Cannelloni - What's Cookin' Chicago?
Orecchiette with Spicy Italian Sausage - Chewing the Fat
Baked Penne with Spinach, Roasted Red Peppers and B.A.C.O.N. - The Recipe Girl
Farfalle with Mushrooms and Sausage - Angelnina's Cottage

Friday, February 18, 2011

Adult Hot Chocolate Made with Nutella and Fortified Spirits


From the kitchen of One Perfect Bite...Sometimes this is a tough job. I had to test this recipe over and over again to get the proportions just right for you. Obviously, I couldn't recommend the spirits used to spike the hot chocolate without first verifying they were compatible with its Nutella base. They are! If you are looking for a special bedtime or fireside drink, I think you might enjoy this one. It's special. Here's the recipe.

Adult Hot Chocolate with Nutella and Fortified Spirits...from the kitchen of One Perfect Bite

Ingredients:
1/3 cup Nutella
1-1/3 cups milk, divided use
2 jiggers spirits (i.e. Jamesons, Baileys, Frangelico Kahlua)
Garnish: Whipped cream and cocoa powder

Directions:

1) Place Nutella and 1/3 cup milk in small saucepan over medium heat. Whisk until blended.
2) Add reserved 1 cup milk, increase heat to medium-high, and whisk until hot and frothy. Pour into two 8-oz. coffee mugs. Pour 1 jigger (shot glass) of desired spirit into each glass and stir well. Top with heavy cream and sprinkle lightly with cocoa powder. Serve immediately. Yield: 2 servings.

You might also enjoy these recipes:
Healthy Hot Cocoa for Kids and Grown-Ups, Too - Skinny Kitchen
Hot Chocolate Truffles - Real Mom Kitchen
Iced Mocha Drinking Chocolate - Cook with Nikki
What's Cooking? Nutella Hot Chocolate - You've Got Supper
Peanut Butter Nutella Hot Chocolate - The Chocolate Peanut Butter Gallery
Nutella Hot Chocolate - Rachel's Cottage House
Nutella Hot Chocolate - The Hungry Housewife

Luscious Lemon Sauce


From the kitchen of One Perfect Bite...I'm really fond of this sauce and always try to keep a jar of it in the refrigerator. I can't imagine having gingerbread without it and, because lemon is my chocolate, I generally put it on ice cream and bread pudding as well. It has the velvety texture and flavor of a good lemon curd, but it flows with the easy grace of a well-made chocolate sauce. This is really easy to make and I'm featuring it here because I think any serious collection of recipes should include a great lemon sauce. This is a great, if simple sauce. It keeps for up to a month in the refrigerator. That being said, it is still best served warm. You can warm the sauce in the microwave or in a pot of barely simmering water. Here's the recipe.

Luscious Lemon Sauce...from the kitchen of One Perfect Bite inspired by Gourmet magazine

Ingredients:
1 large egg - very well beaten
1/4 cup cold water
juice of 1 lemon - approximately 3 tablespoons
finely grated peel of half a lemon
3/4 cup sugar
1/2 cup butter

Directions:

In a small saucepan, whisk beaten egg, water, lemon juice and peel until well blended. Place pan on medium heat and whisk in sugar. Add butter and cook, stirring constantly, until butter is melted and sauce comes to a full boil. Remove from heat, cool slightly and serve warm. Yield: 1-1/2 cups.

You might also enjoy these recipe:
Chocolate Sauce - The Galley Gourmet
Killer Chocolate Sauce - Bon Appetit Hon
Chocolate and Salted Caramel Sauces - It's a Big Cookie, Dude
Dulce De Leche - Being Susie Homemaker
Hot Fudge Sauce - In Flora's Kitchen
Mocha Hot Fudge Sauce - Joy the Baker
Chocolate and Butterscotch Sauces - H.O.G. Food Blog
Ridiculously Easy Butterscotch Sauce - Smitten Kitchen
Vanilla Sauce - Southern Food
Caramel Sauce - Buttercream Barbie

Thursday, February 17, 2011

Skillet Lemon Souffle


From the kitchen of One Perfect Bite...I'm not sure I really enjoy soufflés, but I do know that those who love to cook aren't considered skilled until they can make one. The soufflé was a very popular dessert in the 70's and 80's, and most folks, cooking at that time, mastered the art of whisk and collar and can put a soufflé on the table when they have to. There are several ways to make them. They are usually prepared with with a base of white sauce, custard or fruit puree to which egg whites and flavorings are added. I came across this recipe several years ago and have held on to it because it makes a perfect soufflé every time, if you follow instructions. The recipe was developed for Cook's Illustrated magazine and it is in their book, The Best Skillet Recipes, which can be found here. It's a great, but unconventional recipe, and to get the correct texture and volume, it's really important to use the 10-inch skillet called for in the instructions. As you scan the recipe, you'll see that its base is much lighter than that of a standard soufflé. That makes the use cream of tartar necessary. Cream of tartar is an odorless powder that is a byproduct of wine making. It's used to stabilize and add volume to beaten egg whites. It helps eggs retain their volume once they're beaten and that is very important in this recipe. The bad news is there is no really good substitute for cream of tartar, the good news is that it's readily available and can be found in the spice aisle of your grocery store. It's important not to open the oven door for the first 7 minutes the soufflé is in the oven. This deflates quickly, so it should be served as soon as it is finished. This version of the soufflé lacks the towering height and beauty of those that are classically prepared, but its flavor is sublime and will make lemon lovers weep. Really! I suggest you watch this video before you begin to make the souffle. Here's the recipe.

Lemon Soufflé Recipe...from the kitchen of One Perfect Bite courtesy of Cook's Illustrated

Ingredients:
5 large eggs, separated
1/4 teaspoon cream of tartar
2/3 cup (4 2/3 ounces) granulated sugar
1/8 teaspoon salt
1/3 cup juice from 2 to 3 lemons
1 teaspoon grated zest from 1 lemon
2 tablespoons unbleached all-purpose flour
1 tablespoon unsalted butter
Confectioners’ sugar, for dusting

Directions:
1) Adjust a rack to middle of oven and preheat oven to 375 degrees F.
2) Using an electric mixer, whip egg whites and cream of tartar together on medium-low speed until foamy, about 1 minute. Slowly add 1/3 cup of the granulated sugar and salt, then increase mixer speed to medium-high, and continue to whip until stiff peaks form, 3 to 5 minutes. Gently transfer the whites to a clean bowl and set aside.
3) Using an electric mixer (no need to wash the mixing bowl), whip yolks and remaining 1/3 cup sugar together on medium-high speed until pale and thick, about 1 minute. Whip in lemon juice, zest, and flour until incorporated, about 30 seconds.
4) Fold one-quarter of whipped egg whites into yolk mixture until almost no white streaks remain. Gently fold in remaining egg whites until just incorporated.
5) Melt butter in a 10-inch ovenproof (not nonstick) skillet over medium-low heat. Swirl pan to coat it evenly with melted butter, then gently scrape lemon souffle batter into skillet and cook over medium-low heat until edges begin to set and bubble slightly, about 2 minutes.
6) Transfer skillet to oven and bake souffle until it's puffed, center jiggles slightly when shaken, and surface is golden, 7 to 11 minutes. Using a potholder (the skillet handle will be hot), remove skillet from oven. Dust soufflé with confectioners’ sugar and serve immediately. Yield: 6 servings.

You might also enjoy these recipes:
White Chocolate and Passion Fruit Souffle - Jaana's Kitchen
Lemon Blackberry Souffles - Baking Bites
Chocolate Souffle for Valentine's Day - Zen Can Cook
Lavender and Lemon Souffles - Experiments of a Housewife
Pumpkin Souffles with Maple Pumpkin Ice Cream - Healthy Green Kitchen
Warm Banana Souffle - Moogie and Pap
Nutella Souffle - Felice in the Kitchen
Apricot Souffle - One Perfect Bite
Cranberry Souffle - One Perfect Bite

Wednesday, February 16, 2011

Glazed Lemon Chicken


From the kitchen of One Perfect Bite...There is a logical progression that's led to lemon chicken being featured here tonight. Briefly, we've decided to postpone our trip to Egypt, and while discussing other destinations the topic of airports, carriers and comfort came up. We travel a lot and have become fairly expert in identifying airport restaurants that offer consistently passable meals to travelers. I'm sure you have a list of your own, but at the top of mine is the Panda Express, mainly because I like their orange chicken. I've found that no matter where I am, its taste and heat never vary, and while that might be off putting when you're home, it's a blessing when you're traveling. I was able to find a copycat version of their recipe for the chicken I like, but I couldn't use it because the Silver Fox doesn't share my love of orange entrées. I decided to do a flavor swap and came up with a slightly Asian lemon chicken that we both enjoy. This is not like the cloyingly sweet lemon chicken that you're served in Chinese restaurants. There is a hint of sweet, but that is more than balanced by the tart, slightly acidic flavor of the lemons in this recipe. I'll be featuring more lemon desserts this week, but I thought a real meal might be nice, too. I think you'll enjoy this. Here's the recipe for Lemon Chicken.

Glazed Lemon Chicken...from the kitchen of One Perfect Bite inspired by Panda Express

Ingredients:
2 pounds boneless, skinless chicken thighs, cut in bite-sized pieces
1 large egg
1-1/2 teaspoon salt
Pinch of white pepper
2 tablespoons vegetable oil, divided use + vegetable oil for deep frying
1/2 cup + 1 tablespoon cornstarch, divided use
1/4 cup flour
1 tablespoon minced fresh ginger
1 teaspoon minced garlic
1/2 teaspoon red pepper flakes, crushed
1/4 cup chopped green onion
1 tablespoon rice wine
1/4 cup water
1 teaspoon toasted sesame oil
Sauce
1-1/2 tablespoons soy sauce
1-1/2 tablespoons water
1/3 cup sugar
4 tablespoons rice wine vinegar
1-1/2 tablespoons lemon juice
Finely grated zest of 1 large lemon

Directions:

1) In a large bowl, mix together egg, salt, pepper, and 1 tablespoon of oil. Mix well. Stir in chicken pieces.
2) In medium bowl, stir together flour and 1/2 cup cornstarch. Add chicken pieces, tossing to coat.
3) Heat oil for deep frying in a wok or deep fryer to 375 degrees F.
4) Add chicken, small batches at a time, and fry for 4-5 minutes until golden crisp (but avoid overcooking the chicken). When done remove chicken from oil with tongs and drain on paper towels.
5) Clean wok and heat for 15 seconds over high heat. Lower to medium high and add reserved 1 tablespoon oil.
6) Add ginger and garlic and stir try until fragrant, about 10 seconds.
7) Add red pepper flakes and green onions, then the rice wine, stirring for a few seconds.
8) Add lemon sauce and bring to a boil. Add cooked chicken, stirring until well incorporated.
9) Stir reserved 1 tablespoon of cornstarch into 1/4 cup water and add to chicken. Heat until sauce has thickened.
10) Remove from heat and stir in sesame oil. Serve immediately. Yield: 4 servings.

You might also enjoy these recipes:
Mixed Noodle Stir-Fry with Crispy Pork - Adora's Box
Vegetable Lo Mein - Chef In You
Easy Orange Peel Chicken with Sticky Rice - $10 Buck Dinners
Chow Fun - One Perfect Bite
Orange Chicken - Carrie's Sweet Life
Easy Chinese Pork and Leek Dumplings - Comfort Bites
Chinese Pork Ribs with Black Bean Garlic Sauce - Very Culinary


Tuesday, February 15, 2011

Giant Lemon Sugar Cookies


From the kitchen of One Perfect Bite...When I was a little girl, bread not made at home came from a neighborhood bakery. These were, of course family operations, and tradition dictated that children be given a free cookie when they came into the store. Though grateful, I was always disappointed because I had my eyes on bigger things. I desperately wanted one of the giant sugar cookies displayed in the shop window. While they never made it to our market basket, there were times when two or three carefully wrapped eggs or a hunk of butter did. During the war years, bakeries were exempt from the rationing imposed on the general population and bakers, interestingly, were also exempt from the draft. No one talked much about it, but our early birthday cakes were almost always the results of negotiations with the baker, who did very nicely for himself during the war years. I'm convinced my love of giant and monster cookies dates back to that period of my life. I love to buy them, I love to bake them, and I certainly love to eat them. It's true I've gotten fussy over time. Most of the commercial variety taste like frosted cardboard, so I've taken to making my own. This is one of the recipes I've collected for them, and because this week is dedicated to all things lemon, I thought you might enjoy my giant lemon sugar cookies. They're not half bad, and if you like lemon, you'll probably love them. You'll find the flavor and ease with which they can be made, improves the longer the dough is chilled. I prepare the dough a day before I plan to shape and bake the cookies. These are really easy to do and the raw cookie dough also freezes well. I hope you'll enjoy them. Here's the recipe.

Giant Lemon Sugar Cookies ...from the kitchen of One Perfect Bite adapted from Taste of Home

Ingredients:
2 cups sugar, divided use
Zest of 2 large lemons, divided use
1 cup butter, softened
2 large eggs, at room temperature
1 to 2 teaspoon lemon extract
1 tablespoon lemon juice
2-3/4 cups all-purpose flour
1/4 teaspoon salt
2 teaspoons cream of tartar
1 teaspoon baking soda

Directions:

1) To make lemon sugar: Combine 1/2 cup sugar with 1 teaspoon lemon zest in the bowl of a mini-food processor. Pulse until lemon zest is incorporated into sugar. Pour into a small bowl and stir to break up any clumps. Set aside.
2) To make cookie dough: Combine flour, salt, cream of tartar and baking soda in a medium bowl. Set aside. In a large mixing bowl, cream butter with reserved 1-1/2 cups sugar. Blend in eggs, one at a time. Add lemon extract, lemon juice and reserved lemon zest. Add flour mixture, one cup at a time, blending well after each addition, until all flour is incorporated.
Refrigerate dough for at least 1 hour.
3) To bake cookies: Preheat oven to 350 degrees F. Shape dough into balls using 2 tablespoons of dough for each cookie. Roll in reserved lemon sugar. Bake in batches of six cookies per 18 x 13-inch baking sheets. Place balls of sugar coated dough on cookie sheets. Press down with the bottom of a glass or measuring cup until cookie is about 1/2-inch thick. Bake cookies for 12-14 minutes. Remove tray from oven. Let cookie sit on tray for 5 minutes before transferring to cooling rack. Yield: 24 saucer-sized cookies.

You might also enjoy these recipes:
Monster Cookies - SwEEts
Monster Cookies - The Sweet's Life
Monster Cookies - Sweet and Savory Tooth
Monster Cookies - Brown Eyed Baker
Monster Cookies - The Pioneer Woman Cooks
Flourless Monster Cookies - Picky Cook

Monday, February 14, 2011

Lemon Sour Cream Tart


From the kitchen of One Perfect Bite...I have a collection of recipes that are used primarily for cooking when we are away from home, but staying in accommodations that have kitchens. I learned a longtime ago that the presence of restaurants guarantees only that one will not starve, certainly not that one will dine or even eat well. It's sometimes really nice to have the option of eating in. From a vacationing cook's perspective, however, this works only when the recipes are quick and easy to make and can be assembled with minimal or substandard equipment. No one, escaping daily tedium, wants to spend hours in the kitchen, so, easy on, easy off food becomes de rigueur. Today's tart is a case in point. It is good enough to serve to guests at home, but a bit of deconstruction makes it possible to have this lovely treat wherever you travel. The crust is as negotiable as your standards. It need not be homemade and a really good commercial crust or puff pastry will work just fine. This tart is really a lemon pie that has lost its meringue. With the meringue gone, the tart can be made in a saucepan with a wooden spoon and simply chilled until it can be cut. Whipped cream or a whipped topping is usually served with this, but, when fresh berries are available I prefer to use them. A quick look at the recipe will convince you how easy this is to do. This, by the way, ia a wonderful recipe for new cooks to try. I can assure you it's delicious. Here's the recipe.

Lemon Sour Cream Tart...from the kitchen of One Perfect Bite adapted from Recipezaar

Ingredients:
1 9-inch pie or tart crust
1/4 cup cornstarch
1 cup sugar
4 tablespoons butter
1 cup sour cream
1 tablespoon finely grated lemon zest
1/2 cup lemon juice
3 egg yolks, beaten
1 cup milk
1 cup heavy cream, whipped

Directions:
1) Preheat oven to 400 degrees F.
2) Line a tart or pie pan with pastry. Flute edges. Prick bottom of sides with fork. Bake until light golden brown, about 20 minutes. Remove from oven. Cool to room temperature.
3) Combine sugar, cornstarch, lemon rind, lemon juice and egg yolks and milk in a heavy saucepan. Cook on medium heat until thick, stirring constantly. Add butter and let mixture cool to room temperature. Stir in sour cream and pour filling into tart shell.
4) Refrigerate for at least 4 hours. The pie can be refrigerated for up to 24 hours. Top with dollops of whipped cream just before serving. Yield 8 to 10 servings.

You might also enjoy these recipes:
Lemon and Poppyseed Cake with a Yogurt Glaze - The Kitchen Wench
Meyer Lemon Tart Topped with Lightened Lemon Cream - Food Lover's Oddessy
Lemon Cakes - Pastry Studio
Lightened Up Lemon Bars - Half Baked
Meyer Lemon Bars - Tasty Easy Healthy Green
Strawberry Lemonade Squares - Buttercream Barbie

Sunday, February 13, 2011

Turkey Meatballs with Lemon-Garlic Yogurt Sauce


From the kitchen of One Perfect Bite...I am prone to wanderlust. When the siren calls, I seek one of two things. It's occasionally the lure of brighter lights or a bigger city, but more often than not, especially these days, solitude better meets my need to cast away. Silence paves the way for reflection. Insight and serenity follow and they are my fresh air, my cosmic oxygen. My Valentine, bless him, has brought me to Loon Lake for the weekend. At this time of year, our only neighbors are the loons and save for their keening wails, silence and solitude reign supreme. The weather today was glorious and though a front has just moved in, we are warm and dry and very well-fed as we sit in this tiny cabin that teeters on the edge of the world. Bob has the fire blazing and the wind and rain are beating a steady tattoo that will have me sleepy well before my bedtime. I'm mesmerized by the artillery-like barrage that pine cones, loosed by the wind and pelting rain, are making as they bounce off the metal roof. There will be a mess for someone to clean up tomorrow, but for tonight all's right with my world. I have a lemon pie, and a special one at that, waiting to set, but it won't be ready in time for tonight's post. Fortunately, I can share tonight's dinner with you. I suspect many of you have read, or are at least familiar with, Molly Wizenberg's cookbook "A Homemade Life". While her recipes are wonderful, I'm always struck by her facility with language and the restrained power of her words. I have come to love her writing and her blog, Orangette. Hers, is one of the few books that has made from the library stacks to my personal collection. The meatballs we had for supper came from her book. While they are delicious, they are hard to categorize. They are vaguely Greek and definitely have their roots in Mediterranean kitchens. The ingredient list will be surprising to many. While the meatballs are made with pine nuts and raisins, they serve to make the recipe unique and add a texture and sweetness that makes an otherwise ordinary dish special. I mixed and formed the meatballs yesterday and brought them with us to be cooked. That gave all the flavors time to develop and made for a very tasty supper. While I served the meatballs on pita bread, it is not necessary and they do quite well on their own. The meatballs can be baked if you are watching your diet. I prefer them fried, but to each his own. These are very easy to make and can be assembled in less than 30 minutes. I promise you the flavor is unique and the meatballs are delicious. Here's the recipe.

Turkey Meatballs with Lemon-Garlic Yogurt Sauce...from the kitchen of One Perfect Bite, courtesy of Molly Wizenberg

Ingredients:
Meatballs
1-1/4 pound ground turkey thigh meat
1/2 cup finely minced onion
1 large egg
1/4 cup finely chopped cilantro
1/2 cup toasted pine nuts
1/2 cup cup golden raisins (chopped if large)
1/3 cup fine bread crumbs
1/8 teaspoon ground cumin
1/8 teaspoon fresh ground pepper
1/2 teaspoon salt
4 tablespoons olive oil
Lemon-Garlic Sauce
1 cup plain yogurt (Greek-style if possible)
3 tablespoons fresh lemon juice
1 teaspoon minced garlic
1/4 teaspoon ground cumin
Pinch cayenne pepper
1/4 teaspoon salt

Directions:
1) To make meatballs: Combine turkey, onion, egg, cilantro, nuts, raisins, breadcrumbs, salt, pepper and cumin in a large bowl. Mix just until ingredients are combined and evenly mixed. With wet hands form the mixture into 1 to 1-1/2-inch balls. Set on a tray. Cover lightly with plastic wrap and chill until ready to sauté.
2) To make sauce: Combine yogurt, lemon juice, garlic, cumin and salt in a small bowl. Mix well. Cover and refrigerate.
3) To cook: Heat 2 tablespoons of olive oil in a heavy skillet over moderate heat, and sauté meatballs in batches, so as not to crowd them. As they begin to color, turn them regularly so that they are golden on all sides. They should be done when they are evenly browned and feel medium firm, but not hard when touched. Place on a paper towel to catch excess oil. Serve hot, warm, or cold with yogurt sauce. Yield: 4 to 5 servings.

You might also enjoy these recipes:
Italian-Style Turkey Meatballs - My Kitchen Adventures
Cheese Stuffed Turkey Meatballs - Sydney's Kitchen
Mario Batali Meatballs - Made Famous By
Mozzarella-Stuffed Meatballs - Being Suzy Homemaker
Spicy Buffalo Chicken Meatballs with Creamy Blue Cheese Dip - My Kitchen Adventures
Swedish Meatballs - The Galley Gourmet
Porcupine Meatballs - The Daily Dish

Saturday, February 12, 2011

Lemon Mousse Parfaits


From the kitchen of One Perfect Bite...There are two camps within the legions of dessert lovers. One is fanatically devoted to chocolate, the other to lemon. This week is dedicated to those who profess lemon to be their chocolate. First up, is a lemon mousse-like parfait that is creamy, tart, and as good looking as it is delicious. The parfait, developed by Sally Tager for Gourmet magazine, is a wonderful way to end a company meal. It's also marvelous for family celebrations and holidays. This is a custard-type dessert that's lightened with whipped creamed. The thought of lightening anything with whipped cream is an absurdity I know, but this is just one of many oxymorons we deal with each day of our lives. A whipped topping can be substituted for the heavy cream if you wish, but it will change the texture of the parfait and it won't be quite the same. This is easy to make and all the ingredients you need to make it can be found in your neighborhood grocery store. There are a couple of things to keep in mind if you decide to try these. Separate your eggs when they are cold, but whip them when they are at room temperature. When beating cream, the bowl and beaters you plan to use are should be well-chilled. I put mine into the freezer 30 minutes or so before I plan to beat the cream, which coincidentally, should also be icy cold. When zesting your lemons make sure to avoid the white pith. These parfaits are very tart, but only the lemon pith can make them bitter. They can also be made and frozen a day before serving, but if you want a creamy, mousse-like texture place them in the refrigerator for about 45 minutes before dessert is served. Lemon enthusiasts, prepare to be wowed by this easy and delicious treat. Here's the recipe.

Lemon Mousse Parfaits...from the kitchen of One Perfect Bite courtesy of Sally Tager and Gourmet Magazine

Ingredients:
1 tablespoon finely grated lemon zest
1/2 cup strained fresh lemon juice
3 large eggs, separated
1 cup granulated sugar, divided use
Pinch of cream of tartar
Pinch of salt
1 cup very cold heavy cream
3 tablespoons confectioners' sugar

Directions:
1) To make the custard: Combine lemon zest and juice, egg yolks, and 1/2 cup granulated sugar in a small saucepan, whisking to combine. Over moderate heat, cook, stirring constantly, until mixture thickens and reaches 160 - 170 degrees F on a candy thermometer, about 5 minutes. Do not allow to boil. Transfer to another bowl to cool.
2) To beat egg whites: Place egg whites, cream of tartar and salt in large bowl of an electric mixer fitted with a balloon attachment. Beat on medium speed until soft peaks form. Add reserved 1/2 cup sugar a tablespoon at a time. Beat on high speed until meringue holds stiff, glossy peaks, about 1 minute. Fold meringue into cooled lemon mixture.
3) To beat cream: Place icy cold cream in a chilled bowl and beat with clean chilled beaters until soft peaks form. Add confectioner' sugar and beat at medium speed until stiff peaks are formed. Fold Cream into lemon mixture.
4) To assemble: Divide mixture among eight (8-ounce) stemmed glasses. Freeze, covered with plastic wrap for at least 2 hours. Serve garnished with additional lemon zest, if desired. Yield: 8 servings.

Cook's Note: Parfaits can be frozen for up to one day. Frozen parfaits should be transferred to refrigerator 30 to 60 minutes before serving.

You might also enjoy these recipes:
Lemon Blackberry Souffles - Baking Bites
Lemon Pie - Katy's Kitchen
Meyer Lemon Tart with Lightened Lemon Cream - Food Lover's Odyssey
Lemon Tart Brulee - Sticky Gooey Creamy Chewy
Lemon Cakes - Pastry Studio
Lightened Up Lemon Bars - Half Baked
Old Fashioned Lemon Pudding - One Perfect Bite
Lemon Pound Cake - One Perfect Bite
Lemon Cloud - One Perfect Bite
Lemon Buttermilk Ice Cream - One Perfect Bite
Related Posts with Thumbnails

Printfriendly