Showing posts with label italian. Show all posts

Wednesday, March 9, 2016

Italian Fresh Cream Lemon Cake


From the kitchen of One Perfect Bite...I've had this recipe for a while now. I found it on a terrific blog called An Italian in My Kitchen and when I saw strawberries at the market this morning, I decided the time had come to give it a try. My plan was to combine it with macerated strawberries and serve our first "non-shortcake" of the season. As it turned out, it's still a bit early for the strawberries, but the cake was a delightful find. It is flavored with a hint of lemon and has a texture that is close to perfect. It is, however, the type of cake that is best served with fruit because it is so plain. The cake is easy to make and if you grease your pan well you'll avoid the one problem you might encounter. I don't think the cake is a good keeper, so I suggest you freeze any slices you don't use, or plan to add them in a trifle or extravagant bread pudding if the spirit moves you. Lemon lovers will enjoy this cake and everyone will like its texture. Here is how the cake is made.

Tuesday, July 8, 2014

Something Different for a Change - Roasted Sausages and Grapes - Salsiccia all’Uva


From the kitchen of One Perfect Bite...His request was simple. He wanted something different for dinner, and because he is so constant, the request was hard to refuse. The Silver Fox has a reputation for eating anything that does not bite back, but his palate favors the flavors of China and the peasant creations of Tuscany and Umbria. He especially loves pork in any of its myriad forms. I had sausage, good sausage I might add, in the freezer, and an overly abundant supply of grapes sitting on the counter demanding to be used, so I zeroed in on a recipe I hadn't served in years - Salsiccia all’Uva. The simplicity of this dish is legend and while the combination of grapes and sausage seems unusual, it is delicious and simple enough for a teenager to prepare. Make no mistake about it, this is hearty country fare and while it is usually served with a creamy polenta, cheesy grits, pasta or potatoes, such as rosti, should also be considered. A quick glance at the recipe will convince you how easy this dish is to prepare, and if you have a family whose tastes are at all adventuresome, I hope you'll give this Tuscan triumph a try. Here is how the dish is made.

Wednesday, March 20, 2013

Sweet Easter Pie


From the kitchen of One Perfect Bite...There are some foods and beverages that are acquired tastes. Martinis and haggis come to mind and I suspect the pie I'm featuring tonight might be on that list as well. Pastiera is a wheat and ricotta pie that is part of the Italian Easter tradition. It is made with grano cotto, a cooked wheat product that is sold in cans in older Italian markets. The goopy mass of cooked wheat is mixed with a bit of sugar, fresh ricotta cheese and orange water then poured into a pie shell for baking. Back in the day, the pie was an integral part of the Easter meal in Italian homes, though I'm sure there were some at the table who would have preferred a coconut lamb cake. I had a forkful of the pie when I was six years old, and despite my love of all things Italian, it never crossed my lips again. As I initially said, this is an acquired taste and I suspect some of you are wondering why I am even mentioning the pastiera tonight. As it happens, I have a friend who was passing through a bad stretch a few years ago. She had fond memories of the pastiera, so I took it upon myself to bake for her and lift her spirits with the Easter pie. I was unable to find grano cotto, so I used soaked barley instead. My first effort was an unmitigated failure, so I began to look for other ways to make the pie. I knew that wheat was used because it symbolizes resurrection, but symbolism aside, without the proper form of wheat, I had no chance of success. In the course of my search, I found recipes that used rice, rather than wheat to make the pie. Both Mary Ann Esposito and Giada De Laurentis used rice, but I decided to use Giada's recipe because it was easier and used phyllo sheets to make a leafy crust for a custard that was much like rice pudding. The finished pie was beautiful. If you'd like to see Giada make the pie, a video can be found here. I do have a caution to share with those of you who decide to make this pie. Taste the custard filling as you go along. Keep the vanilla bottle nearby and don't be afraid to use more sugar. I still make this pie for my friend who asks for it each year. Never doubt that memory trumps the palate. Now for those of you who are brave enough to try a real pastiera, I'd like to recommend the one that is made my friend Claudia, who has a recipe for the pie on her blog, Journey of An Italian Cook, which you can find here. The recipe below is the one I used to make my friend's Easter pie.

Sweet Easter Pie...from the kitchen of One Perfect Bite courtesy of Giada De Laurentis

Ingredients:
3/4 to 1 cup powdered sugar, plus extra for garnish
3 large eggs
2 teaspoons pure vanilla extract
1 tablespoon orange zest
1 (15-ounce) container whole milk ricotta cheese
1/2 cup cooked short-grained rice
1/3 cup toasted pine nuts
6 sheets fresh phyllo sheets or frozen, thawed
3/4 stick (3 ounces) unsalted butter, melted

Directions:
1) Blend 3/4 to 1 cup  powdered sugar, eggs, vanilla, orange zest and ricotta in a food processor until smooth. Stir in rice and pine nuts. Set ricotta mixture aside.
2) Preheat oven to 375 degrees F.
3) Lightly butter a 9-inch glass pie dish. Lay 1 phyllo sheet over  bottom and up  sides of the dish, allowing  phyllo to hang over  sides. Brush the phyllo, including the drooping sides  with  melted butter. Top with a second sheet of phyllo dough, laying it in  opposite direction as the first phyllo sheet. Continue layering remaining sheets of phyllo sheets, alternating after each layer and buttering each sheet. Spoon  ricotta mixture into the dish. Fold  overhanging phyllo dough over  top of filling to enclose it completely. Brush completely with melted butter.
4) Bake  pie until phyllo is golden brown and the filling is set, about 35 minutes. Transfer pan to a rack and cool completely. Sift powdered sugar over the pie and serve. Yield: 8 servings.


One year Ago Today: Tom  Yum Goong - Hot and Sour Lemongrass  Soup


Two Years Ago Today: Spicy Peanut Noodles for Blog Insert


Three Years Ago Today: Ciambellone - Italian Easter Bread


Four Years Ago Today: Key Lime Sherbet

Tuesday, March 19, 2013

Colomba Pasquale - Italian Easter Cake


From the kitchen of One Perfect Bite...Our plans for the Easter holiday are falling into place. We'll be having friends for a traditional dinner on Saturday night and on Sunday, if the good Lord's willin' and the creek don't rise, we'll be enjoying a potluck brunch on the shores of Loon Lake. After sifting through a maze of possibilities, I decided to make an Italian Easter cake, called Colomba Pasquale, as my contribution to the communal feast. I did a test run of the recipe today and I'm really pleased with the results. The cake is made with a sweet dough, similar to the one that is used for panettone, and it is usually baked in a dove-shaped mold. I've reached an age where the chances of any new pots, pans or molds coming into my kitchen are mighty slim, so the idea of a dove-shaped cake, no matter how lovely the symbolism, was immediately sacrificed on the altar of  practicality. I was tempted to try a freeform version of the dove, but the dough used to make the cake is so soft I was afraid it would sprawl and look like an amoeba by the time it finished baking. I decided to use a large springform pan instead and it worked really well. I put a collar on the pan, so the dough was free to rise and my finished cake was a bit over 3 inches high. The dough used to make the Easter cake is easy enough to prepare, but because it begins with a sponge and rises several times, it is time consuming and shouldn't be attempted when you are short of time. The dough is sticky, but if you use too much flour to remedy that, your finished cake will be dry. While it is counterintuitive, wet hands will make working the dough easier. You could also use an electric mixer that has a dough hook and be done with it.  The best part of the colomba is the almond topping which adds texture, flavor and eye appeal to the bread. The finished cake is really pretty and I know you will enjoy it. Here is how it is made.

Colomba Pasquale - Italian Easter Cake...from the kitchen of One Perfect Bite courtesy of the Italian Connection and Emanuele's Kitchen

Ingredients:
Sponge
3/4 cup milk
2-1/4 teaspoons active dry yeast
1 cup all-purpose flour
1 teaspoon sugar
Dough
3 large eggs
1 egg yolk (set aside the white)
1 stick (4-oz.) butter, melted
1/2 cup granulated sugar
1/2 teaspoon salt
Grated rind of 1 lemon
Grated rind of 1 small orange
1/2 teaspoon vanilla
3 cups all-purpose flour
3/4 cup golden raisins
Almond Glaze
1/3 cup almonds
1/4 cup granulated sugar
1-1/2 teaspoons cornstarch
1 egg white
1/3 cup whole almonds
Confectioners' sugar for sprinkling

Directions:
1) To make the sponge: Heat milk to 105 degrees F. and pour into a medium size bowl. Mix in 1 teaspoon sugar and yeast and let sit for 5 minutes. Stir to combine. Add 1 cup flour and mix thoroughly with a fork. Cover with plastic wrap and place in warm spot until doubled in bulk, about 30-45 minutes.
2) To make dough: Melt butter in a saucepan and let cool. In a large bowl, beat 3 whole eggs and 1 yolk with a fork. Mix in sugar, salt, vanilla, and lemon and orange rinds. Stir in butter. Stir in risen sponge. Mix energetically until well combined. Gradually mix in the 3 cups of flour.
    Turn dough out onto a well-floured board and knead until smooth, adding additional flour only if needed to keep dough from sticking. Knead in raisins. Place dough in a large buttered bowl, cover with plastic wrap and set in a warm place to rise until doubled in bulk, about 1 hour.
   When dough has risen, fold it over itself in the bowl several times, then shape as desired, either as one large round cake, 2 smaller round cakes, or 2 colombe-dove shapes. I made one large cake in an 10” springform pan. Butter bottom of the pan, then line inside ring with parchment paper so that it is above rim of the pan by several inches, and secure with a metal paper clip. Place dough in pan, and flatten so that it is even and touches side of the pan. Cover with a cloth and leave to rise until doubled, 60-90 minutes.
    Preheat oven to 375 degrees F.
3) To make almond glaze: In a food processor, grind almonds and sugar by pulsing, until they are finely chopped. Add cornstarch and egg white and blend well. Carefully spoon glaze over cake dough,- do not push down on dough, which will deflate it and ruin your efforts! Scatter whole almonds over surface of glaze and sprinkle with confectioners sugar.
4) To bake: Place cake pan on bottom rack of oven, and bake for 20 minutes, then lower temperature to 325 degrees F. and bake for another 20-40 minutes, or until a cake tester comes out clean. If top starts to darken too much, cover it with aluminum foil to prevent it from burning. Cool on a rack. If made a day ahead, cover well in plastic wrap to keep fresh. Yield: 12 to 16 servings.

Cook's Note: While the traditional shape of this cake is a colomba – the dove that is the symbol of peace - the dove shape is a bit awkward without a special pan, so I make one large round cake which gives spectacular results.


One Year Ago Today: Chocolate-Cherry Cookies


Two Years Ago Today: Peanut Butter Fudge


Three Years Ago Today: Zeppole for the Feast of St. Joseph


Four Years Ago Today: Cinnamon Rolls and the Junction City Daffodil Festival

Monday, March 18, 2013

Italian Pine Nut Cookies + Fava Bean and Fennel Soup


From the kitchen of One Perfect Bite...I've been featuring Irish recipes and ingredients for a week now, but it is time to move along. Tucked between the hoopla that surrounds St. Patrick's Day and Easter Sunday is the feast of St. Joseph, a holiday of special importance to the people of Italy. I've told the full story of St Joseph before, but for those of you who are too busy to backtrack, I wanted to include a brief summary of it here. The gentle Joseph was the stepfather of Jesus. He is said to have spent time in Italy and was considered to be the patron saint of Sicily. During a period of devastating drought, the Sicilian people prayed to him for rain that was necessary to prevent a full-scale famine. When rain came, the people decorated altars and prepared a feast in his honor and welcomed all to the banquet table they had prepared. That table became known as St.Joseph's table and the food on it was meant for distribution to the poor. Three foods became associated with his holiday. The first is the fava bean, which survived the drought and kept the people alive. The second is a pasta tossed with bread crumbs instead of cheese, that you can find here, and the third is a Neopolitan pastry, called a zeppole, which you can find here. I have two other recipes to share with you today. They are not associated with St. Joseph's Day but they are very Italian and I though this would be a great day to share them with you. The first is a simple Italian cookie that is made with pine nuts. It is not the traditional almond and pine nut cookie that I'm sure you are already familiar with. This recipe was developed by Giada De Laurentis and it is flavored with ground fennel seeds instead of almond paste. This cookie is easy to make and is far less expensive to prepare than the classic Pignoli. It is wonderful to serve after dinner with espresso or a glass of sweet wine and I know you will enjoy it. The second recipe is for a creamy soup that is made with fava beans and fennel. It is delicious and if you have time to make it, I know you will love it as well. Without further ado, here are today's recipes.

Pine Nut Cookies ...from the kitchen of One Perfect Bite courtesy of Giada De Laurentis

Ingredients:
1 stick (1/2 cup) unsalted butter, at room temperature
1/2 cup plus 2 tablespoons sugar
1 teaspoon vanilla extract
1 teaspoon ground fennel seed
1/4 teaspoon salt
1 large egg
1 1/4 cups all-purpose flour
1/4 cup pine nuts

Directions:
1) Using an electric mixer, beat  butter, sugar, vanilla, fennel seed, and salt in a large bowl until light and fluffy. Beat in egg. Add flour and mix just until blended.
2) Transfer dough to a sheet of plastic wrap. Shape dough into an 8-inch-long log. Wrap dough in plastic and refrigerate for 2 hours.
3) Preheat  oven to 350 degrees F. Line heavy large baking sheets with a silpat or parchment paper. Cut  dough log crosswise into 1/8 to 1/4-inch thick slices. Transfer cookies to prepared baking sheets, spacing evenly apart. Press pine nuts decoratively atop cookies. Bake until the cookies are golden around edges, about 15 minutes. Yield 24 to 36 cookies.


Fava Bean and Fennel Soup...courtesy of Giorgio Locatelli from his book Made in Sicily

Ingredients:
1 pound + 5 ounces dried broad beans (favas)
1 teaspoon chopped wild fennel (or 1 teaspoon of fennel seeds, soaked in a little water)
7 ounces (1-1/2 cups) fresh broad beans (favas)
Olive oil
1 small onion, finely diced
1 medium carrot, finely diced
1 celery stalk, finely diced
Sea salt and freshly ground black pepper
Extra-virgin olive oil for finishing

Directions:
1) Soak dried broad beans in cold water overnight, then drain.
2) Next day, put soaked beans and wild fennel, or soaked fennel seeds, into a pan. Add enough water to cover, and bring to a boil. Turn down heat and cook slowly for about 2 hours, or until beans are completely soft, adding water as necessary. Blend by hand or machine until smooth and set aside.
3) While dried beans are cooking, blanch fresh beans in boiling unsalted water for a couple of minutes, then drain and peel off the skins.
4) In a separate pan, heat a little olive oil, then add diced onion, carrot and celery and cook until soft but not colored. Add fresh broad beans and the blended beans and cook for 15 minutes, then season and serve drizzled with a little extra-virgin olive oil. Serve hot. Yield: 6 servings.


One Year Ago Today: Braided Easter Egg Bread


Two Years Ago Today:  Tapenade Two Ways - Black and Green Olive Tapenade


Three Years Ago Today: Avgolemono - Greek Lemon Chicken Soup


Four Years Ago Today: Mustard Glazed Potatoes

Friday, March 15, 2013

Frugal Foodie Friday - Sicilian-Style Pepperoni Pizza


From the kitchen of One Perfect Bite...It's frugal Friday and this week's feature is a delicious Sicilian-style pizza that's inexpensive to prepare when all the elements used to make it are homemade.  Those elements are quite easy to make, so I am including recipes for both the dough and sauce in this post as well. I had hoped to share the classic Sicilian pie with you, but the ingredients needed to make it were simply to expensive to be a frugal Friday feature. Most pizza lovers think that any square pie with a thick and chewy crust is Sicilian. Taint true McGee! A true Sicilian pie is neither saucy nor cheesy. It has a thick crust that is, instead, topped with a mixture of cooked onions and tomatoes that receive a flavor boost from melted anchovies and a healthy sprinkling of oregano. It is a real treat, but quite unlike an America pizza. The pie I'm featuring tonight is not truly Sicilian. It does have a thick square crust, but it's toppings are decidedly America. The pie is lightly covered with tomato sauce, cheese and a very small amount of pepperoni. I diced the pepperoni in an attempt to trick the eye into thinking there was more of it that was actually the case. The pie is easy to prepare and it makes a wonderful meal for those who are trying to control their food expenditures. All the recipes needed to make it are below. I hope you enjoy the pie and I also hope you'll be back this afternoon. I still have Irish recipes to share with you. In the meantime, buon appetito!

Sicilian-Style Pepperoni Pizza...from the kitchen of One Perfect Bite courtesy of Family Circle magazine

Ingredients:
2 pounds commercial pizza dough, at room temperature, or one batch Basic Pizza Dough (see below)
1 cup marinara sauce (see below)
1/2 teaspoon dried oregano
2 cups shredded mozzarella cheese
2 ounces sliced pepperoni (about 1/3 cup)

Directions:
1) Heat oven to 500 degrees F. Coat a 15 x 10 x 1-inch baking pan with nonstick cooking spray.
2) On a lightly floured surface, roll dough into a 15 x 10-inch rectangle. Gently roll up onto a lightly floured rolling pin and unroll onto prepared pan. Push dough into corners.
3) Spread sauce evenly over dough to within 1/2 inch of edge. Sprinkle oregano over sauce. Scatter cheese over top. Place pepperoni slices over cheese. Bake at 500 degrees F for 15 to 20 minutes or until nicely browned on bottom. Remove from oven. Cool slightly before serving. Yield: 12 slices.

Basic Pizza Dough...from the kitchen of One Perfect Bite courtesy of Family Circle magazine

Ingredients:
1 cup warm water (about 110 degrees F)
1 package (2-1/4 teaspoons)dry active yeast
2-3/4 cups all-purpose flour, divided use
1 teaspoon sugar
1 teaspoon salt
2 tablespoons olive oil

Directions:
1) Place water in a small bowl and stir in yeast. Let stand 5 minutes.
2) In a large bowl, whisk together 2-1/2 cups of the flour, sugar and salt. Make well in center and add yeast mixture and olive oil. Stir until dough comes together and forms a ball. Turn out onto a well-floured surface and knead for 5 minutes, adding as much of remaining 1/4 cup flour as needed. Form into a disk and place in a bowl that has been lightly coated with olive oil. Turn disk over and cover bowl with plastic wrap. Allow to rise in a warm place for 2 hours.
3) Remove dough from bowl and punch down. Roll out into desired shape.

Quick and Easy Marinara Sauce...from the kitchen of One Perfect Bite courtesy of Family Circle magazine

Ingredients:
2 tablespoons olive oil
4 cloves garlic, finely chopped
1 can (28 ounces) San Marzano tomatoes, crushed by hand
1 teaspoon sugar
1/2 teaspoon dried oregano
1/2 teaspoon dried basil
1/4 teaspoon salt

Directions:
In a medium-size saucepan, heat oil over medium heat. Add garlic, cook 1 minute, stirring so garlic does not burn. Stir in tomatoes, sugar, oregano, basil and salt. Bring to a boil. Cook, with lid ajar, for 30 minutes over medium-low heat, stirring occasionally. Yield: 2 cups.


One Year Ago Today: Adult Irish Oatmeal Cookies


Two Years Ago Today: Chilled Spring Pea Soup with Garlic Cream and Bacon


Three Years Ago Today: Shrimp Risotto

Thursday, February 21, 2013

Greens and Beans - A Tuscan-Inspired Bean Soup


From the kitchen of One Perfect Bite...This fast and simple riff on the classic Tuscan Bean Soup has just saved my bacon. The quick bread I had intended to feature tonight was a complete and utter failure. It cemented to the no-stick pan in which it baked and when it finally released it looked like the debris on either side an earthquake fault-zone. Worse still, its taste and texture left much to be desired and I was not inclined to give the recipe another try. I did, however, still need something to share with you tonight and I needed it quickly. Fortunately, I had seen this recipe on Serious Eats at the beginning of the year and had made it for a family lunch at that time. I loved the recipe as it was written, but had made notes in the margin of my printed copy, and I thought tonight would be the perfect time to test the recipe with my changes in place. Save for the greens, this is a pantry soup that takes minutes to prepare. It comes very close to the Tuscan classic that inspired it, though it is much faster to make. As you skim through the ingredient list, please note that you'll want to save the almost gelatinous liquid in which the beans are packed. It lends flavor to the soup, but it contains sodium so you'll want to watch how much additional salt you add to the soup. When served with a crusty peasant bread and a bright green salad, you'll have the makings of a wonderful family meal. The soup keeps well but the greens will quickly lose that bright color that makes them so appealing. Unfortunately, green vegetables tend to lose their color quickly when cooked. This happens because cooking releases acids in the vegetables that react with chlorophyll, the substance that is responsible for their green color. The acids and heat destroy some of the chlorophyll, and by degrees those lovely greens turn gray. Blanching works in some preparations but it doesn't help much with soups. My advice - eat quickly. I know that those of you who try this recipe will be pleased. Here is how the soup is made.

Greens and Beans - A Tuscan-Inspired Bean Soup...from the kitchen of One Perfect Bite inspired by J. Kenji Lopez-Alt and Serious Eats

Ingredients:
2 tablespoons extra-virgin olive oil, plus more for serving
1 cup finely diced onion
1 cup finely diced carrot
1 cup finely diced celery
4 teaspoons minced garlic
1/2 teaspoon dried red pepper flakes
4 cups low-sodium vegetable broth
3 (15-ounce) cans white beans (cannellini or great northern), with their liquid
4 6-inch sprigs rosemary, leaves finely chopped and stems reserved
1 (3-4 inch) chunk Parmesan rind (optional)
2 bay leaves
4 cups mixed baby spinach and kale
1 teaspoon cider vinegar
Kosher salt and freshly ground black pepper
Parmigiano-Reggiano for serving

Directions:
1) Heat olive oil in a large saucepan over medium-high heat until shimmering. Add onions, carrots, and celery and cook, stirring frequently, until softened but not browned, about 3 minutes. Add garlic and dried red pepper flakes and cook, stirring constantly until fragrant, about 1 minute. Add vegetable broth, beans and their liquid, rosemary stems, Parmesan rind, and bay leaves. Increase heat to high, and bring to a boil. Reduce to a bare simmer, add spinach and kale mixture, cover and cook for 15 minutes.
2) Discard bay leaves and rosemary stems. Use a hand blender to roughly puree a portion of bean mixture until desired consistency is reached. Alternatively, transfer 2 cups of soup to a blender or food processor and process until smooth (start on low speed and increase to high to prevent blender blow-out). Return puree to soup and stir to combine. Stir in cider vinegar and season to taste with salt and pepper.
3) Ladle into bowls, sprinkle with reserved chopped rosemary leaves, drizzle with extra-virgin olive oil and a grating of Parmigiano-Reggiano, and serve hot with crusty bread. Yield: 6 servings.


One Year Ago Today: Oatmeal Pancakes for Shrove Tuesday


Two Years Ago Today: Lemon Bavarian Cream Cake


Three Years Ago Today: Corn Salad with Edamame and Tomatoes

Saturday, December 15, 2012

Anise Biscotti


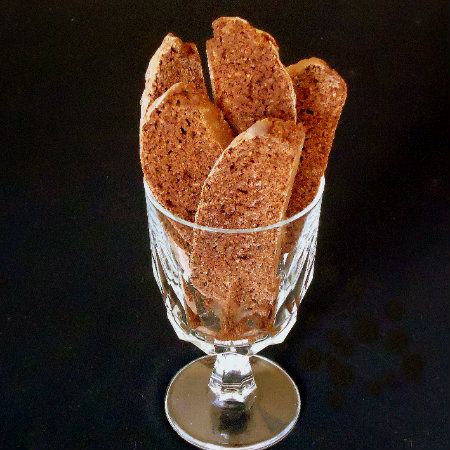
From the kitchen of One Perfect Bite...We are delivering Christmas baskets to the neighbors this afternoon. I've just made a last minute addition to them because they weren't quite full enough to achieve the look I was aiming for. I decided to use these anise flavored biscotti as a filler because, while they are delicious, they are also very easy to make. As it happens, they're also one of my favorite cookies and I liked the thought of holding a few of them back for my own consumption. They are wonderful with a cup of coffee and it is a near perfect treat for those of us who don't like our desserts to be too sweet. The cookies have a mild licorice flavor that is a perfect way to end a meal. I have one caution to share with those of you who plan to give this recipe a try. The dough is very soft and I've found it best to form the logs on prepared cookie sheets rather than attempt a transfer from the counter to the pan. You'll also want to form long, narrow logs because this is a dough that spreads and will encroach, amoeba-like, on its neighbor if given half a chance. I do hope you will try this recipe. This biscotti would be a perfect addition to your holiday cookie tray. Here's how they are made.

Anise Biscotti...from the kitchen of One Perfect Bite courtesy of Carroll Pellegrinelli at about.com

Ingredients:
3-1/4 cups flour
1 tablespoon baking powder
3/4 teaspoon salt
1-1/2 cups sugar
10 tablespoons (1-1/4 stick) butter, melted
3 large eggs
1 tablespoon anise extract
2 teaspoons ground aniseed
1 cup slivered almonds, lightly toasted, hand-crushed

Directions:
1) Preheat to 350 degrees F. Line baking sheet with parchment paper.
2) Mix flour, baking powder, and salt with a wire whisk.
3) Cream sugar and butter. Add eggs one at a time. Mix in anise extract and ground seeds.
4) Gradually add flour mixture until well combined. Hand stir in almonds.
5) Divide dough in half. Shape into two logs, about 12-inches long, and place on baking sheet. Bake until golden brown, about 30 minutes. Remove from oven and transfer pans to wire racks for cooling. Let pans sit until biscotti are completely cool, about 25 minutes. Slice logs diagonally into 1/2 to 3/4-inch slices.
6) Discard parchment paper, and place log slices, cut side down on baking sheet. Bake for 12 minutes. Turn and bake for 8 minutes longer, or until just beginning to color. Biscotti can be made 1 week before you plan to serve them if they are stored in an airtight container. Yield: 2 dozen biscotti.


One Year Ago Today: Mulled Cranberry and Cider Punch


Two Years Ago Today: Miso Soup


Three Years Ago Today: Warm Apple Pudding with Hot Caramel Sauce


Saturday, December 8, 2012

Double Chocolate Biscotti


From the kitchen of One Perfect Bite...I've been trying to find new biscotti to add to my holiday food baskets. The baskets are sent as token gifts to our neighbors at Christmas, but my schedule, of late, has been so frantic that those gifts will be much simpler than in years past. If all goes well, the baskets  will contain small holiday breads and the standard sweets, but I also wanted to tuck a new "dunkable" in with the other cookies that I plan to make. I've been testing some recipes that sounded interesting to me, and while I haven't decided if this biscotti will make the final cut, I can tell you they would be a wonderful addition to the baskets. They are dense and crunchy and intensely chocolate and my failure to reserve a place for them is only because I still have more recipes to test.  Having made and generously sampled the biscotti, I'm completely comfortable in passing this recipe, originally developed for Eating Well magazine, on to the chocolate lovers among you. I think you'll really like them. The biscotti are very easy to make and if you store them in an airtight container you'll find them to be good keepers. Here's how they are made.

Double Chocolate Biscotti...from the kitchen of One Perfect Bite courtesy of Eating Well magazine

Ingredients:
1-1/2 cups whole-wheat pastry flour
1-1/2 cups all-purpose flour
1/3 cup plus 1 tablespoon unsweetened cocoa powder
1-1/4 teaspoons baking powder
1/2 teaspoon baking soda
1/2 teaspoon salt
3 large eggs
1 large egg yolk
1 cup sugar
1 tablespoon vanilla extract
5 ounces semisweet chocolate, chopped, or chocolate chips, melted (see Cooking Tip)

Directions:
1) Position rack in the center of the oven; preheat to 325°F. Line 2 large baking sheets with parchment paper or a silicone baking mat.
2) Whisk whole-wheat flour, all-purpose flour, cocoa powder, baking powder, baking soda and salt in a large bowl.
3) In another large bowl, beat eggs, egg yolk and sugar (or Splenda) with an electric mixer until thick and pale yellow, about 2 minutes. Beat in vanilla and melted chocolate. Stir in the dry ingredients with a wooden spoon until just moistened.
4) Turn the dough out onto a lightly floured surface; knead for 1 minute, then divide in half. Roll each piece into an 8-inch log; flatten slightly to about 3/4 inch high and 3 1/2 inches wide. Place the logs side by side on one of the prepared baking sheets.
5) Bake until lightly browned and firm, about 20 minutes. Cool on the pan on a wire rack for 20 minutes. Keep the oven on; switch the oven racks to the upper and lower thirds of the oven. Slice the logs on the diagonal into cookies 1/2 inch thick. Arrange, cut-side down, on the 2 baking sheets. Bake for 10 minutes. Turn the biscotti over and rotate the pans from top to bottom; bake until dry, 15 to 20 minutes more. Transfer to a wire rack to cool. Yield 32 biscotti.


One Year Ago Today: White Chicken Chili


Two Years Ago Today: Hong Kong-Style Broccoli


Three Years Ago Today: Dutch Baby Pancake with Spiced Peaches

Wednesday, December 5, 2012

Braciola and Tomato Sauce


From the kitchen of One Perfect Bite...The French may have pot-au-feu but when it comes to great steaming casseroles, Sicilian Sunday gravy made with meatballs, sausage and braciola probably has more fans. It is easier to make and certainly less expensive to construct than the boiled supper of the French. That's a good thing, especially when more than 20 people regularly gather for Sunday supper at your table. Mrs. S, a special woman who contributed so much to the richness of my childhood, was the undisputed queen of Sunday gravy and I suspect that in her lifetime she made enough of it to fill a swimming pool. I spent hours in her kitchen and, by osmosis, learned how to make many of the dishes she prepared for her huge extended family. She used no recipes and, because she had no daughters, none of her specialties were ever written down. I had a sense of what went into her Sunday gravy, but the particulars remained her secret. Time has changed the way we eat and I haven't thought of her gravy in years, but I chanced on a recipe for braciola in Saveur magazine and memories came rushing back. Now the Silver Fox and I are good eaters, but a gravy made with meatballs, sausage and braciola was way too much food for the two of us to contemplate, much less eat. Fortunately, the version in the magazine was streamlined and only braciola was used to flavor the sauce. Braciola are roulades of beef that are filled with a stuffing of some type. Years ago they were time consuming to make because the meat had to be thinly sliced and pounded before if could be stuffed. Nowadays, thinly sliced beef is available at the meat counter and the work has been considerably reduced. Once stuffed, the rolls are fried and then placed in sauce for a long slow braise that brings all the flavors together. I like my braciola to be fork tender, so I have made a few changes to the recipe you see below. To allow the rolls to brown without sticking, I dust them with an instant blend before frying. I also braise them in a 250 degree oven for 5 to 6 hours. The slow oven produces a wonderful tomato gravy and delicious roulades. We had these for dinner tonight and I loved the memories that surfaced as we ate them. I've found that good food makes for great company and even better memories. Thank you Rose, for everything. I hope you will give this recipe a try. Here's how the braciola and this version of Sunday gravy are made.

Braciola and Tomato Sauce...from the kitchen of One Perfect Bite courtesy of Saveur magazine

Ingredients:
1/3 cup golden raisins
1/3 cup chopped Italian parsley
1/4 cup pine nuts
1/4 cup finely grated Parmesan
1 tablespoon finely chopped garlic
12 (6"x 4") slices boneless beef chuck, pounded to 1⁄16" thickness
Kosher salt and freshly ground black pepper, to taste
Instant blend flour (i.e. Wondra)
1/4 cup olive oil
1 medium yellow onion, finely chopped
1/2 cup dry red wine
1/4 tp 1/2 teaspoons red chile flakes
2 (28-oz.) cans whole, peeled tomatoes in juice, crushed by hand
1 bay leaf
Cooked spaghetti and garlic bread for serving

Directions:
1) To make filling: Mix together raisins, 4 tablespoons parsley, pine nuts, Parmesan, and garlic in a bowl; set aside.
2) Place a slice of beef on a work surface perpendicular to you, season with salt and pepper, and place about 1 tablespoon filling on the bottom half. Roll beef up around the filling into a tight cylinder. Secure roll with toothpicks, and repeat with remaining beef and filling.
3) Heat oil in a 6-quart Dutch oven over medium-high heat. Season beef rolls with salt and pepper and lightly dust with instant blend flour. Working in batches, add rolls, and cook, turning as needed, until browned on all sides, about 6 minutes. Transfer to a plate and set aside. Add onion to pot, and cook, stirring, until soft, about 5 minutes. Add wine, and cook, stirring to scrape bottom of pot, until almost evaporated, about 5 minutes. Stir in chile flakes, tomatoes, and bay leaf, and then return beef rolls to pot. Bring to a boil, and then reduce heat to medium-low; cook, covered partially and gently stirring occasionally, until meat is cooked through and tender, about 2 hours.
4) Remove meat rolls from sauce, remove toothpicks, and transfer to center of a serving platter. Continue cooking sauce until reduced and thickened, about 20 minutes. Surround braciola with cooked spaghetti. Pour sauce over meat rolls, and sprinkle with remaining parsley. Serve immediately. Yield: 6 servings.


One Year Ago Today: Moroccan Chicken Smothered in Olives


Two Years Ago Today: Christmas Bread Round-Up


Three Years Ago Today: Lebkuchen Bars and Speculaas


Wednesday, August 8, 2012

Tortellini with Spinach and Parmesan Cream Sauce


From the kitchen of One Perfect Bite... I've been out of commission for most of the day. My head feels like a watermelon and I suspect the odds of my winning the day's Miss Congeniality contest are nil. It's nothing serious, just a nasty summer cold and medication that has given me sleeping sickness. The Silver Fox, bless him, made dinner tonight, and that proves two things. He is, of course, a great guy, but it also speaks volumes about how easy this dish is to prepare. The recipe comes from the Taste of Home site and it was perfect for our appetites tonight. He pretty much followed their recipe, but used fresh basil in place of dry and replaced the heavy cream with a non-fat half and half. After the fact, we both think the dish also could use less spinach. Half the frozen block would be plenty and 1 pound of wilted fresh baby leaves would be even better. I suspect that when made with a full compliment of heavy cream, this dish rivals the richness of an Alfredo sauce. It nice to have recipes like this in the hopper for insanely busy days. They are fast and delicious, and, if you can get past all that heavy cream, you can have dinner on the table in minutes. This recipe will not be to all tastes, but it is definitely worth a try. Here's how the dish is made.

Tortellini with Spinach and Parmesan Cream Sauce ...from the kitchen of One Perfect Bite inspired by Taste of Home Magazine

Ingredients:
1 package (16 ounces) frozen cheese tortellini
1 small onion, chopped
2 tablespoons olive oil
3 garlic cloves, minced
1 can (14-1/2 ounces) diced tomatoes, undrained
1 package (10 ounces) frozen chopped spinach, thawed and squeezed dry
1-1/2 teaspoons dried basil
1 teaspoon salt
1/2 teaspoon pepper
1-1/2 cups heavy whipping cream
1/2 cup grated Parmesan cheese
Additional grated Parmesan cheese, optional

Directions:

1) Cook tortellini according to package directions. Meanwhile, in a large skillet, saute onion in oil until tender. Add garlic; cook 1 minute longer. Add tomatoes, spinach, basil, salt and pepper.
2) Cook and stir over medium heat until liquid is absorbed, about 3 minutes. Stir in cream and cheese. Bring to a boil. Reduce heat; simmer, uncovered, for 8-10 minutes or until thickened.
3) Drain tortellini; toss with sauce. Sprinkle with additional cheese if desired. Yield: 6 servings


One Year Ago Today: Orange Glazed Banana Bread


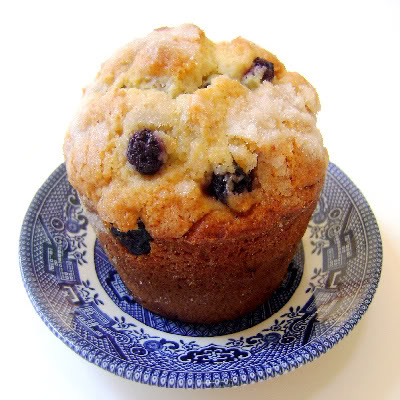
Two Years Ago Today: Blueberry-Corn Muffins


Three Years Ago Today: Roasted Red Pepper and White Bean Spread


Friday, July 27, 2012

A Light and Meatless Manicotti


From the kitchen of One Perfect Bite...When my children were in high school they were heavily involved in activities and team sports that made the counting of fat grams and calories unnecessary. Pasta, in various forms, appeared frequently on my table, and manicotti was a special favorite. The version I used was made with crepes and covered with a lovely tomato sauce that simmered for hours on the back burner of the stove. It was delicious, but because it was labor intensive and undeniably fattening for those of us who do not regularly run 5 minute miles, it disappeared from my table as the house began to empty. My oldest daughter, whose kitchen these days is a happening place, re-introduced us to manicotti last week. Her version is lean and mean and about as figure friendly as pasta can get. She found the recipe in Cooking Light magazine several years ago and it has since become a standard on her menu roster. Her decision to make it concerned me a bit. I had visions of a very late dinner as she began to stuff the tubes for the small army that was waiting for dinner that evening. I never should have doubted her. Proving, yet again, that the apple does not fall far from the tree, she pulled  a pastry bag from her luggage. It had been packed expressly for this  purpose, and she had the tubes filled in less than 15 minutes. Dinner was served on time and I must say it was delicious. I hope you will give this pasta a try. Its flavor belies the low-fat products with which it is made and because the imanicotti is not cooked before stuffing, this version is a huge time and step saver. I know that those of you who try it will be really pleased with this figure friendly and easy to assemble pasta. Here's the recipe.

Meatless Manicotti...from the kitchen of One Perfect Bite courtesy of Cooking Light

Ingredients:

2 cups (8 ounces) shredded part-skim mozzarella cheese, divided use
1 (16-ounce) carton fat-free cottage cheese
1 (10-ounce) package frozen chopped spinach, thawed, drained, and squeezed dry
1/4 cup (1 ounce) grated fresh Parmesan cheese
1 1/2 teaspoons dried oregano
1/4 teaspoon salt
1/4 teaspoon black pepper
1 (8-ounce) package manicotti (14 shells)
1 (26-ounce) jar fat-free tomato-basil pasta sauce
Cooking spray
1 cup water

Preparation:

1) Preheat oven to 375 degrees F. Spray 13 x 9-inch baking dish with cooking spray.
2) Combine 1-1/2 cups mozzarella, cottage cheese, spinach, Parmesan cheese, oregano and salt and pepper  in a medium bowl. Spoon about 3 tablespoons cheese mixture into each uncooked manicotti.
3) Pour half of tomato-basil pasta sauce into prepared baking dish. Arrange stuffed shells in a single layer over sauce, and top with the remaining sauce. Pour 1 cup water into dish. Sprinkle the remaining 1/2 cup mozzarella evenly over sauce. Cover tightly with foil. Bake for 1 hour, or until shells are tender. Let stand 10 minutes before serving. Yield: 7 servings.


One Year Ago Today: Cauliflower Salad with Red Peppers, Black Olives and Anchovies


Two Years Ago Today:  Red Bell Peppers Stuffed with Orzo and Feta Cheese


Three Years Ago Today: Kona Coffee Cookies

Wednesday, July 11, 2012

Spaghetti and Meatballs


From the kitchen of One Perfect Bite...This might seem an unlikely choice for a summer meal, but after a day on the water or hiking in the woods, a meal like this really hits the spot. Our older grandsons, who suffer from what we who love them call hollow leg syndrome, consume an amazing amount of food and a meal like this really helps keep their hunger at bay. This recipe is a scaled back version of one developed by Cook's Illustrated and if you have not yet tried this recipe, I hope you soon will. These are some of the best meatballs I've ever tasted and the sauce is wonderfully flavorful and robust without being heavy. Don't let the length of the ingredient list mislead you into thinking this is a difficult recipe to prepare. It most decidedly is not. The various elements of this dish can be tackled separately and put together for a final simmer just before serving. All the ingredients used here can be found in any grocery store and none of them are exotic. I suspect the use of gelatin may be puzzling to some of you, but the editors at Cook's Illustrated explain that it is used to keep the meatballs soft and tender. While I don't understand the chemistry of this, I can tell you that it works. As with all of the vacation recipes I'm featuring this month, the quantities used here can be doubled or tripled if you have a gang to feed. I do hope you'll try this version of spaghetti and meatballs. It really is delicious and I know you will enjoy it. Here's the recipe.

Spaghetti And Meatballs...from the kitchen of One Perfect Bite adapted from Cook's Illustrated

Ingredients:
Meatballs
3/4 cup panko bread crumbs
1/2 cup buttermilk
1 large eggs, lightly beaten
12-oz. 85 percent lean ground beef
4-oz. ground pork
2 ounces thinly sliced prosciutto, chopped fine
1/2 cup grated Parmesan cheese
2 tablespoons minced fresh parsley leaves
1 medium garlic clove, minced or pressed through garlic press
1/2 teaspoon powdered gelatin dissolved in 1 tablespoon cold water
Salt and ground black pepper
Sauce
1 tablespoon extra-virgin olive oil
1/2 cups grated onion (I used the grating blade on my food processor)
2 medium garlic cloves, minced or pressed through garlic press
1/4 teaspoon red pepper flakes
1/2 teaspoon dried oregano
2 cups tomato juice (bottled)
1 (28-ounce) cans crushed tomatoes
2 tablespoons dry white wine
Salt and ground black pepper
12 to 16-oz. spaghetti
3 tablespoons minced fresh basil leaves
1 tablespoons minced fresh parsley leaves
Granulated sugar
Grated Parmesan cheese, for serving

Directions:
1) To make meatballs: Place a wire racks in 1 foil-lined rimmed baking sheet. Adjust one oven rack to middle position and preheat oven to 450 degrees.Combine bread crumbs and buttermilk in large bowl and let sit, mashing occasionally with fork, until a smooth paste forms, about 10 minutes.Add eggs, beef, pork, prosciutto, Parmesan, parsley, garlic, gelatin mixture, 1/2 teaspoon salt, and 1/4 teaspoon pepper to bread crumb mixture. Gently mix everything with your hands until thoroughly combined. Spray wire rack with nonstick cooking spray (or rub with olive oil). Form meatballs using about 1/4 cup of meat mixture per meatball, and space the meatballs out on the rack as you form them. You should end up with 10 to 12 meatballs. Roast until browned, about 30 minutes, rotating tray from front to back halfway through.

2) To make the sauce: While meatballs roast, heat olive oil in a large Dutch oven or other pot over medium heat until shimmering. Add onion and cook, stirring occasionally, until softened and golden around edges, 6 to 8 minutes.Add garlic, red pepper flakes, and oregano, and cook, stirring frequently, until fragrant, about 30 seconds. Stir in tomato juice, crushed tomatoes, wine, 1/2 teaspoons salt, and pepper to taste. Increase heat to medium-high, and bring to a simmer. Reduce heat to medium-low, and simmer until slightly thickened, about 15 minutes.

3) To complete: Remove meatballs from oven, and lower oven temperature to 300 degrees. Add meatballs to sauce, cover pot, and place in oven. Cook until meatballs are firm and sauce has thickened, about 1 hour.

4) Shortly before serving: Cook pasta according to package directions in boiling salted water. Drain pasta and return to cooking pot. Stir basil and parsley into sauce and adjust seasoning with sugar, salt and pepper to taste. Add a 1/2 cup of sauce to pasta and toss until lightly coated. Serve pasta from a serving bowl. Pass meatballs and remaining sauce at table with a separate bowl of Parmesan cheese. Yield: 4 to 5 servings.


One Year Ago Today: Fresh Salmon Quiche


Two Years Ago Today: Banana Mousse


Three Years Ago Today: Chocolate Soup
Related Posts with Thumbnails

Printfriendly