Showing posts with label yeast. Show all posts

Monday, January 28, 2013

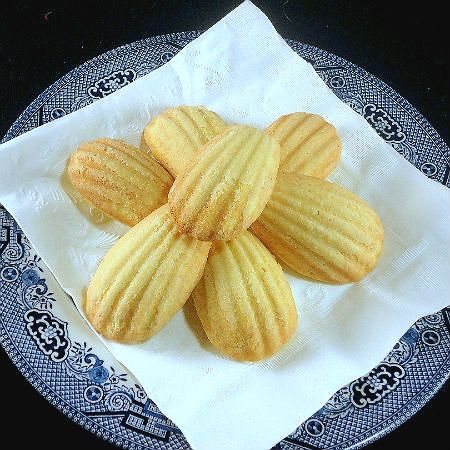
Madeleines a l’ancienne - Old-Fashioned Madeleines


“Remembrance of things past is not necessarily the remembrance of things as they were.”
                                                        Marcel Proust

From the kitchen of One Perfect Bite...I want to begin with a spoiler alert for the romantics among you. I have been known, usually without malice, to burst a bubble or two. Tonight I fear I'm going to do that to lovers of Proust and his beloved madeleines. I suspect that everyone knows that the madeleine is the shell-shaped confection that inspired his legendary reverie in Remembrance of Things Past. You'll recall, I'm sure, the scene in the book where the narrator dips a madeleine into a cup of tea. Bits of the cookie settle into the tea and when it is stirred, a spoonful contains crumbs that release the flood of memories that fill the rest of the novel. There is one small problem. That doesn't happen when you soak a typical madeleine in tea. There are purists who, in the interest of transparency, test such things and they say the Proustian madeleine does not exist. I suspect he used Proustian poetic license, but some guys just can't get a break. It seems that scholars agree that an early version of Remembrance of Things Past was inspired by a piece of toast. I can't write much about toast, but I can share this wonderful and unusual recipe for madeleines with you. It is unusual because the soft cookies are leavened with yeast. Don't let that scare you off.  They are really easy to make. I really love these petite cakes and I consider the recipe I'm featuring tonight to be a treasure. Don't stress about the use of European butter if it is not readily available. I often make these using standard sweet butter. While European butter has 3% more butterfat than brands typically found in the supermarket, the madeleines made with 80% will bedelicious as well. The recipe that follows comes from Saveur magazine.

Madeleines a l’ancienne - Old-Fashioned Madeleines

Ingredients:
3/4 cup + 2 tablespoons sugar
1 tablespoon + 1/2 teaspoon yeast
1 lemon, for zest
1-3/4 cups flour
1/2 cup unsalted European-style butter, melted + butter for molds
4 eggs
salt to taste

Directions:

1) In a pastry bowl, combine whole eggs and sugar until mixture turns white and sugar is completely dissolved.
2) Add flour, salt, and yeast with a spatula. Then add lemon zest. Add melted butter. Set aside.
3) Brush madeleine molds with melted butter, then dust with flour, shaking out any excess.
4) Using a pastry bag or a spoon, fill each madeleine mold 3/4 full.
5) Set filled pans aside and let them rest for at least 20 minutes. During this time pre-heat oven to 350 degrees F.
6) Cook for 8 minutes, or until pale golden brown. Let sit for 5 minutes. Turn cookies out and continue to cool on a wire rack. Yield: 24 to 30 madeleines.

Cook's Notes:
1) Let madeleines sit for 2 hours before serving. Store in a dry place.
2) For best results let dough rest for 2 hours before placing in molds.


One Year  Ago Today: Sweet and Spicy Bacon Wrapped  Breadsticks


Two Years Ago Today: Dulce de Leche Ice Cream


Three Years Ago Today: Game Day Chili-Mac Skillet

Tuesday, November 22, 2011

Soft Dinner Rolls


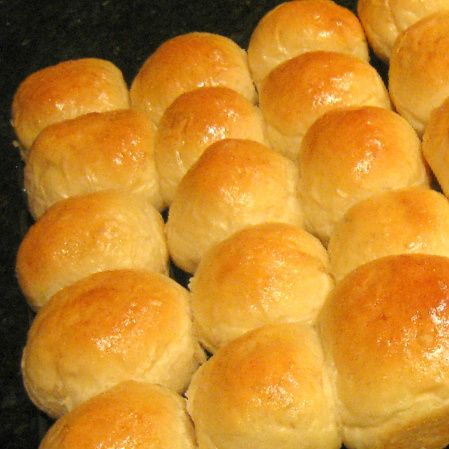
From the kitchen of One Perfect Bite... Bread, in one form or another, has always been a part of our holiday meals. I've been looking for a recipe that would allow me to make rolls from a dough that could be shaped and frozen days before the rolls were to be baked off. I envisioned the maddening aroma of just baked bread greeting guests as they walked through the door. While that's a great appetite stimulant, it's also helps boost the cook's reputation and I'm not above a dirty trick or two. Martha Stewart had a recipe for a rich and buttery pan roll that I thought would work well for my purposes. I've just completed a test run and these are just what I was looking for. The dough for these rolls can be made without special equipment. If you have a wooden spoon, you can have rolls for dinner. They are easy to make and have a soft crust that covers a buttery interior that is light and fluffy. They are a perfect addition to the holiday table and I can assure you they will be on mine this year. I hope you will give them a try. The recipe for the rolls follows and below it you can see the complete menu for our non-traditional holiday dinner. Bon Appétit!

Soft Dinner Rolls...from the kitchen of One Perfect Bite courtesy of Martha Stewart

Ingredients:
1/4 cup warm water
4-1/2 teaspoons (4 packets) active dry yeast
1 1/2 cups warm whole milk
1/2 cup (1 stick) unsalted butter, melted, plus more for bowl and pans
1/4 cup sugar
2 1/4 teaspoons salt
3 large eggs, divided use
6 to 6 1/2 cups all-purpose flour (spooned and leveled), plus more for work surface

Directions:

1) Place water in a small bowl; sprinkle with yeast, and let stand until foamy, about 5 minutes. In a large bowl, whisk together milk, butter, sugar, salt, and 2 eggs. Whisk in yeast mixture.
2) Using a wooden spoon, stir in 6 cups flour, 1 cup at a time, until you have a soft, shaggy dough (if necessary, add up to 1/2 cup more flour). Turn dough out onto a floured work surface; knead until smooth and elastic, 5 to 10 minutes. Butter the inside of a large bowl; place dough in bowl, turning to coat. Cover bowl with plastic wrap; let stand in a warm spot until dough has doubled in size, about 1-/4 hours.
3) Butter two 13-by-9-inch baking pans. Divide dough in half. Roll each half into a 15-inch rope; cut each rope into 15 1-inch pieces. Press each piece into a disk, then shape into a ball. Arrange dough balls in prepared pans. (To make ahead: Wrap pans well, and freeze, up to 2 months.) Cover pans loosely with plastic; let stand in a warm spot until rolls have doubled in size, about 1 1/4 hours (2 hours more if frozen for a total of 3 to 3-1/2 hours).
4) Position racks in upper and lower third of oven. Preheat oven to 375 degrees F. In a small bowl, beat remaining egg until blended; brush onto rolls. Bake until golden brown, about 20 minutes, rotating pans back to front and top to bottom halfway through. Let rolls cool 15 minutes before serving. Yield: 30 rolls.

Thanksgiving Menu 2011


First Course: Fennel and Carrot Soup


Salad Course: Roasted Apple Salad with Bacon and Mixed Greens


Main Course: Cider Brined Pork Loin


Side Dish: Sweet Potato Home Fries


Additional Sides: Minted Peas, Apple Stuffing and Red-Currant Cranberry Sauce


Dessert One: Frozen Maple-Mousse Cake with Candied Cranberries


Dessert Two: Cranberry Bread Pudding with Orange Hard Sauce

Thursday, April 21, 2011

Brioche du Carême - Hot Cross Buns


From the kitchen of One Perfect Bite...If I may, I'd like to have a word or two with those wonderful souls who have been following One Perfect Bite from its very hesitant beginnings. Initially, there were just four of you, two of whom were family. That is painfully true. Those four kept each other company for the longest time, but when that first Easter rolled around the ranks had swollen to a hundred or so, and I was comfortable posting recipes for seasonal foods that I thought my readers might enjoy. That April I featured a recipe for hot cross buns that I had been asked to post. Unfortunately, it was not the recipe my readers wanted to see. It was too involved for those who didn't have the leisure the retirement kitchen afforded, and, while it's taken a while, I've finally found one that will better suit those with less time on their hands. We've been featuring French recipes this week and while searching for foods that might be part of the French Easter celebration, I came across a recipe for hot cross buns, or brioche du carême. I'm told the buns are not standard fare in France, but that they can be found in the boulangeries of Alsace-Lorraine, probably because of the German influence in the region. The word carême means Lent and the Lenten buns made in France are nearly identical to their English counterpart, the hot cross buns which are eaten on Good Friday by the British. While I prefer the original recipe I posted for hot cross buns, I must admit this one is delicious as well. I hope you will like this easier version. Here's the recipe.

Brioche du Carême - Hot Cross Buns ...from the kitchen of One Perfect Bite courtesy of the Kitchen Garden in France and Bella Online

Ingredients:
Dough
1/4 cup water - at room temperature or slightly above
1/2 cup lukewarm milk
1/4 cup melted butter
1 egg, lightly beaten
3-1/2 cups all purpose flour
1/4 cup sugar
1-1/2 teaspoons active dry yeast
1 teaspoon cinnamon
1/2 teaspoon nutmeg
pinch of ground cloves
pinch of allspice
1/2 teaspoon salt
1/2 cup golden raisins
1/4 cup finely chopped, mixed candied fruit
Glaze
2 tablespoons granulated sugar
2 tablespoons water
Icing
1/2 cup Confectioners' sugar
2 teaspoons water water

Directions:

1) Mix yeast, 1 cup flour, sugar, salt, and other spices in a bowl. In a separate bowl, mix milk and water together. Combine dry ingredients mixture, liquid ingredients, and butter in a large bowl. Beat for 2 to 3 minutes at medium speed. Add egg and beat 1 more minute. Stir in raisins, fruit, and enough of remaining flour to make a firm dough. Knead dough on a floured surface for about 5 to 7 minutes or until smooth and elastic. Use additional flour if necessary. Place in a lightly greased bowl; turn over to grease other side of the dough. Cover and let rise in a warm place. After about 15 minutes, test dough to see if it has risen sufficiently and is ready to be shaped. To test, gently stick two fingers into risen dough up to your second knuckle. Remove fingers. If indentations remain, dough is ready.
2) Divide dough into 12 pieces. Shape pieces into balls and place them 3 inches apart on a lightly greased baking sheet. Cover and let rise in warm place until almost doubled, about 45 minutes to an hour. Bake in a preheated oven at 375 degrees F for 15 to 18 minutes, or until light brown on top. Remove from oven. Place baking sheet full of buns on a wire rack to cool. Prepare glaze, then spread it over the warm buns. Let buns continue to cool on baking sheet. When completely cool, fill a cake decorating bag, fitted with a round tip, with icing. Pipe an icing cross on each bun. Yield: 1 dozen buns.


One Year Ago Today: Frittata with Spring Herbs and Leeks


Two Years Ago Today: White Chocolate Truffles


You might also enjoy these recipes:
Easter Bread with Colored Eggs - Italian Food Forever
Kulich, A Russian Easter Bread - The Winter Guest
Tsoureki Sweet Easter Bread - Culinary Flavors
Braided Easter Bread - Moogie and Pap
Easter Bread - Bobbini's Kitchen
Ciambellone Italian Easter Bread - One Perfect Bite
Kozunak Bulgarian Sweet Easter Bread - Annie's Art Book
Hot Cross Buns - The Cottage Kitchen
Orange Hot Cross Buns - Karen Cooks
Gluten-Free Hot Cross Buns - The Baking Beauties

Monday, March 7, 2011

Wicked Good Pecan Rolls


From the kitchen of One Perfect Bite...If you enjoy ooey, gooey, warm and chewy sweets, these rolls are meant for you. I made a large batch of them this week as a pre-Lenten treat for our neighbors and the Silver Fox. I also managed to freeze some for brunch on Easter Sunday. This recipe is another that I've pieced together from various sources. Rather than make a brioche dough, I used one developed for a challah that appeared in The New York Times Bread and Soup Cookbook. The recipe is a golden oldie, but it makes a gorgeous egg bread that is hard to beat. When I make challah I divide the dough, using half for bread and half for sweet rolls of one type or another. This is a dough that can be made with a stand mixer, so, while some kneading is required, I would classify it as easy to prepare. The filling is one I learned to make as a child and the topping comes Mark McGough who developed it for Martha Stewart. This is a very rich pastry that is made in Texas-sized muffin pans. If you prefer more modest bites, standard muffin pans can be used, though they will cook more quickly. My only caution, large or small, is to make certain the rolls are done before you remove them from the oven. Once they're out of the oven the pans should be inverted before the topping has time to set. This recipe makes wonderful rolls. If you like pecan rolls or sticky buns, you'll love these. Here are the composite recipes.

Pecan Rolls...from the kitchen of One Perfect Bite with some help from Mark McGough

Ingredients:
Dough
5-1/2 to 6-1/2 cups flour, unsifted
3 tablespoons sugar
1-1/2 teaspoons salt
2-1/4 teaspoons active dry yeast
1/2 cup butter or margarine, softened
Pinch of powdered saffron for color (optional)
1 cup warm water
4 eggs, at room temperature
Filling
3/4 cup granulated sugar
4 teaspoons ground cinnamon
6 tablespoons unsalted butter, room temperature
Topping
1/2 cup (1 stick) unsalted butter
1-1/2 cups packed light-brown sugar
1-1/2 cups pecan or walnut pieces
1/4 cup corn syrup

Directions:

1) To make dough: Combine 1-1/4 cups of flour, sugar, salt and yeast in a large bowl. Mix in softened butter. if using, stir saffron into warm water until it dissolves. Add a little at a time to flour mixture and blend thoroughly. Beat for 2 minutes with an electric mixer at medium speed, scraping bowl occasionally. Blend eggs into batter, one at a time. Stir another 1/2 cup of flour into batter and beat at high speed for 2 minutes, scraping bowl occasionally. Blend in enough additional flour to make a soft dough. (I used a total of 5-1/2 cups flour) Knead dough on a lightly floured board about 8 to 10 minutes or until it is smooth and elastic. Place dough in a greased bowl, turning it once to grease top. Cover and allow the dough to rise in a warm, draft free place until double in bulk (approximately one hour). Punch dough down and let rise again until it has again doubled in size, about 45 to 60 minutes.
2) To make filling: Combine sugar and cinnamon in a small bowl. Set aside.
3) To make topping: Spray two 6 cup Texas-size muffin tins with nonstick spray. Melt butter in a medium sauce pan set over moderate heat. Stir in brown sugar, corn syrup and toasted pecan pieces. Cook until sugar is dissolved. Divide mixture among muffin cups.
4) To assemble: Turn dough onto a lightly floured work surface. Roll dough to form a 12 x 12-inch square. Spread 6 tablespoons butter over dough. Sprinkle with cinnamon-sugar mixture. Roll dough into a cylinder. Use a sharp serrated knife to cut cylinder into 12 (1-inch each) slices. Transfer slices to muffin tins. Cover and let rise for 40 minutes.
5) To bake: Preheat oven to 350 degrees F. Place muffin tins on baking sheets to catch drips. Transfer to oven and bake until lightly brown, about 35 minutes. Remove from oven and immediately invert onto heatproof racks. Let sit for two minutes. Remove tins and continue to cool to room temperature. Yield: 12 pecan rolls.

You might also enjoy these recipes:
Bon Ton Bakery Cinnamon Bread - Eat Me, Delicious
Sticky Buns - Cookin' for My Captain
Honey-Nut Sticky Buns - Buttercream Barbie
Cinnamon Rolls Perfected - Sugar Pies
Pecan Sticky Buns - The Teacher Cooks
Schnecken - One Perfect Bite
Overnight Sticky Buns - Plain Chicken
Butterscotch Sticky Buns - Pinch My Salt
Apple Butter Sticky Buns - Modern Comfort Food
Caramel Apple Sticky Buns - The Pioneer Woman Cooks
Cinnamon Pecan Rolls - Foodista

Thursday, February 24, 2011

Rue Tatin Sweet Crescent Rolls


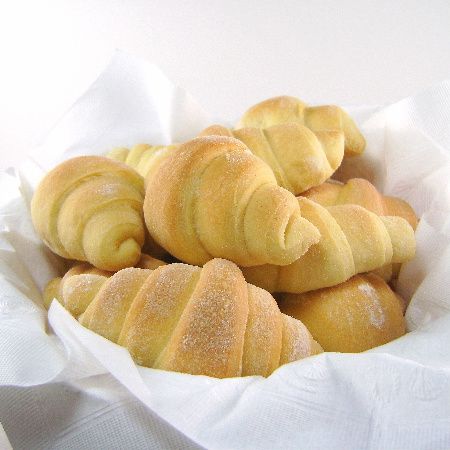
From the kitchen of One Perfect Bite...Every year at this time, I renew my search for the perfect cinnamon roll. I've been looking for decades now and still come up short. I've finally decided that the only way I'll ever find my golden fleece, is to rob elements of existing recipes, and combine them in such a fashion that they can be called my own. Tonight's post is not about cinnamon rolls, it is, rather, about an outstanding sweet dough that I think will work very nicely as a base for them. I know most of you have read the charming memoir, On Rue Tatin, written by Susan Loomis. Tucked between its covers is a lovely recipe called Les Pains De Rapprochement or The Rolls That Brought us Together. That dough is the one I'll be using next week when I feature the world's ultimate cinnamon roll. They are really good and I think you forgive my modest brag when you taste them. Anyway, I tested Susan's recipe exactly as it was written before forging the path that will lead all of us to those very special rolls. The Silver Fox loved the basic recipe and was charmed by the shape and color of the rolls. It is at his urging that I'm sharing the original recipe for her crescent rolls with you. These are really easy to do, especially if you have a large stand mixer to do the work for you. The dough requires a bit of kneading, but it is so velvety in hand that that is a pleasure to do. These are really nice. They are meant to be served warm from the oven, but they can be reheated in a microwave if needs be. There are no tricks here. Follow the recipe and you have gorgeous crescent rolls to serve your family and friends. I hope you'll come back next week when we feature them with added bells and whistles. Here's the basic recipe.

Sweet Crescent Rolls...from the kitchen of One Perfect Bite courtesy of Susan Herrmann Loomis

Ingredients:
1 cup whole milk
8 tablespoons (1 stick) unsalted butter, at room temperature
2-1/4 teaspoons (1 package) active dry yeast
1/2 cup granulated sugar
4-1/2 cups all-purpose flour
2 large eggs, room temperature
1 teaspoon table salt

Directions:
1) Scald milk over medium-high heat. Pour it into large bowl of an electric mixer. Add butter and stir until butter has melted. Set aside until mixture is lukewarm.
2) Stir yeast and sugar into milk. Add 1 cup flour and mix well. Add eggs, one at a time, beating well after each addition. Add salt and 1 more cup of flour. Mix vigorously until dough is smooth and elastic, about 3 minutes on medium speed.
3) Add reserved 2-1/2 cups flour and mix just until incorporated. Turn dough onto a lightly floured surface. Continue kneading by hand until it is smooth.
4) Place dough in a bowl, cover with a towel or plastic wrap and set aside until it has doubled in size, about 2 hours.
5) Lightly flour 2 baking sheets.
6) Turn dough onto a well-floured surface, divide it in half, and roll each half to form a circle that is 1/8-inch thick and 16-inces in diameter. Cut each circle into quarters, and cut each quarter into 4 wedges, Roll edges up, beginning at the wide end, to form crescents.
7) Place rolls on prepared sheets, leaving 2-inches between them and arranging them with tips tucked underneath. Cover rolls with a kitchen towel and let rise until they have doubled in size, at least 4 hours.
8) Preheat oven to 350 degrees F.
9) Bake rolls in center of oven until they are golden, 10 to 15 minutes. Remove and serve immediately. Yield: 32 crescent rolls.

You might also enjoy these recipes:
Dark and Soft Restaurant Dinner Rolls - Handle the Heat
Olive and Asiago Rolls - Cookie Madness
Soft Whole Wheat Rolls - One Perfect Bite
90 Minute Dinner Rolls - Drick's Rambling Cafe
Sour Dough Dinner Rolls - Phoo-d
Potato Dinner Rolls - Sweet and Savory Tooth
Parker House Rolls - The Pioneer Woman
Soft Dinner Rolls - Inspired2Cook

This post is being linked to:
Wild Yeast - Yeast Spotting

Monday, August 16, 2010

Pumpkin Yeast Rolls - Blue Monday


From the kitchen of One Perfect Bite...While it may sound strange to those whose families live in close proximity to one another, we are spread over the globe and celebrate Thanksgiving whenever we can all get together to celebrate the feast. The Eastern contingent of the family, which includes our younger grandsons, will be joining our very full house on Tuesday. That will be the night we celebrate our family Thanksgiving. These lovely rolls, for now safely ensconced in the freezer, will be one of the things that we serve. The recipe belonged to my husband's mother who was raised in Southern Illinois. They were part of her childhood and fairly typical of the farm breads that were served in that region at the time. They were served at bridge luncheons, probably because the original recipe made dainty rolls that were only 1-inch in diameter. The smaller size doesn't work for my trenchermen, so I double the size of our rolls. This dough, by the way, would make a wonderful cinnamon bread. The pumpkin keeps the rolls moist and there is just a hint of cinnamon to confound the tongue. I use canned pumpkin puree to make these because it's easier to use than fresh puree which can be stringy. I make these rolls for sentimental reasons. Some of you might enjoy them for their novelty. Here's the recipe.

Pumpkin Yeast Rolls...from the kitchen of One Perfect Bite

Ingredients:

1-1/2 teaspoons active dry yeast
1 teaspoon granulated sugar
1/4 cup lukewarm water
3 cups all-purpose flour
3-1/2 tablespoons unsalted butter
2 tablespoons light brown sugar
1/4 teaspoon salt
1 cup pureed pumpkin
1 egg, lightly beaten
1/4 cup maple syrup
1/4 teaspoon ground cinnamon
1 cup whole wheat flour

Directions:

1) Combine yeast, sugar and water in a large bowl. Let sit until foamy, about 5 minutes. Stir in 1/2 cup all-purpose flour. Cover and let risein a warm spot until double, about 1 hour
2) Melt 2 tablespoons butter and pour into a medium bowl. Add brown sugar, salt, pumpkin, egg, maple syrup and cinnamon. Add to yeast mixture and beat until smooth. Add whole wheat flour and 2-1/4 cups all-purpose flour to make a stiff dough.. Knead in pan. Cover and let rise in warm place until double in size, about 2 hours.
3) Punch dough down and turn onto a floured board. Knead briefly and roll to a sheet about 1/2-inch thick. Cut into 2-inch circles and place circles on a floured baking sheet. Cover loosely with a towel and let rise again for 1 hour.
4) Preheat oven to 425 degrees F. Melt reserved 1-1/2 tablespoons butter and brush on top of rolls. Bake for 15 to 20 minutes. Yield: 1 dozen 2-inch rolls.

You might also enjoy these recipes:
Quick Yeast Dinner Rolls - Christine's Cuisine
Honey-Oatmeal Dinner Rolls - Salad in a Jar
Buttered Rosemary Rolls - Sugar Crafter
Dinner Rolls for a Crowd - Noble Pig
Classic Dinner Rolls - Beach Lover's Kitchen
Dark Dinner Rolls - Canela and Comino

This post is being linked to:
Smiling Sally - Blue Monday

Maple Syrup World

Thursday, April 15, 2010

Chocolate Babka


From the kitchen of One Perfect Bite..."The Queen is dead. Love live the Queen." I've long fancied myself a babka expert. It was a proud product of the Swedish and German kitchens in which I leaned to cook and I became reacquainted with it as a bride living in the South Shore and Hyde Park areas of Chicago. For the uninitiated, babka is a sweet bread that is a bit like a light textured coffee cake. It is made from a butter rich dough that rises slowly and is then rolled around a filling of nuts, fruit or chocolate. Traditional versions of the bread originally came from the shtetls of Eastern Europe and were filled with fruit and nuts. The more popular modern versions is filled with a nut paste and really good chocolate. Last week I had some extra time and was surfing through some blogs that had been recommended to me. One of them was Trissalicious. It happened that a chocolate babka from the "Australian Gourmet Traveller" was being featured and it looked gorgeous. I was, of course, hooked and it was just a matter of time before I tried the recipe. This is its maiden voyage and I'm really happy to report that it is delicious. The chocolate and hazelnut filling is marvelous, but the dough is what makes this loaf stand head and shoulders above any I've had to this point. It is quite simply wonderful. It should be served warm if at all possible. The babka will stay fresh for about 3 days if it is properly wrapped. I hope you will try this. Here's the recipe.

Chocolate Babka
...from the kitchen of One Perfect Bite courtesy of Trissalicios and Australian Gourmet Traveller

Ingredients:
3/4 cup lukewarm milk
4-1/2 teaspoons active dry yeast
1/2 cup granulated sugar, divided use
1/4 teaspoon salt
3-1/4 cups all-purpose flour
2 whole eggs + 1 egg yolk
1 cup softened butter, divided use
1 cup coarsely chopped, toasted hazelnuts
1 bar (4-oz.) dark or bittersweet chocolate, coarsely chopped
For glaze:
Eggwash
Coarse sugar

Directions:
1) Combine milk, yeast and 1 tablespoon sugar in bowl of a stand mixer fitted with a paddle attachment. Let sit until foamy, about 5 minutes. Add 1/2 cup flour and mix on low speed to combine. Add whole eggs and yolk, reserved sugar and salt and mix to combine. Turn mixer to low speed. Gradually add reserved flour. When combined, add 2/3 cup butter, a little at a time, beating until smooth and elastic, about 5 minutes. Turn soft dough into a greased bowl, cover, and let rise until double in bulk, about 1-1/2 hour.
2) Place hazelnuts in a food processor with reserved 1/4 cup butter. Process until a paste is formed. Set aside.
3) Grease 2 (3-1/2 x 8-inch) loaf pans. Line bottom with parchment paper and grease again. Punch dough down and divide into two pieces. Working with one piece at a time, roll dough on a lightly floured surface to an 8 x 14-inch rectangle. Working from long side nearest you, spread half the hazelnut paste over dough to within 1-1/2 inches of all sides. Scatter with half of chopped chocolate. Roll into a cylinder, brush ends with eggwash and join ends to form a loop, then twist into a figure eight and place in prepared pan. Repeat with remaining dough. Cover pans with plastic wrap and let rise until loaves reach top of pans, about 1 hour.
4) Preheat oven to 350 degrees F. Brush loaves with eggwash and sprinkle with coarse sugar. Bake for 35 to 40 minutes. Remove from oven. Let cool in pans for 10 minutes before turning onto cooling racks. Serve warm or at room temperature. Yield: 2 loaves.

This post is being linked to:
Wild Yeast - Yeast Spotting

You might also enjoy these recipes:
Sugar Crusted Viennese Nut Bread - One Perfect Bite
Very Berry Lemon and Blueberry Sweet Bread - One Perfect Bite
Lemon Poppyseed Bread - One Perfect Bite

Tuesday, March 23, 2010

Horner's Corner Plum Bread


From the kitchen of One Perfect Bite...Oven duty began early this morning. There's been a death in a neighbor's family and I wanted to get a loaf of their favorite plum bread to them while it was still warm and fragrant. When I make this kind of visit, I'm confounded by the way we mark the measure of a man and his passing. A life, a good life of 80 years, is over and can't be summarized in the seven lines of his obituary. Those who mark his passing will take those lines and, from them, weave the history that is his life and share it with each other. He was not a religious man, so, most likely, this story will be told at the table as they break bread together. Friends and neighbors will assure that none who gather to tell that story will go hungry. Food has become an important part of all our rituals. This bread is but one of many offerings that will be shared as his story is re-told.

Plum Bread
...from the kitchen of One Perfect Bite


Ingredients:
1 cup pitted dried plums, coarsely chopped
3 cups all-purpose flour + flour for kneading
1 cup whole wheat flour
4-1/2 teaspoons active dry yeast
1 teaspoon salt
1 cup mashed sweet potatoes
1 cup warm milk
1/4 cup + 1 tablespoon honey, divided use
1 tablespoon vegetable oil
2 tablespoons fresh orange juice

Directions:

1) Toss plums with 1 tablespoon flour. Set aside. Combine 1-1/2 cups all-purpose flour, whole wheat flour, yeast and salt in bowl of an electric stand mixer. Add sweet potatoes, milk, 1/4 cup honey and oil. Beat with a paddle attachment until smooth, about 2 minutes. Stir in reserved 1-1/2 cups flour and mix to form a soft dough.
2) Turn dough onto a floured surface and knead until smooth and elastic, about 10 minutes. Knead plums into dough. Place dough into a bowl coated with vegetable oil or cooking spray. Turn to coat top. Cover with plastic wrap and let rise in a warm spot until doubled in bulk, about 1 hour.
3) Punch down and turn dough onto a lightly floured surface. Divide into 3 potions. Roll each portion into a rope about 15-inches long. Braid ropes, pinching ends to seal. Place braid on a baking sheet covered with parchment paper. Cover and let rise until double in bulk, about 30 minutes.
4) Meanwhile, preheat oven to 350 degrees F. Bake bread for 40 minutes, or until loaf sounds hollow when tapped. Remove pan from oven and place on a cooling rack. Mix reserved 1 tablespoon honey with orange juice and brush over exposed surfaces of bread. Yield: 1 large loaf.

You might also enjoy these recipes:

Lemon and Blueberry Sweet Bread - One Perfect Bite
Lemon Poppyseed Bread - One Perfect Bite
(Almost) Irish Soda Bread - One Perfect Bite

This post is being linked to:

Wild Yeast - Yeast Spotting

Monday, March 22, 2010

Flower Pot Bread - Blue Monday


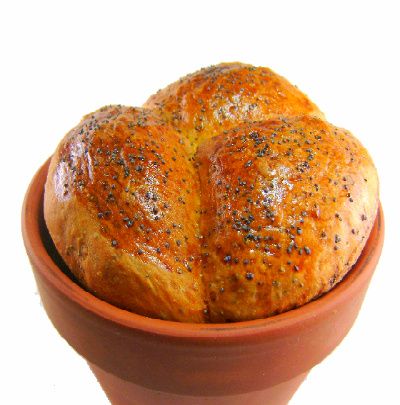
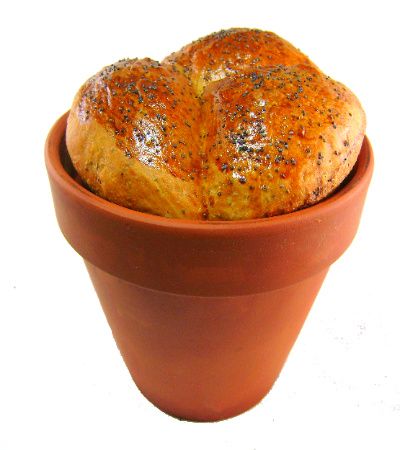
From the kitchen of One Perfect Bite...Saturday was a beautiful day in the Willamette Valley. We spent the morning at the Junction City Daffodil Festival, but the day was so lovely, that Bob and I couldn't bring ourselves to return home and attend to the chores we should be doing. We headed, instead, to some local nurseries to check out new stock. I also needed clay pots to use as molds for ornamental breads that would be used as centerpieces for a luncheon. I've made flower pot breads before and they are really not hard to do. While a lovely sweet bread or brioche could be used to fill the pots, I planned to use a reasonably plain white bread dough. The loaves were to be used for decoration only and it didn't make much sense to spend a lot of time or money on something that wouldn't be eaten. I hasten to add that the bread is edible, but in its unwrapped state it will stale quickly. The bread I used is simple to make and, as luck would have it, I could pass the finished loaves on to others for final decorating. Actually, the only difficult part of my chore was seasoning the pots to make them fit for baking. It's tedious work but not hard. I set aside 3 hours to season twelve pots and get the bread ready for its first, and only, rise. I'm including instructions for seasoning the flower pots, along with the recipe for the very easy bread I used to make them. Here's how it's done.

Flower Pot Bread...from the kitchen of One Perfect Bite, courtesy of Recipezaar

Directions for seasoning Terra Cotta Flower Pots:
1) Take two (6-inch) new terra cotta flower pots. Wash thoroughly, drain dry and grease them inside and outside, with shortening, butter or oil. Make sure to coat the rims as well
2) Heat pots in a pre-heated oven at 375 degrees F. for 25-30 minutes. Remove. Let cool. Repeat process two or three more times to create a non-stick surface on flower pots. Be careful not to burn yourself.

Flower Pot Bread

Ingredients:
3-3/4 cups all-purpose flour
3 teaspoons sugar, divided use
1-1/2 teaspoons salt
1/4 cup vegetable oil
2-1/4 teaspoons active dry yeast
1 cup warm water
Egg wash: 1 egg + 1 teaspoon water or milk
Optional Extras
2 tablespoons poppy seeds
2 tablespoons mixed seeds
2 tablespoons pumpkin seeds
2 tablespoons chopped walnuts


Directions:

1) Grease inside and rim of 2 (6-inch) flower pots with shortening, oil or butter. Set aside.
2) Combine water and 1 teaspoon sugar in a small bowl. Sprinkle dry yeast over water. Let sit until frothy, about 10 minutes.
3) Combine flour, salt and reserved 2 teaspoons sugar in a large bowl. Add any extras you want to use. Add yeast mixture and oil. Mix to form a smooth dough. Turn onto floured board and knead until smooth and no longer sticky, about 10 minutes.
4) Cut dough into 6 equal pieces. Form each piece into a ball. Place 3 balls in the bottom of each flower pot. Place on a baking sheet. Cover with plastic wrap and let rise until doubled in size, about 1 hour.
5) Meanwhile preheat oven to 400 degrees F. Brush top of loaves with egg wash. sprinkle with seeds if desired. Bake loaves in middle of oven for 30 minutes, or until bread is a rich golden brown and sounds hollow when tapped. Remove bread from oven. Cool on rack for 10 minutes. Remove from pots and continue cooling on wire racks until bread is at room temperature. Bread can be served in flower pots or decoratively wrapped. Yield: 2 loaves.

You might also enjoy these recipes:

Kaiser Rolls - One Perfect Bite
Anadama Rolls - One Perfect Bite
St. Lucia Buns - One Perfect Bite


This post is being linked to:
Smiling Sally - Blue Monday

This post is being linked to:
Wild Yeast - Yeast Spotting

Tuesday, February 16, 2010

French Quarter Beignets


Photo courtesy of Ron Dauphin

From the kitchen of One Perfect Bite...A still warm beignet cloaked in confectioners' sugar must be included on the long list of pleasures that is New Orleans. To have beignets, in various shapes, with mugs of steaming coffee at the Cafe du Monde, or elsewhere in the French Quarter of the city, is a near perfect way to start a day or end a night of revelry. While I can't take you there, I can show you how to enjoy this treat in your own kitchen with a quiet cup of coffee and a table and floor relatively free of sticky powdered sugar. While I've tried, I can't find a way to keep the powdered sugar off your face. Everyone will know exactly what you've been doing. For the uninitiated, a beignet is a warm, crisp piece of fried dough that is topped with a heavy layer of confectioners' sugar. Food historians believe French colonists brought beignets to New Orleans in the 18th century. Some believe the Ursaline nuns brought the recipe with them from France, others believe the Acadians, who were expelled from Nova Scotia, introduced them to the people of New Orleans. No one is sure how the donuts got their name. The Celts had a word "bigne" that meant to raise. The French called donuts "beignet". We know for sure that beignets are made with yeast and while they are allowed to slowly rise, how they got their name is not at all important to those who love them. This recipe makes about 48 donuts. The good news is that the dough keeps well for about five days when it's refrigerated. That's important on several levels. Though beignets should be thought of as a dessert and can be eaten anytime, once fried and cool they quickly lose their appeal. Day old, they become bird-fodder or the base for bread pudding. You can cut this recipe in half to produce a less gargantuan quantity. These should always be served warm. If I haven't frighted you away and you actually make these, I know you'll love them. They are addictive. Here's the recipe for your downfall.

French Quarter Beignets...from the kitchen of One Perfect Bite, inspired by Paula Deen and others

Ingredients:

1-1/2 cups lukewarm water
1/2 cup granulated sugar
2-1/4 teaspoons active dry yeast
2 eggs, room temperature slightly beaten
1-1/4 teaspoons salt
1 cup evaporated milk
7 cups all-purpose or bread flour
1/4 cup shortening, melted and cooled to room temperature
Nonstick spray
Oil, for deep-frying
3 cups confectioners' sugar

Directions:
1) Mix water, sugar, and yeast in a large bowl and let sit for 10 minutes.
2) In another bowl, beat eggs, salt and evaporated milk together. Whisk egg mixture into yeast mixture.
3) Mix 3 cups of flour into yeast mixture. Add shortening and continue to stir while adding remaining flour. Remove dough from the bowl, place onto a lightly floured surface and knead until smooth. Spray a large bowl with nonstick spray. Put dough into bowl and cover with plastic wrap or a towel. Let rise in a warm place for at least 2 hours.
4) Preheat oil in a deep-fryer to 350 degrees F.
5) Place confectioners' sugar in a paper or plastic bag. Set aside.
6) Roll dough out to about 1/4-inch thickness and cut into 2-inch squares. Deep-fry, flipping constantly, until golden color. Drain on paper towels for a few seconds then place in bag with confectioners' sugar and toss to thickly coat. Serve warm. Continue until all beignets have been fried and coated. Yield: 48 donuts.

You might also enjoy these recipes:

Open Mouths Laughing
Donuts for National Donut Day
Apple Fritters

This post is being linked to:

Wild Yeast - Yeast Spotting

Monday, February 15, 2010

Shrove Tuesday Buns - Blue Monday


From the kitchen of One Perfect Bite...These these lovely cream filled buns were once associated with the Lenten season in Scandinavia. They were prepared on Shrove Tuesday to use up stores of butter, cream and sugar that could not be eaten during the days of fast and abstinence that led up to Easter Sunday. While religious affiliations in the region have changed, they are still called Fat Tuesday or Shrove Tuesday Buns. The buns are now enjoyed at any time, but they were once made only on the day before Ash Wednesday. That day was called Shrove Tuesday because those whose confessions were heard on this day were called shrove, or shriven of sin. The buns are a real delicacy and I think everyone will enjoy them. A simple sweet dough is shaped into rolls and baked. Once they're done they can be filled in many ways. Some simply hinge the roll, insert a piece of almond paste into it and top it with whipped cream. Others remove the top of the roll, scoop out the innards and mix the bread crumbs with ground nuts to form a poor man's almond paste. Either way, the buns are delicious and they are not hard to do. While everything can be prepared ahead of time, it's best not to fill these until you're ready to serve them. They can get soggy. Here's the recipe.

Shrove Tuesday Buns...from the kitchen of One Perfect Bite inspired by Kathy Cutler

Ingredients:

Buns
3 to 3-1/2 cups all-purpose flour
1/4 cup granulated sugar
1/2 teaspoon salt
1 tablespoon Active dry yeast
1 teaspoon ground cardamom
3/4 cup milk
6 tablespoons butter
1 egg
Filling
3/4 cup finely chopped nuts
3/4 cup confectioners" sugar + additional sugar for dusting
1 cup light cream or half-and-half
1/2 teaspoon vanilla extract
1 cup heavy cream, whipped

Directions:
1) Combine 2 cups flour, sugar, salt, yeast and cardamom in a mixing bowl. Whisk well.
2) Place milk and butter in a small saucepan and heat until butter is melted. Let cool to 120 degrees.
3) Add milk to flour mixture. Mix well. Add egg and about 1 cup of remaining flour to make a soft dough.
4) Knead on a lightly floured surface until smooth and elastic, about 10 minutes. Place in a lightly greased bowl, cover with plastic wrap and let rise in a warm place until doubled in volume, about 1 hour.
5) Punch dough down. Shape dough into a 12-inch rope. Cut rope into 12 1-inch pieces.
Form pieces into round buns. Cover a baking sheet with parchment paper. Place buns on baking sheet. Lightly cover and let rise until double, about 30 minutes.
6) Meanwhile, preheat oven to 400 degrees F.
7) Bake buns for until golden brown, about 10 to 15 minutes. Cool on a wire rack.
8) Slice top off each bun. Reserve tops. Scoop out center of rolls, leaving a shell about 1/4-inch thick, with a fork or grapefruit spoon.
9) Place crumbs, nuts and confectioners' sugar in bowl of a food processor. Pulse until the mixture resembles corn meal. Transfer to a medium bowl. Add light cream and vanilla. Mix well.
10) Spoon filling into buns. Top each with a heaping spoonful of whipped cream. Put tops back on and sprinkle with confectioners' sugar. Yield: 12 Buns.

You might also enjoy:

Crepes with Hot Buttered Rum Sauce
Gluten Free Pancakes
Hot Cross Buns


This post is being linked to:

Smiling Sally - Blue Monday
Wild Yeast - Yeast Spotting

Wednesday, February 10, 2010

Crumpets


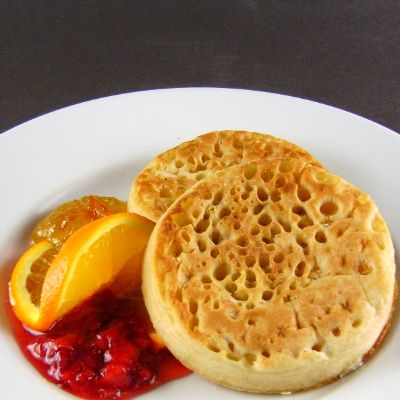
From the kitchen of One Perfect Bite...Do you know the difference between a crumpet and an English muffin? You probably do, but because we're friends I hope you'll humor me. Did you know that English muffins are an American invention? They were created by the "nooks and crannies" guy, Samuel Bath Thomas, towards the end of the 19th century. His goal was to create a crumpet that could be split and then toasted on both sides. Unfortunately, history does not tell us why this feat was of such great importance to him. While many use the terms interchangeably, there is a real difference between a crumpet and an English muffin. Muffins are made from a drier batter than crumpets and are served split rather than whole. The crumpet is cooked, stovetop, in a shallow ring mold that allows its bottom to become a lovely brown while the top develops a gazillion tiny holes that are perfect vessels for holding copious quantities of butter and warm jam. In England they are usually served for tea, while here they are served for breakfast. Let me insert, at this point, a disclaimer. While I love crumpets, I make them only once or twice a year. Life in any kitchen is a matter of choices, and while I bake all our bread, I'm quite content to purchase commercially prepared crumpets as long as I know I can make them if I have to. The "can if I have to" mind set was fueled by an economics professor who insisted my generation would starve to death surrounded by animals we had never learned to hang and dress. I was very impressionable, so, in addition to making crumpets and cheese, I stand at the ready if you ever need a chicken's neck wrung. My crumpet recipe comes from James Beard. I have an equally delightful recipe for English muffins that was developed by Julia Child. We'll do English muffins in a few weeks. Today we are all about crumpets. Tea anyone?

Crumpets...from the kitchen of One Perfect Bite inspired by James Beard

Ingredients:
1/2 cup milk
1/2 cup boiling water
2-1/4 teaspoons active dry yeast
1 teaspoon granulated sugar
1-1/2 teaspoons salt
1-3/4 cups all-purpose flour
1/4 teaspoon baking soda, dissolved in 1 tablespoon hot water
8 to 10 buttered flan rings or tuna cans with tops and bottoms removed

Directions:
1) Combine milk and boiling water in a large bowl. Cool until lukewarm. Add yeast and sugar. Let sit for 5 minutes, or until bubbly. Mix salt with flour. Add to yeast mixture and beat with a spoon for several minutes. Let batter rise until doubled in bulk and slightly bubbly. Beat dissolved soda into batter. Let rise again until doubled in bulk.
2) Heat a griddle or large frying pan over medium-hot heat. Position buttered rings in pan. Spoon batter into rings to a depth of about 1/2-inch. Cook until dry and bubbly on top. Remove rings, turn crumpets and brown lightly on the other side. Transfer to a rack to cool. Toast and butter to serve. Yield: 8 to 10 servings.

You might also enjoy:

Brussels and Liege Waffles
Gluten-Free Pancakes
Baked Swedish Pancake

This recipe is linked to:
Wild Yeast - Yeast Spotting

Sunday, December 13, 2009

St. Lucia Buns - Blue Monday


From the kitchen of One Perfect Bite...
Christmas celebrations in Sweden begin with the feast of St. Lucia on the 13th of December. Lucia is the patron saint of light and she is honored on this day. In homes that still observe the feast, the eldest daughter awakens early, dons a white garment sashed in red and places a crown of laurel that holds 4 candles upon her head. Legend tells us that Lucia, whose name means light, placed candles in a wreath she placed on her head in order to free her arms to carry bread she was smuggling to Christians hiding in the catacombs. These days the daughter leads a musical procession with her younger siblings in tow and serves the family special buns called lussekatt for their breakfast. The saffron flavored buns are usually shaped like the figure eight and are topped with raisins at either end of the spiral. The children may, if they wish, wear their costumes to school on this day. Winter months are dark in Sweden and the candles in Lucia's crown symbolize the light of faith and the promise of the sun's return.


Last year my nod to Lucia was a special coffee cake and a recounting of Christmas misadventures with Claire, who dreamed of being chosen to led the St. Lucia Day procession. That story is here should you like to read it. Today's treat is the saffron buns that are traditionally served on this holiday. They are very easy to do, so I'll get right to the recipe.

St. Lucia Buns...from the kitchen of One Perfect Bite

Ingredients:
8 tablespoons (1 stick) unsalted butter
1-1/3 cups milk
1 teaspoon saffron threads, chopped fine and soaked in a few drops of water
1 tablespoon active dry yeast
2/3 cup sugar
1/2 teaspoon salt
2 eggs, divided use
4 cups unbleached flour + flour for kneading
Raisins for garnish

Directions:
1) Melt butter in a small saucepan set over medium heat. Add milk and saffron and heat until just until warm. Pour into bowl of an electric stand mixer. Sprinkle yeast over milk and let it sit for 5 minutes. Add sugar, salt, 1 egg and 2 cups flour. Beat with paddle attachment until smooth and well combine, about 2 minutes on medium speed. Add final 2 cups of flour. Using dough hook, beat until mixture is smooth and begins to climb beater. Transfer dough to a lightly floured surface and knead until perfectly smooth. This dough has a wonderful velvety texture to it. Place in a greased bowl, turn once to coat all surfaces, and let rise, covered, in a warm place until doubled in bulk, about 1 hour.
2) Line a baking sheet with parchment paper. Preheat oven to 400 degrees F. Punch dough down, roll into a cylinder 36 inches long. Cut 18 2-inch pieces from cylinder. Roll each piece into a 10-inch rope. Form each piece into an S, spiraling ends to form a figure eight. Transfer pieces to to prepared baking sheet. Let rise, covered, until doubled in size, about 45 minutes. Brush buns with reserved egg. Tuck raisins into spirals at each end of figure eight. Bake for 15 minutes, or until golden brown. Yield: 18 buns.

This post is being linked to:
Smiling Sally - Blue Monday

This recipe is linked to:
Wild Yeast - Yeast Spotting


Photo of Lucia procession courtesy of Flickr Creative Commons license.

Thursday, October 29, 2009

Bread of the Dead - Pan de Muerto


From the kitchen of One Perfect Bite...The Day of the Dead, or Dia de Los Muertos, represents the melding of an old Aztec tradition with the religion of the Conquistadors. The celebration is actually a two day feast that coincides with the Catholic observance of All Saint's and All Soul's days. The first day of the celebration occurs on the 1st of November. It's called the Day of the Little Angels and it is set aside to remember children who have died. The second day is set aside to honor adults who have passed to the next life. It is important to understand that these are days of celebration rather than days of mourning. In homes that observe Dia de los Muertos, altars are built containing symbols of the four elements: fire, water, wind and earth. They are beautifully decorated and, because many believe that the deceased visit their homes during this celebration, food is placed on the altar to entice them to stay for the festivities. Feasting is an important part of both days of celebration. Good food, and clean homes are thought to entice the dead. Toy skeletons and skulls are welcome features and "dead" bread may even have a small skeleton, promising good luck, baked inside it. The second day of the celebration is usually spent outdoors with picnics in graveyards. It is a joyous time and seen as an opportunity for families to come together to honor the memories of those who have passed to the next life. It is hoped that the laughter and mention of the deceased will bring their spirits back to earth to visit with the assembled family members. To many, the Day of the Dead is a strange observance, but Mexican tradition views death as an important part of life, a natural consequence of living and one not to be feared. It's their belief that these celebrations connect families to each other and their deceased relatives, a proof, if you will, that the ties of love cannot be broken - even by the grave.

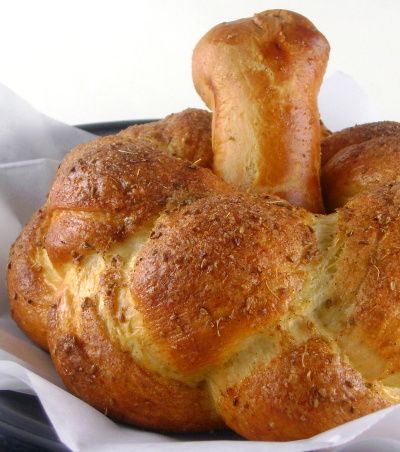
The Aztecs believed that death was a portal to another existence. Oral tradition tells us that the request of the dead before burial is, "Give me bread and sugar to help me on my journey." The bread of the dead, pan de muerto, is made only for the Dia de los Muertos celebration. It is a sweet, egg-rich bread and it can be found throughout Mexico, though its form differs vastly from one region to the next. The bread is supposed to resemble a skull and it is adorned with bones and sometimes tear drops.

I've chosen a very simple recipe for the bread and have opted for bare bones - forgive the pun - adornment. While this recipe appears in many places, I believe that its original source is "Look What We Brought You from Mexico." I actually had trouble with the first loaf I tried to make. I found 3 cups of flour produced a loaf that was heavy enough to be a door stop. The loaf you see in the photo was made with 2-1/2 cups flour. I've changed the flour measurement to reflect a range, but I strongly advise you mix with the lesser amount and use the last 1/2 cup for kneading. Here's the recipe, just in time for Dia de Los Muertos.

Pan de Muerto (Bread of the Dead)...from the kitchen of One Perfect Bite

Ingredients:
1/4 cup milk
1/4 cup (half a stick) butter, cut into 8 pieces
1/4 cup sugar
1/2 teaspoon salt
2-1/4 teaspoons active dry yeast
1/4 cup very warm water
2 eggs, divided use
2-1/2 to 3 cups all-purpose flour, unsifted
1/2 teaspoon anise seed
1/4 teaspoon ground cinnamon
2 teaspoons sugar

Directions:
1) Bring milk to boil in a small saucepan; remove from heat. Stir in butter, 1/4 cup sugar and salt.
2) In large bowl, mix yeast with warm water until dissolved and let stand 5 minutes. Add the milk mixture.
3) Separate yolk and white of one egg, reserving white for glaze. Add yolk and 1 whole egg to yeast mixture. Stir in flour, blend until a dough ball is formed.
4) Flour a pastry board or work surface. Knead dough until smooth. Return to large bowl and cover with plastic wrap. Let rise in warm place for 90 minutes.
5) Grease a baking sheet. Punch dough down. Knead again on floured surface. Divide it into fourths and set one piece aside. Roll remaining 3 pieces into "ropes."
On greased baking sheet, pinch 3 rope ends together and braid. Finish by pinching ends together on opposite side to form a circle. Use remaining dough to form bones. Place them on the baking sheet.
6) Preheat oven to 350 degrees F. Cover bread with plastic wrap and let rise for 30 minutes. Meanwhile, in a bowl, mix anise seed, cinnamon and 2 teaspoons sugar together. In another bowl, beat egg white lightly.
7) Brush top of bread and bones with egg white, sprinkling only the loaf with sugar mixture. Bake at 350 degrees for 35 minutes. Cool. Yield: 1 loaf.

Print Friendly and PDF

This post is being linked to:

Wild Yeast - Yeast Spotting

Friday, October 16, 2009

Yeasted Walnut Bread from Southern Burgundy - World Bread Day


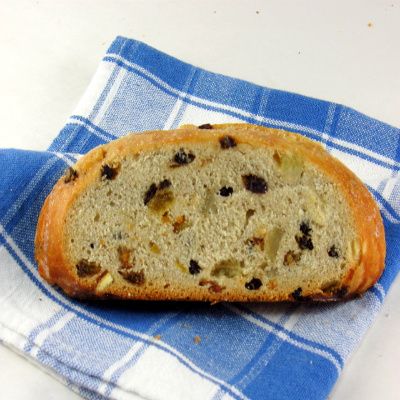
Today is World Bread Day and I almost - almost - forgot. I'm sneaking under the wire with a yeasted walnut bread from Southern Burgundy that was developed by Jane Grigson, an English food writer. She was a good friend of James Beard and had the unique honor of having her work translated into French. That was an uncommon occurrence 40 years ago. I've had her recipe for decades and never made it for want of walnut oil. Fortunately, I've remedied that and was able to make the bread for this event. The bread is simple to do, and while it's a bit costly to make, it is delicious. The only change I would make is to increase the measure of walnuts used in the bread. I can't wait to see how it tastes tomorrow after it's had time to ripen. This recipe makes 4 small loaves of a bread that is flavored with onions, chopped walnuts and walnut oil. The aroma of this bread when it is baking will bring you to your knees and the trick will be allowing it to cool before you slice into it. The bread has a lovely crust and a very mild onion flavor. Here, just in time for World Bread Day, is Jane Grigson's Yeasted Walnut Bread from Southern Burgundy. Enjoy!

Yeasted Walnut Bread from Southern Burgundy...from the kitchen of One Perfect Bite, courtesy of Jane Grigson from James Beard's Beard on Bread

Ingredients:
5 cups all purpose flour (preferably unbleached)
1 tablespoon salt
2 tablespoons sugar
2 packages active dry yeast or 4-1/2 teaspoons active dry yeast
2 cups warm milk
1/2 cups walnut oil or olive oil or 8 tablespoons (1 stick) butter, melted but cool
1/2 to 1 cup walnuts, roughly chopped
3/4 cup onion, finely chopped

Directions:
1) Sift flour, salt, and sugar into a warm bowl. Dissolve yeast in 1/2 cup of warm milk, and pour it into middle of the flour, together with walnut oil (or butter) and remainder of milk. Knead well until dough is firm and blended into a smooth, springy ball, about 10 minutes.
2) Leave in a warm place to rise for 2 hours. Punch down dough, mix in walnuts and onions, shape into four rounds, and leave on a greased baking tray to rise for 45 minutes. Bake at 400 degrees F for 45 minutes or until loaves sound hollow when tapped underneath. Yield: 4 small loaves.

This post is being linked to:

World Bread Day

Wild Yeast - Yeast Spotting

Monday, October 5, 2009

Barmbrack - Irish Halloween Bread - Blue Monday


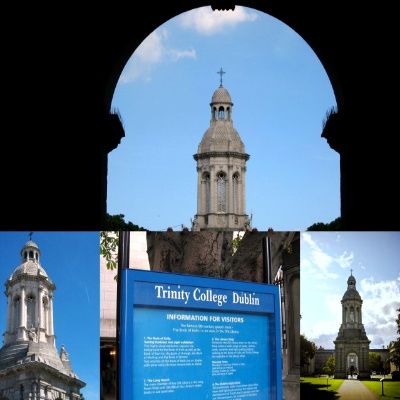
The landmark Campanile, Trinity College Dublin. The college, established in 1592, is home to scholars and men of letters some famous, some forgotten. Among the blessed are Jonathan Swift, Oliver Goldsmith, Oscar Wilde and Samuel Beckett. Trinity College has a deservedly proud heritage. While it's not well known, the Irish, including some matriculating at Trinity, revel in the celebration of Somhain, a Halloween festival that includes a parade and boisterous bonhomie to mark the end of summer and All Saint's Eve. All holidays have special trappings and this one is no exception. The zealous celebrate with costumes and special food. Some of the foods associated with the Somhain are colcannon, a potato dish, and barmbrack, a confection sweeter than a bread but less rich than cake.


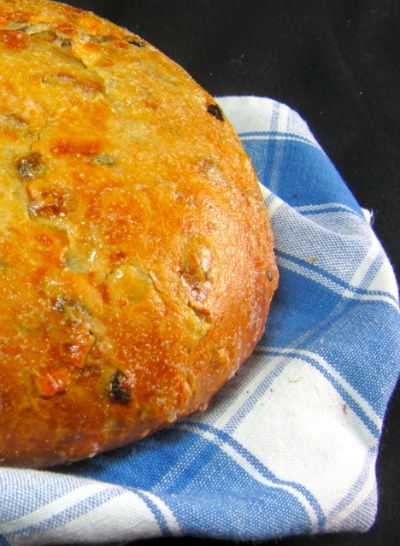
Both Van Morrison and James Joyce mention barmbrack, a yeasted sweet bread that's traditionally served on Halloween in Ireland. The Irish sometimes called it Báirín (top) Breac (dirty or speckled). Years ago the yeast to raise the bread dough was skimmed from the top of a vat of fermenting beer, the Bairin. The dried fruit was the Breac. It is the custom in Ireland to place trinkets into the bread dough. The charms determine if luck in the coming year will be good or bad. If a pea is found, the finder will not marry. If a coin is found, good fortune and wealth can be anticipated. A small stick indicates a bad or violent marriage, a piece of cloth poverty and a ring an impending marriage. Some cakes contain all these objects and fate is determined by what's in the slice of cake you receive. For the superstitious it's not unlike a crap shoot. Like many women, I seed my bread in such a way that only good luck is bestowed on any who are at my table. The bread is not difficult to make and I'm a bit surprised that the tradition has faded in so many Irish-American families. Soda bread is still made for St.Patrick's day but there are precious few families that still make barmbrack for Halloween. I have a pointer that will make your bread exceptional. In Ireland, the raisins and currants are steeped in tea for 24 hours before baking. At Chez Mary, they bathe in Jameson's Irish Whiskey. I have the happiest raisins in the Pacific Northwest. This is a lovely sweet bread. I hope you'll try it. Here's the recipe.

Irish Barmbrack...from the kitchen of One Perfect Bite

Ingredients:

1 cup milk
4-1/2 teaspoons active dry yeast
1/2 cup warm water
4 cups all-purpose flour, sifted, divided use
3/4 cup granulated sugar
3 teaspoons salt
1 teaspoon ground allspice
1/3 cup butter, room temperature
1/2 cup currants
3/4 cup seedless raisins
1/2 cup candied lemon peel
Glaze
2 tablespoons sugar
1 tablespoon water

Directions:
1) Scald the milk or heat it on HIGH power for 1 minute in a microwave oven. Sprinkle yeast over warm water in a small bowl. Let sit for 5 minutes to soften.
2) In the bowl of an electric mixer, combine 2 cups sifted flour, sugar, salt and allspice. Whisk to combine. Add yeast, milk and butter. Beat with paddle attachment for 2 minutes at medium speed. Cover and let sit in a warm spot for 30 minutes. When it has doubled in size, add 1 cup of reserved flour and beat with electric mixer on low speed until flour is well blended, about 1 minute. Repeat with the last cup of flour.
3) Turn onto a lightly floured work surface. Knead for 8 minutes, gradually working in currants, raisins and lemon peel. Place dough in a greased bowl, cover and allow to rise until double in bulk, about 90 minutes. Punch dough down. If you wish to add trinkets to dough, add them now. Shape the dough into a round loaf and set it on a greased baking sheet. Cover and let rise again until double in bulk, about 90 minutes.
4) Preheat oven to 350 degrees F. Bake loaf for 45 to 50 minutes. Combine sugar with water and brush over loaf. Cook for an additional 5 minutes. Remove from oven. Let sit for 5 minutes before transferring to a wire rack to cool. Yield: 1 loaf.

This post is being linked to:

Smiling Sally - Blue Monday

Wild Yeast - Yeast Spotting

Thursday, July 30, 2009

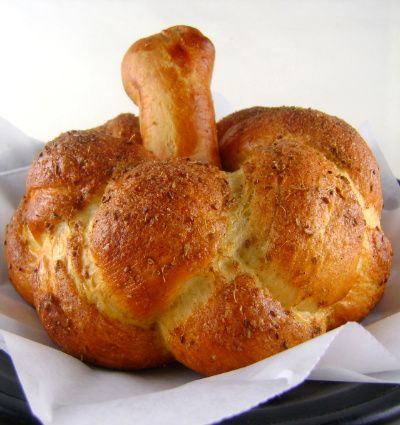
Apple Onion Bread with Cheddar Cheese


From the kitchen of One Perfect Bite...This is a wonderfully savory bread that can be made by beginners, but it's so flavorful I suspect that experienced bakers will try it as well. Mary Woodruff develop this prize winning recipe for the Vidalia Onion Festival. A "cheat" gets the recipe off to a quick start. A packaged hot roll mix is used as a base for the loaf. What makes this bread a standout are the ingredients added to the dough. Purists can add those "extras" to a homemade dough and achieve the same results. This is the winning recipe.

Apple Onion Bread with Cheddar Cheese...from the kitchen of One Perfect Bite

Ingredients:
1 tablespoon butter
1 large apple, diced
1/2 cup chopped sweet onion
1 (16-oz.) package hot roll mix
1 cup shredded cheddar cheese
2 tablespoons chopped red bell pepper
1 tablespoon caraway seeds
1 egg, slightly beaten
1 cup hot water

Directions:
1) Melt butter in a small skillet set over medium heat. Add apple and onion and saute until tender. Set aside.
2) Place contents of roll mix in a large bowl. Open yeast package and whisk into flour. Stir in cheese, red pepper and caraway seeds; mix well. Add egg, water and apple-onion mixture; mix with a wooden spoon until mixture pulls away from sides of bowl.
3) Transfer dough to a lightly floured work surface; knead for 5 minutes.
4) Return dough to bowl; cover with plastic wrap and let dough rest for 5 minutes.
5) Grease a 6 to 8 cup bread pan. Place dough in pan; cover with plastic wrap and let it rise for 30 minutes.
6) Meanwhile, preheat oven to 375 degrees F.
7) Bake the bread for 30 to 35 minutes, until golden brown and loaf sounds hollow when thumped. Yield: 1 loaf.


I'm linking this recipe to Wild Yeast for the weekly Yeast Spotting event.
Related Posts with Thumbnails

Printfriendly