Showing posts with label dorie greenspan. Show all posts

Thursday, March 28, 2013

Bubble Top Brioche


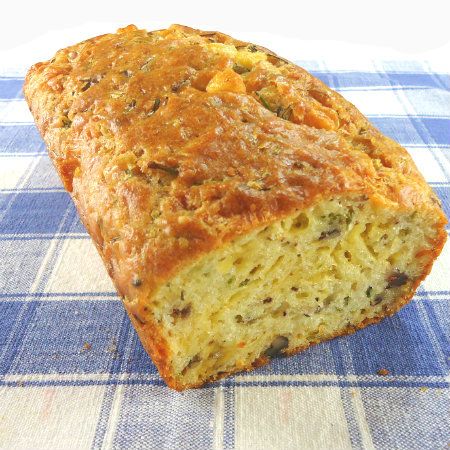
From the kitchen of One Perfect Bite...I have been loyal to Julia Child's recipe for brioche for several decades now. It is delicious and dependable but it needs more attention than some of the other recipes that have found favor in recent years. I've been flirting with Dorie Greenspan's recipe for a while now, and because we have a special dinner planned for Saturday night, as well as a brunch on Sunday, I thought I could use Dorie's much simpler recipe to make rolls for both occasions. I made a triple batch of her bubble top brioche today and I couldn't be more pleased with the results. I started the rolls yesterday because they require an overnight chill, but other waiting for that interim rise, these are easiest fancy rolls I've ever made. You'll need a stand mixer to beat the dough, but the mixer literally does all the work and, save for killing the yeast, it would be hard to spoil these rolls. If you start with ingredients that are at room temperature and slowly incorporate the butter into the dough, you can't go wrong. The dough does not have a pleasant hand. It is shaggy and difficult to work with when it is not cold. That long chill is an absolute necessity for shaping the brioche. The recipe states that it makes a dozen rolls. You should be aware that those 12 rolls are voluptuous and will spill into each other as they bake. If you are a fussbudget and want perfectly formed and contained buns, aim for 16 rather than 12 buns per batch. Appearances aside, this is a terrific recipe and I hope you'll give it a try. The brioche freeze well and I know that any of you who make them will be delighted. Here's the recipe.

Bubble Top Brioche...from the kitchen of One Perfect Bite courtesy of Dorie Greenspan and Epicurious

Ingredients:
1/4 cup warm water
1/4 cup warm whole milk
3 teaspoons active dry yeast (measured from two 1/4-ounce envelopes)brioche.
2-3/4 cups all purpose flour
1-1/2 teaspoons salt
3 large eggs, room temperature
3 tablespoons sugar
12 tablespoons (1-1/2 sticks) unsalted butter, room temperature
1 large egg beaten to blend with 1 teaspoon water (for glaze)

Directions:
1) Combine 1/4 cup warm water and warm milk in bowl of heavy-duty mixer fitted with paddle attachment. Sprinkle yeast over liquids and stir to moisten evenly. Let stand until yeast dissolves, stirring occasionally, about 8 minutes.
2) Add flour and salt to yeast mixture. Blend at medium-low speed until shaggy lumps form, scraping down sides of bowl occasionally, 1 to 2 minutes. Add eggs, 1 at a time, beating until blended after each addition. Beat in sugar. Increase mixer speed to medium; beat until dough is smooth, about 3 minutes.
3) Reduce speed to low. Add butter, 1 tablespoon at a time, beating until blended after each addition, about 4 minutes (dough will be soft and silky). Increase speed to medium-high and beat until dough pulls away from sides of bowl and climbs paddle, 8 to 9 minutes. Trust me, it will do this butyou'll have to be patient.
4) Lightly butter a large bowl. Scrape dough into bowl. Cover bowl with plastic wrap. Let dough rise in warm draft-free area until almost doubled in volume, about 1 hour 15 minutes to 1 hour 30 minutes.
5) Gently deflate dough by lifting around edges, then letting dough fall back into bowl, turning bowl and repeating as needed. Cover bowl tightly with plastic wrap and chill, deflating dough in same way every 30 minutes until dough stops rising, about 2 hours. Chill overnight. (At this point, use the dough to make 12 brioches, or 6 brioches and 1 tart, or 2 tarts.)
6) Butter 12 standard (1/3-cup) muffin cups. Divide dough into 12 equal pieces; cut each piece into thirds. Roll each small piece between palms into ball. Place 3 balls in each prepared cup (dough will fill cup).
7) Place muffin pan in warm draft-free area; lay sheet of waxed paper over. Let dough rise until light and almost doubled (dough will rise 1/2 inch to 1 inch above top rim of muffin cups), 50 to 60 minutes.
8) Position rack in center of oven and preheat to 400 degrees F. Place muffin pan on rimmed baking sheet. Gently brush egg glaze over risen dough, being careful that glaze does not drip between dough and pan (which can prevent full expansion in oven).
9) Bake brioches until golden brown, covering with foil if browning too quickly, about 20 minutes. Transfer pan to rack. Cool 10 minutes. Remove brioches from pan. Serve warm or at room temperature. Yield: 12 rolls.


One Year Ago Today: Baked Brocolli and Sausage Fritatta


Two Years Ago Today: House Special Mac N' Cheese with Brocolli


Three Years Ago Today: Yucatan-Style Chicken, Lime and Orzo Soup

Monday, February 25, 2013

Theme and Variation - Another Lemon Loaf Cake


From the kitchen of One Perfect Bite...This is the other lemon cake I experimented with for the party this weekend. This cake, developed by Dorie Greenspan, is a kissin' cousin to the one that was introduced by Patricia Wells. The cakes use almost the same ingredients, but they produce very different results. The Wells' cake has an intense lemon flavor and a fine tight crumb. The Greenspan cake is more like a standard pound cake that has been enhanced with lemon zest. I've been asked to pick a favorite and I'm going to field the question because this is an instance where personal taste will dictate choice. I suspect that true lemon lovers will be more inclined to the Wells' cake, but I have a hunch that the Greenspan cake will be more popular with dessert lovers who are not lemon fanatics. Both cakes are nice. I've appended a lemon syrup to tonight's recipe. While the cake is lovely without it, it adds a tart sweetness that makes a somewhat ordinary cake special. This cake is a study in simplicity. It can be made by hand with no special equipment other than a whisk, but you will have better results if you use cake flour to make it and carefully watch your baking time. Don't over bake! I also learned a trick while gathering information about poundcakes in general. Did you know that you can guarantee a perfect crack in the center of your poundcake? The trick is to draw a butter coated knife lengthwise through the center of the cake after it has baked for 10 minutes. Now, I don't know why that works, but I tried it with this cake and had ended up with a lovely center split that would make any baker proud. I hope you'll give this cake a try. There is nothing here not to like. Here is the recipe.

Dorie Greenspan's Lemon Loaf Cake...from the kitchen of One Perfect Bite courtesy of Dorie Greenspan

Ingredients:
Cake
4 eggs, at room temperature
1-1/3 cups sugar
Pinch of salt
Grated zest of 3 large lemons
1-3/4 cups cake flour
1/2 teaspoon baking powder
1/2 cup heavy cream, at room temperature
5-1/2 tablespoons unsalted butter, melted and cooled to room temperature
Syrup
1/3 cup fresh lemon juice
1/3 cup granulated sugar

Directions:
1) Position a rack in center of oven. Preheat oven to 350 degrees F. Butter a 9- by 5-inch loaf pan and dust with flour, shaking out the excess.
2) Working in a large bowl, whisk together eggs, sugar, and salt for just a minute, until foamy and smoothly blended. Mixture should not thicken. Whisk in grated zest.
3) Spoon flour and baking powder into a sifter and sift about a third of dry ingredients over foamy egg mixture. Whisk flour into eggs, mixing lightly. Sift remaining flour over eggs in two more additions and whisk only until everything is incorporated. Whisk heavy cream into mixture. Switch to a rubber spatula and gently and quickly fold in the melted butter.
4) Pour and scrape batter into prepared pan and bake for 50 to 60 minutes, or until center of cake crowns and cracks and a toothpick inserted in center comes out clean. Remove cake to a cooling rack to rest for 10 minutes before unmolding and brushing with syrup.
5) While cake is baking, make lemon syrup. Place sugar and water in a small saucepan and cook over low heat until sugar dissolves. Brush warm cake with half of lemon syrup. Let cake cool to room temperature. Slice with serrated knife. Yield: 8 servings.


One Year Ago Today:  Avocado Pudding with Chocolate and Coconut


Two Years Ago Today: Peas with Onions and Mint


Three years Ago Today: Crisp Cranberry and Carrot Oatmeal Cookies


Four Years Ago Today: Farfalle with Fresh Tomato and Basil Sauce

Thursday, August 16, 2012

Roasted Peppers


From the kitchen of One Perfect Bite...While Americans tend to treat roasted peppers as a colorful addition to sandwiches, salads and pizza, they receive a more prominent role in Mediterranean countries, where they are served as a first course. It's pepper season here and because my eyes are bigger than my stomach, I now have a proverbial peck of them to pick. I've already done lots of canning and freezing, and the Silver Fox and I are connoisseurs when it comes to the use of piperade with chickens and their eggs, but I had never thought of serving peppers as a first course. It took Dorie Greenspan to set me straight. By way of explanation, I have to interject that I've never outgrown my childhood love of pictures. My attraction to cookbooks is, at least in part, based on the gorgeous photos they contain. The photo of her roasted peppers in Around My French Table, was a siren's song to me, and, like it or not, I was lured back into the kitchen to imitate, if not duplicate, what I had seen. While peppers can be roasted in a variety of ways, the recipe in her book utilized the oven. While I would normally use an outdoor grill, I wanted to follow her recipe as closely as I could, so, I used the oven and had great results. After the fact, I learned this recipe can also be found on her website, which you can link to here. She discusses various roasting times and techniques that you will find  very helpful if you choose not to use the oven. I used a variety of bell peppers to get the color pop I wanted, but I must say the red peppers are the sweetest of the lot and I'll restrict my use to them in the future.  I have a full compliment of herbs at this time of year, so I used the combination that was suggested in Dorie's recipe and I did use garlic. I can't imagine using olive oil without it. I served the peppers on small plates with knives and forks and had a basket of really good French bread to accompany them. It made for a great first course and I'll be serving this again. I love its simplicity and almost effortless assembly. The  peppers are a perfect way to begin a meal of plain grilled meat or chicken.  I hope you'll give this a try. Here's the recipe.

Roasted Peppers
...from the kitchen of One Perfect Bite courtesy of Dorie Greenspan

Ingredients:

6 large bell peppers (a mix of red, orange and yellow)
Coarse sea salt and freshly cracked black pepper
Assorted fresh herbs (a combination of parsley, basil, rosemary and thyme leaves)
1 to 2 garlic cloves, split
1/2 cup extra virgin olive oil

Directions:

1) Move a rack to center of oven. Preheat oven to 425 degrees F. Line a baking sheet with parchment paper or aluminum foil.
2) Wash and dry peppers, place on prepared pan and roast, turning every 15 minutes, for 45 to 60minutes, or until every side of peppers is blistered. Transfer peppers to a large bowl, cover bowl will plastic wrap or aluminum foil, and let rest until they are cool enough to handle.
3) While peppers cool, pull out a pyrex loaf pan, or, if you plan to use the peppers immediately, a large rimmed serving platter.
4) Working over a bowl, with 1 pepper at a time, remove stem and drain. Remove blistered peel and cut each pepper into 2 or 3 segments, depending on its natural separations. Scrape away seeds and ribs from inside. Place pepper pieces cut side down in loaf pan or on a platter, sprinkle with salt and pepper, strew with garlic and herbs of your choice, then pour some olive oil over layer. Continue until all peppers are in pan or on serving platter. Chill. Garnish with fresh herbs before serving.


One Year Ago Today: Lime Milk Shake


Two Years Ago Today: Pumpkin Yeast  Rolls


Three Years Ago Today: My Grandson Makes Scrimp Scampi with Cumin, Paprika and Sherry Vinegar

Thursday, August 2, 2012

Savory Cheese and Chive Bread


From the kitchen of One Perfect Bite...I was given a copy of Dorie Greenspan's Around My French Table earlier this summer. As soon as it arrived, I curled up on the sofa, and like a child paging through a Christmas catalogue, marked my favorites and plotted the order in which my choices would be tried. The bread I am featuring tonight was on that list. The photo that accompanied the recipe was gorgeous and highlighted a deep gold pebbly crust that was unique and gave the bread an irresistible, come-hither air. I was finally able to make the bread today and I am generally pleased with the result. The bread, which is delicious, does, indeed, have gorgeous color and its aroma will make stomachs start to growl as it wafts through the kitchen and adjoining rooms. I couldn't wait for it to cool enough to slice. It's meant to be served as an appetizer and its cheesy goodness makes it perfect to serve with drinks at an informal gathering. I let the bread sit for 45 minutes before I had my first bite. It had wonderful flavor, but I was unhappy with the appearance of the sliced bread. The surface had holes and tunnels that are usually an indication that a dough has been over-mixed. I knew that was not the case, so I did a search to find other photos of the bread and see what others had come up with. As it turns out, my results were not unique. Most of the breads I found had the same holes and tunnels, so it is probably safe to say they are a characteristic of this bread, probably caused by slow melting cheese. I will, however, give the recipe another try in an attempt to produce a more finely grained loaf. I'll keep you posted if the results are significantly different. I think those of you who try the bread will really like it. It is easy to do and makes an unusual cocktail appetizer. Here's how it is made.

Savory Cheese and Chive Bread...from the kitchen of One Perfect Bite courtesy of Dorie Greenspan

Ingredients:
Unsalted butter, for greasing the pan
1-3/4 cups flour
1 tablespoon baking powder
1/2 to 1 teaspoon salt (depending on what cheese you're using)
1/4 teaspoon freshly ground white pepper (may substitute a pinch of cayenne pepper)
3 large eggs, at room temperature
1/3 cup whole milk, at room temperature
1/3 cup extra-virgin olive oil
1 generous cup (about 4 ounces) coarsely grated Gruyere, Comte Emmental or cheddar cheese
2 ounces Gruyere, Comte, Emmental or cheddar cut into very small cubes (1/2 to 3/4 cup)
1 bunch chives, minced (1/2 cup; may substitute thinly sliced scallions)
1/3 cup walnuts, toasted

Directions:
1) Position a rack in middle of oven; preheat to 350 degrees. Use butter to grease an 8 x 4-1/2 x 2-3/4-inch loaf pan, preferably Pyrex.
2) Whisk flour, baking powder, salt to taste and pepper together in a large bowl.
3) Whisk eggs in a medium bowl for 1 minute, until foamy, then whisk in milk and oil.
4) Pour egg mixture into flour mixture; use a sturdy flexible spatula or wooden spoon to gently mix together until moistened, then stir in grated and cubed cheese, chives and walnuts to form a thick dough. Transfer to loaf pan and spread to make dough even on top. Bake for 35 to 45 minutes or until bread is golden and a slender knife inserted into center comes out clean.
5) Transfer pan to a wire rack to cool for 3 minutes, then run a round-edged knife along edges of pan to loosen loaf. Turn it out and cool right side up before cutting and serving. Yield: 1 loaf.


One Year Ago Today: Stove-Top Barbecued Chicken "Ribs"


Two Years Ago Today: Schnecken
Related Posts with Thumbnails

Printfriendly