Showing posts with label confection. Show all posts

Monday, September 2, 2013

Goody Goody Bars - A Simple No-Bake Confection


From the kitchen of One Perfect Bite...A used copy of America's Test Kitchen Quick Family Cookbook came my way while I was vacationing this summer. It, of course, became my beach read for a couple of days, and while I was paging through it, I came across the recipe I'm featuring today. The name grabbed me and I knew I'd have to try the recipe before the seasons changed. As you can see, I'm sneaking in just under the wire. While the Goody Goody Bars are categorized as a cookie, I liken them to a candy-like confection because of their texture and richness. Whatever, you decide to call them, this treat is nearly effortless to make and the recipe uses ingredients that have universal appeal. I love the marriage of chocolate and peanuts, and, if you share my weakness, I think you'll enjoy these bars. Do give them a try. Here is how they are made.

Goody Goody Bars...from the kitchen of One Perfect Bite courtesy of America's Test Kitchen Quick Family Cookbook

Ingredients:
1 cup packed light brown sugar
1 cup light corn syrup
1 cup peanut butter
1 cup salted dry-roasted peanuts, very coarsely chopped
6 cups cornflakes
2 cups (12-oz.)semisweet chocolate chips, melted
1 tablespoons vegetable oil

Directions:

1) Line a 9x13-inch baking dish with foil, allowing excess to overhang pan edges. Spray foil with nonstick cooking spray.
2) Bring sugar and corn syrup to simmer in a large pan set over medium heat. Remove pan from heat. Add peanut butter and chopped peanuts, stirring until smooth. Add corn flakes and stir until well-coated. This mixture is very hot and capable of burning, so do not use your hands for the final mixing.
3) Working quickly, scrape mixture into prepared pan. Using a greased spatula, press mixture into bottom and corners of the pan.
4) Microwave chocolate chips and oil together in a covered bowl, stirring often, until melted, about 2 minutes. Spread evenly over cornflake mixture. Freeze, uncovered, until filling is firm and chocolate has hardened, about 15 minutes.
5) Using foil overhang, lift bars from pan and transfer to a cutting board. Cut into squares. Serve immediately or store at room temperature in an airtight container for up to 2 days. Yield: 24 bars.

If you have enjoyed your visit here, I hope you'll take a minute to...

Follow Me on Pinterest      


One Year Ago Today: Maple Apple and Cheddar Pie


Two Years Ago Today: Mexican Lasagna


Three Years Ago Today: Pear Flognarde
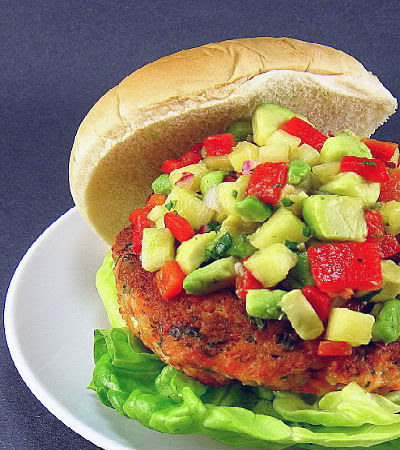


Four Years Ago Today: Fresh Salmon Burger with Chipotle Aioli and Pineapple-Avocado Salsa

Sunday, June 2, 2013

Crunchy Chocolate-Peanut Stix


                                        My thought for today can be found  here.

From the kitchen of One Perfect Bite...While they may not be pretty to look at, I think you'll enjoy this simple confection that tastes a bit like a Twix bar. I found the recipe in the February issue of Family Circle magazine and its simplicity intrigued me. I figured that any recipe that used a combination of milk chocolate, caramel and peanut butter couldn't be half bad, especially when the combination is used to cover a base of salted crackers. I clipped the recipe and finally, in what the Silver Fox calls a Paula Deen moment, got back to it this week. I had no expectations for the recipe, so I was delightfully surprised when my creation turned out well enough to share with you. These are kid cookies that will never make it to a tea tray, but they are perfect for a cookie jar and you'll find that small hands can finish a batch with great dispatch. So, if you tend to the young or young at heart, I hope you'll give this recipe a try. Here is how this confection is made.

This week's Weekly Menu is ready for browsing. The Seasonal Menu will be changed this morning. I hope you'll take a peek at both of them.

Crunchy Chocolate Peanut Stix...from the kitchen of One Perfect Bite courtesy of Family Circle magazine

Ingredients:
75 rectangular buttery crackers (i.e. Keebler Club)
1/2 cup butter
1/2 cup milk
1-1/4 cups light brown sugar
1/4 cup granulated sugar
2 cups finely crushed honey graham crackers
1-1/4 cups milk chocolate chips
1 cup peanut butter chips

Directions:
1) Line 13x9x2-inch baking pan with foil, leaving extra on ends for handles. Line bottom of pan with 25-27 butter crackers and set aside.
2) In medium saucepan, melt butter and add in milk, brown sugar and white sugar. Bring to a simmer. Gradually stir in 2 cups of graham cracker crumbs. Simmer, stirring frequently for 5 minutes.
3) Pour 1 cup of butter/crumb mixture over cracker layer in pan. Top with another layer of crackers and spread remaining butter/crumb mixture over it. Cover with another layer of crackers.
4) In microwavable bowl, combine milk chocolate and peanut butter chips. Cook on high for 1 minute and stir. Continue to cook in 30 second intervals until chips can be stirred smooth. Pour over top of final cracker layer and spread evenly. Refrigerate for at least 1 hour. Carefully lift out of pan and place on cutting board, removing foil. Cut into 1 x 4 inch bars with a serrated knife. Yield:6 dozen bars.

Follow Me on Pinterest


One Year Ago Today: Asian-Style Chicken Meatballs with Peanut Sauce


Two Years Ago Today: Pickled Asparagus


Three Years Ago Today: (Almost) Cherry Garcia Ice Cream


Four Years Ago Today: Green Gazpacho

Sunday, May 26, 2013

Reese's-Like Peanut Butter Bars - A No-Bake Treat


My Thought for the Day can be found, here. If you like it, give us a thumbs up and share it with your friends.

From the kitchen of One Perfect Bite...I hope at least a few of you share my enjoyment of chocolate and peanut butter desserts. The pairing in this candy-like confection makes me positively giddy and whenever these bars are around my resolve, which can be impressive, simply crumbles. I suspect you already have this recipe in your files, but I stumbled on it only a year ago and it has become my favorite go-to treat whenever I have the urge for something ridiculously sweet and truly terrible for me. I am in transit today and have some ridiculous layovers, so, my urges will definitely be met. Carrot sticks will simply not do it for me. The version I'm sharing today is all over the blogosphere, so, I had a really hard time determining whom to credit for the original creation of the bars. I ended up using date of entry as my guide and am, therefore,  crediting them to Food.com because they published the earliest version I was able to find. Truth be told, I have no idea who first developed the recipe, but God should have a special spot in heaven for them, whoever they may be. Without further ado, here is the recipe for the world's finest no-bake peanut butter treat. Enjoy!

Reese's-Like Peanut Butter Bars...from the kitchen of One Perfect Bite courtesy of Food.com

Ingredients:
1-1/2 cups graham cracker crumbs
1 pound confectioners' sugar (3 to 3 1/2 cups)
1-1/2 cups + 2 teaspoons peanut butter, divided use
1 cup butter, melted
1 (12 ounce) bag chocolate chips (milk chocolate, semi-sweet,bittersweet or combination)

Directions:
1) Line a 9 x 13-inch pan with foil, leaving enough to hang over sides for lifting. Mist foil with nonstick spray. Set aside.
2) Combine graham crumbs, sugar and 1-1/2 cups peanut butter in a large bowl and mix well. Blend in melted butter until well combined. Press mixture evenly into prepared pan.
3) Combine 2 teaspoons peanut butter and chocolate chips in top of a double boiler or in a microwave bowl. Melt and stir together. Spread over peanut butter mixture.
4) Chill until just set. Use foil handles to lift from pan. Cut into bars (these are very hard to cut if the chocolate gets "rock hard". Yield: 36 bars

Follow Me on Pinterest


One Year Ago Today: Not Your Mama's Macaroni Salad


Two Years Ago Today: Linguine with Snow Peas, Cucumbers and Peanuts


Three Years Ago Today: The Last Best Egg Cream in New Jersey


Four Years Ago Today: Very Berry Lemon and Blueberry Sweet Bread

Saturday, May 4, 2013

Kentucky Bourbon Balls for Derby Day


The changes I planed to make to the blog are nearly completed. Most of the advertising and clutter have been removed. I was beginning to feel like a carny shill and the chaos of it all was getting to me. I will continue to work with Jenn and Ben at The Foodie Blogroll and will place more emphasis on my Amazon Store in order to keep the blog self supporting, but I plan to keep clutter and advertizing to an absolute minimum. My Amazon Store, which I hope you will visit often, can be found in the pages underneath the blog header, along with some new features I hope you will enjoy or find useful. There is now a Master Recipe Index and there are pages for weekly and seasonal menus. The weekly menu will change every Sunday and the seasonal menus will change in accordance with holidays and/or the seasons. I will, at least for a period of time, be making a push to direct you to my social media sites.

When the Silver Fox and I swapped coasts, the cell phone was still in its infancy and social media was unheard of. If, while walking down the street, you encountered someone who appeared to be talking to themselves, you immediately assumed they were deranged and quickly moved on by. Nowadays, the world is has changed and a walk through a mall or a stroll down the street is akin to visiting the land of the exiled book lovers, who constantly recited their books in Fahrenheit 451. Everyone is wired and everyone seems to have a lot to say, so much so, that the cell phone proved not to be enough and Twitter and Facebook burst on the scene to fill the void. I claimed a small piece of territory in each, but didn't do much with either of them until now. That means I've fallen behind the times and I'm going to ask you to help me catch up by visiting my Facebook fan page or following me on Twitter. If you look in the column to the right of this post you'll see my Facebook fan page. Please pay me a visit. I have no idea of what I'll be doing there, but I promise you it will be great.I hope to see you there soon. Now, on to the recipe of the day.

From the kitchen of One Perfect Bite...I have a whisp of a recipe to share with you today. I'm nearly out of ideas for Derby Day and I had to dig deeply into my grab-bag to find a recipe that I hadn't already shared with you. Bourbon balls are among the easiest of cookies to make and their connection to Kentucky can't be argued. Because they are festive and simple to make I thought they'd be perfect for today. I found recipes galore for their assembly, and by process of elimination, and a boatload of bourbon, I might add, I settled on this one from Bon Appetit magazine, mainly because it was a favorite of their editorial staff. There are a few tricks to their assembly, however, and I think you'll find that all cookies of this type are easier to make if you process the dry ingredients together in a food processor so the crumbs are of uniform size. It also helps to mix the Karo syrup with the bourbon before adding the liquids to the dry mixture. If the dough is too dry to form into balls don't be afraid to add a bit more bourbon. Now,  for the part that is missing from most recipes. Once the balls are formed, let them sit for 24 hours before rolling them in powdered sugar. They can be stored in an airtight for several months, and, like a good fruit cake, they are best when aged and allowed to ripen for at least six weeks before eating. I know you will enjoy these. Here is the recipe. Bottom's up!

Kentucky Bourbon Balls...from the kitchen of One Perfect Bite inspired by Bon Appetit magazine

Ingredients:
4 cups ground vanilla wafers, about 88 wafers
1 cup ground pecans
1 cup confectioner's sugar
3 tablespoons white Karo syrup
1/2 cup good bourbon whiskey

Directions:
Mix vanilla wafers and pecans together in a food processor until fine crumbs form. Add Karo syrup and bourbon to dry mixture and process to combine. Shape into small balls, about the size of a large cherry, and roll in confectioners' sugar. Makes about 40 balls, depending on size.


Kentucky Derby Mint Julep Cake


Bourbon and Brown Butter Pound Cake


Derby Day Hot Browns and Devonshire Sandwiches


Southern Nut Cake

Sunday, February 10, 2013

Sweets for the Sweet - Chocolate Mint Fudge


From the kitchen of One Perfect Bite...I've just finished making a double batch of this fudge for a holiday bake sale. Candy has proved to be popular at the sales that are held just before Valentine's Day and this recipe is so simple that I was delighted to contribute something, especially when it is so easy to make. This is truly a no-stress confection. There are a boatload of fudge recipes floating through cyberspace. I chose this one because the use of two types of chocolate and peppermint oil or extract make it more interesting than most. I use oil rather than extract in baking because I prefer its more intense flavor, but it is important to know that one can't be substituted for the other in a one-to-one ratio. Peppermint oil is four times stronger than extract and it does not bake off when exposed to oven heat. The oil is available at farmer's markets in my area, but Ive been told it can also be ordered from the King Arthur website. You'll notice that I've used the old-fashioned method for melting chocolate. This again is a personal preference and while I often use the microwave to melt chocolate, I've found there is less chance of it seizing in this recipe when I use a double boiler and take it nice and slow. This recipe was originally developed for Taste of Home magazine and you can their version  here.  If you are looking for something simply scrumptious to prepare for Valentine's Day, you might want to give this recipe a try. Here is how the mint fudge is made.

Chocolate Mint Fudge...from the kitchen of One Perfect Bite courtesy of Taste of Home magazine

Ingredients:
1-1/2 teaspoon + 1 tablespoon butter, divided use
2 cups (12-oz.) semisweet chocolate chips
1 package (11.5-oz.) milk chocolate chips
1 can (14-oz.) sweetened condensed milk
1/8 teaspoon peppermint oil or 1 teaspoon peppermint extract
1 teaspoon vanilla extract

Directions:
1) Line a 10 x 6-inch pan with foil and grease it with 1-1/2 teaspoons butter. Set aside.
2) Melt chocolate chips and reserved 1 tablespoons butter in the top of a double boiler set over simmering water, stirring until smooth. Remove from heat and quickly stir in condensed milk and extracts, stirring until smooth. Spread into prepared pan. Refrigerate until set, about 2 hours. Using foil, lift fudge out of pan. Remove foil and cut fudge into 1-inch pieces. Store in refrigerator. Yield: 60 pieces.


One Year Ago Today: Catfish Fingers with Tomato Tartar Sauce


Two Years Ago Today: Paella fried Rice and Bread Soup


Three years Ago Today: Crumpets

Friday, April 6, 2012

Pink Popcorn


From the kitchen of One Perfect Bite...I came across this pink confection at a luncheon that was hosted by a church youth group. I thought it would make a perfect feature for Pink Saturday and might be something that anyone planning a shower or spring luncheon might want to consider. I must warn you that is more like a candy than Kettle Corn and will satisfy the cravings of even the most ravenous sweet tooth. The group that prepared this treat had a limited budget, so they used standard popcorn to make it. I'd recommend that you splurge and buy gourmet, large kernel, popcorn if you think this recipe is something you might want to try. Those with dentures and braces will appreciate your special effort. While this version of popcorn is very easy to make, you'll need a candy thermometer to gauge the readiness of the syrup used to color and flavor it. It can be made a day before serving, but the flavor is best if the corn is served shortly after it is made. This is not a treat for the sugar shy, but those with a fondness for sweets will love it. Here's the recipe.

Pink Popcorn...from the kitchen of One Perfect Bite courtesy of Nan's Recipe Spot

Ingredients:
6 quarts popped popcorn (3/4 cup kernels)
2 cups sugar
2/3 cup half & half, cream or whole milk
1 tablespoon white corn syrup
1/4 teaspoon salt
1 teaspoon vanilla
5 drops red food coloring

Directions:
Place sugar, cream, corn syrup and salt in saucepan on a medium heat. Stir well and cook until sugar has fully dissolved before allowing mixture to boil.. Continue to cook stirring occasionally until reaching 230 degrees or slightly soft ball stage. Add vanilla and food coloring. Mix well. Pour over 6 quarts of popcorn and stir until well coated. Spread out on flat surface to let dry and cool. Yield: 6 quarts.


One Year Ago Today: Portuguese White Cornmeal Bread


Two Years Ago Today: Chocolate Flans


Monday, February 13, 2012

Cherry Berry Fudge


From the kitchen of One Perfect Bite...As a child I was regularly scolded for the way I picked chocolates from a box. While I still consider it to be terribly unfair, we were expected to eat whatever we took from the box. I was about six years old when I learned a well-placed thumb in the bottom of a chocolate would assure that I didn't have to deal with the dreaded coconut or candied fruit that masqueraded as candy. As far as I was concerned, they were only a step or two above canned peas and any scolding I received was far better than having them cross my lips. I still have that aversion. The trouble is the Silver Fox does not. He loves both. Several years ago I found a really quick recipe for a chocolate and berry fudge that I make for him at this time of year. It is very easy to prepare and the type of dried fruit that is used to make it can be varied. He prefers cherry, but cranberries, blueberries or apricots can also be used. This is as straight forwarded as a candy recipe can get and if you enjoy the chocolate and fruit combination, you'll love the fudge. As for me, I find solace in turtles or chocolate covered caramels. Here's the recipe for a cherry berry fudge that's perfect for Valentine's Day.

Cherry Berry Fudge...from the kitchen of One Perfect Bite courtesy of Taste of Home Magazine

Ingredients:
2 cups (12 ounces) semisweet chocolate chips
1/4 cup light corn syrup
1/2 cup confectioners’ sugar
1/4 cup evaporated milk
1 teaspoon vanilla extract
1 package (6 ounces) dried cherries
1/3 cup chopped walnuts

Directions:
1) Line an 8-in. square pan with foil. Coat foil with cooking spray. Set aside.
2) In a heavy saucepan, combine chocolate chips and corn syrup. Cook and stir over low heat until melted. Remove from the heat.
3) Stir in confectioners’ sugar, milk and vanilla. Beat with a wooden spoon until thickened and glossy, about 5 minutes. Stir in cherries and walnuts. Spread into prepared pan; refrigerate until firm.
4) Using foil, lift fudge out of pan; discard foil. Cut fudge into 1-in. squares. Store in an airtight container in the refrigerator. Yield: 1-1/3 pounds (64 pieces).


One Year Ago Today: Turkey Meatballs with Lemon Yogurt Sauce


Two Years Ago Today: Marbled Sweetheart Sugar Cookies

Saturday, January 14, 2012

Chocolate-Covered Almonds


From the kitchen of One Perfect Bite...I have one last almond confection to share with you. I'm nearing the end of the over-sized bag of almonds I purchased at a local warehouse store, and while I've gone a bit overboard with this recipe, I keep telling myself that it's O.K. because almonds are a superfood. Due to their health properties, they have become very popular, and, as long as you don't eat too many of them, they are actually good for you. They are high in protein and they are very filling. While they are high in fat, it is a healthy monounsaturated fat that has been proven to help stave off heart disease and diabetes. They are also high in antioxidants, especially if you leave their skins on. That's the good news. The bad news is I've covered them in sugar, chocolate and cocoa to make them more festive for Valentine's Day. That probably mitigates all the good stuff I've just walked you through. Almonds prepared in this way are delicious, but they are not easy or fuss free to make. This is a three step process, so you'll need time to make and clean up after them. You will, however, be really pleased with the end result. This is a delicious confection whose parentage is questionable. Greeks and Italians both claim bragging rights. Whatever their origin, I think you'll love this Mediterranean treat. Here's the recipe.

Chocolate-Covered Almonds...from the kitchen of One Perfect Bite courtesy of D. Schubring via the Chicago Sun-Times

Ingredients:
1 pound raw almonds with skins
1 cup water
2 cups sugar
12 ounces semisweet chocolate chips
2 cups confectioners' sugar or 1 cup unsweetened cocoa

Directions:
1) Combine almonds, water and sugar in a large heavy saucepan. Bring mixture to a boil over high heat. Adjust heat to keep mixture just at a boil. Stir constantly until syrup is reduced to sand, about 20 minutes. All of the water will evaporate and the sugar "sand" will adhere to the almonds. Remove pan from heat.
2) Spread sugared almonds on a baking sheet and place in refrigerator or freezer until cool.
3) Place chocolate in top of a double boiler and gently melt until chocolate reaches 88 degrees.
4) When almonds are cool, break off excess clumps of sugar and place half of them in a large mixing bowl. Pour half of melted chocolate over them, and stir until almonds are fully coated, separated and have cooled. Place chocolate-covered almonds on a wax paper-lined baking sheet and set aside. Repeat with remaining almonds.
5) Place one batch of almonds in a medium bowl. Top with half of cocoa or powdered sugar. Toss to coat and separate almonds. When completely covered transfer to a baking sheet. Repeat procedure with remaining almonds. Store in an airtight container or freezer if not to be served immediately.


One Year Ago Today: Crock-Pot Golden Mushroom Soup


Two Years Ago Today: Warm Beef and Cheese Dip with Pecans

Monday, January 9, 2012

Nutella and Hazelnut Fudge


From the kitchen of One Perfect Bite...This simple recipe for Nutella fudge is a bit different than the one that was so popular on blogs during the run-up to the Christmas holiday. This version was developed by Elizabeth LaBau who writes the candy guide at About.com. It's a nice recipe and with Valentine's Day just ahead of us, I thought those of you who make candy for your sweet things might like to see the recipe before V-Day actually arrives. This fudge is made with Nutella and it gets an added flavor boost from the addition of toasted hazelnuts. Hazelnuts, or filberts, if you prefer, are a major crop in the state of Oregon, so I use them a lot in my cooking. As a matter of fact, I like them well enough to go for extra flavor whenever I can, so I use hazelnut rather than vanilla extract when I make this fudge. I realize that most of you live in areas where hazelnut extract can't be found. If you'd like to try it, a quick "google" search will return several sources from which it can be ordered. This fudge is fine when made with vanilla but its flavor is really enhanced by the addition of the hazelnut extract. It is smooth and creamy and if you like fudge, you'll like this version. Here's how it is made.

Nutella and Hazelnut Fudge
...from the kitchen of One Perfect Bite courtesy of Elizabeth LaBau

Ingredients:
1-1/2 cups granulated sugar
2/3 cup evaporated milk
2 tablespoons butter
1/2 teaspoon salt
1-1/2 cups (9-oz.) semi-sweet chocolate chips
1 (7-oz.) jar marshmallow cream
1 cup chocolate-hazelnut spread, like Nutella
1 teaspoon vanilla extract or 1-1/2 teaspoons hazelnut extract
1/2 cup chopped toasted hazelnuts (optional)

Directions:

1) Prepare an 8x8 pan by lining it with aluminum foil and spraying foil with nonstick cooking spray.
2) Place sugar, evaporated milk, butter, and salt in a medium saucepan over medium-high heat. Stir until sugar and butter dissolve, then wash down sides of pan with a wet pastry brush to prevent sugar crystals from forming.
3) Insert a candy thermometer into syrup and cook, stirring constantly, until temperature reaches 236 degrees F (113 C). If you are not using a candy thermometer, bring candy to a rapid boil for 5 minutes.
4) After it reaches 236 F, or 5 minutes of boiling, remove pan from heat and add chocolate chips, stirring until they're completely melted.
5) Next add marshmallow cream, Nutella, and vanilla extract, and stir until everything is well-mixed. Add chopped toasted hazelnuts last, if you're using them.
6) Scrape fudge into prepared pan and smooth it into an even layer. Allow fudge to sit at room temperature to firm up, for about 2 hours, or refrigerate for 45 minutes.
7) Once set, remove fudge from pan using foil handles. Cut it into small 1-inch pieces to serve. Store in an airtight container at room temperature for up to two weeks.


One Year Ago Today: Lamb Chops with Pomegranate Glaze


Two Years Ago Today: Ravioli with Smoked Salmon and Vodka Sauce

Monday, December 19, 2011

Peanut Brittle


From the kitchen of One Perfect Bite...It took two attempts, but I finally got this lovely recipe right. While it didn't burn first time through, I was distracted and let the brittle get ahead of me. It turned a dark and unappealing color that looked burned and would prevent folks from trying it, despite its lovely taste. Rather than waste the batch, I put it into the blender and made a praline-type powder to use for flavoring and decorating other pastries.Then I took the phone off the hook and set to work again. The Silver Fox loves brittle, and when I saw the candy Dave and Sarah Eickelberg made using a treasured family recipe, I was determined to duplicate their results. They have a step by step tutorial that will make easy work of this, should you decide to give their recipe a try. The tutorial can be found here and I'm happy to report that second time through was a charm. This is a lovely brittle and candy lovers will be delighted with the results. You will, however, need a candy thermometer to make this properly. I used salted peanuts, so I ended up with a sweet and salty combination that is almost irresistible. Those of you who love sweet things will love this recipe. Here's how the brittle is made.


Peanut Brittle
...from the kitchen of One Perfect Bite courtesy of Dave and Sarah Eickelberg

Ingredients:
2 cups sugar
1 cup light corn syrup (i.e.Karo)
1/2 cup water
2 sticks (1 cup) of butter
3 cups roasted peanuts
1 teaspoon vanilla extract
1 teaspoon baking soda

Directions:

1) Combine sugar, corn syrup and water in a 3 quart saucepan. Cook and stir on medium to medium-high heat until sugar dissolves. When syrup begins to boil, blend in butter.
2) Stir frequently after mixture reaches the syrup stage (230 degrees F).
3) Add nuts when temperature reaches soft-crack stage (280 degrees F).
4) Stir constantly until temperature reaches hard-crack stage (305 degrees F).
5) Remove pan from heat. Quickly stir in baking soda and vanilla, mixing thoroughly. Pour onto two cookie sheets, sprayed with cooking spray. Stretch mixture evenly across pan using the back of a metal spoon, sprayed with cooking spray.
6) After brittle cools (30-45 minutes), remove from pan and break into pieces.


One year Ago Today: Quick Bread Round-Up


Two Years Ago Today: Moravian Spice Cookies

Saturday, December 17, 2011

Candied Almonds + Giveaway Winner


The winner of the National Pork Board Small Plate giveaway is Pondside. The entry was selected by a random number generator using numbers that ranged from 1 to 186. Details can be seen at the end of this post. Pondside, please contact me with mailing information. Congratulations!

From the kitchen of One Perfect Bite...I keep these candied almonds on hand during the Christmas holiday. They are delicious and very simple to prepare. They add some variety to the usual cookie tray and they're healthier than many of the snacks we serve and eat at this time of year. The recipe is straight forward and you should have no trouble making them as long as you keep the almonds in a single layer as they dry. They keep well and can be stored in an airtight jar for several weeks. Here's the recipe.

Candied Almonds...from the kitchen of One Perfect Bite

Ingredients:
3 cups whole natural almonds
1/4 cup honey or maple syrup
2 tablespoons butter
1 cup brown sugar
1 tablespoon ground cinnamon
1/4 teaspoon salt

Directions:
1) Place almonds on a baking sheet and set them into a cold oven.
2) Turn oven temperature to 350 degrees. Bake almonds for 15 to 20 minutes, stirring occasionally, so they brown on all sides. Remove from oven.
3) Combine butter and honey in a 2 to 3 quart saucepan set over medium heat. Bring mixture to a boil. Lower heat and cook for 2 minutes longer. Add roasted almonds and stir to coat well. Cook for 2 minutes longer. Using a slotted spoon transfer almonds to waxed paper to cool.6
4) Combine sugar, cinnamon and salt in a large bowl. Stir in almonds and toss until coated well.
5) Arrange almonds in a single layer on a cookie sheet that has been covered with a non-stick cooking spray.
6) Place baking sheet with almonds under broiler for a minute or two to melt and caramelize sugar.
7) Transfer almonds to waxed paper to cool. Store in an airtight container. Yield: 3 cups.

True Random Number Generator 65


One Year Ago Today: Bean Burgers


Two Years Ago: Pan de Polvo

Tuesday, December 6, 2011

Peppermint Bark


Then


Now


From the kitchen of One Perfect Bite...Once upon a time there was a city that had a street that held a store that had a restaurant where the world's most beautiful Christmas tree stood. It happened that each year a parade was held to welcome a visitor from the polar region to the store that held the tree. Once inside, the old and red-robed guest held court in a kingdom where he had a throne surrounded by a train in which the young could ride, and an assembly of gnomes and fairies and candy canes that danced at his command. His council was sought by the well-dressed young and he was in great demand. There would, of course, be a private visitations, but before that could happen there were blocks of decorated windows in need of review, and a lunch to be had in that huge room with the magical tree. It was a day wondrous in every way and it is remembered so, even to this day.

My lovely memory of Christmas past was rudely jarred this past weekend and I'm putting Santa on report. I don't want to hear the world has changed or that times are different. Santa has clearly dropped the ball and some attitude adjustment is in order. What happened to the dress code? How can one pour out their collective soul to someone in pajamas and suspenders? That's not the worst of it. With a line that stretched clear to the high dessert, Santa decided to take an unscheduled coffee break, over and above the ones that are mandated by his union. The line, already packed with bored and tired tots, turned really ugly and Santa got exactly what he deserved on his return. I'm told photo sales for the day were down.

I needed something to sweeten my disposition after our outing and I had a new recipe for peppermint bark that I wanted to try. It uses light and dark chocolate and it sounded more interesting than the recipe I've been using. Bark is one of the easiest recipes in the Christmas repertoire. It is nothing more than melted chocolate into which peppermint candy is pressed. Over the years I've learned a trick that makes it really easy to make. Adding a 1/2 teaspoon of shortening to every ounce of chocolate makes it easier to spread. I'm told that butter or margarine, because of their water content, cannot be used in its place. Melted chocolate will seize if it comes in contact with liquids. Chocolate that has seized can sometimes be brought back by using shortening as well. I really like the new bark recipe and if you make candy for the holidays you might want to give it a try. Here's the recipe.

Peppermint Bark...from the kitchen of One Perfect Bite courtesy of ChefsCatalog.com

Ingredients:
12-oz. high quality semi sweet chocolate
1 pound white chocolate (with cocoa butter)
1/2 teaspoon peppermint extract
3/4 cup candy canes or peppermint candy, crushed

Directions:
1) Place candy canes or peppermint candies in mini-food processor and pulse until in
small pieces. Set aside.
2) Line a 15 x 10 jelly roll pan with foil, letting it hang over the sides. Grease foil
with nonstick spray. Melt chocolate chips in a double boiler over medium-low heat.
Pour evenly into jelly roll pan and smooth with an offset spatula. Sprinkle with 1/4
cup peppermint candy. Place in refrigerator until cold and firm.
3) Heat white chocolate chips in a double boiler over medium-low heat until chocolate is
almost melted. Remove double boiler insert from pan and stir until completely melted.
Stir in extract. Cool slightly. Pour this over chocolate layer, and, working quickly,
spread to cover. Sprinkle with 1/2 cup crushed candy. Lightly press it in.
4) Chill until both layers are firm. Lift foil out of pan and shake off excess candy.
Peel foil from bottom of peppermint bark. Trim edges. Cut into 2" squares. Yield: 2 pounds.


One Year Ago Today: Broccoli and Cheddar Cheese Soup


Two Years Ago Today: Meatball Sub with Homemade Sicilian Sausage
Related Posts with Thumbnails

Printfriendly