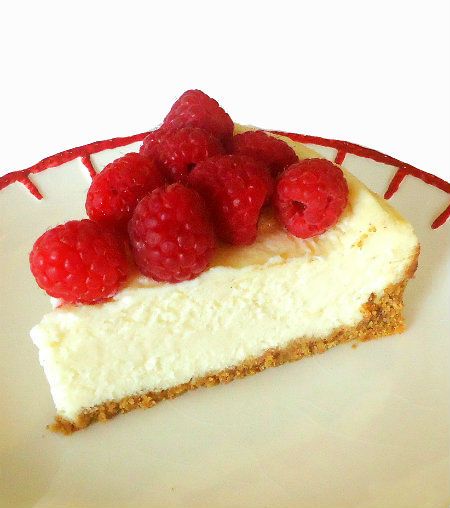
Showing posts with label cheesecake. Show all posts

Sunday, December 1, 2013

Countdown to Christmas - Eggnog Cheesecake


From the kitchen of One Perfect Bite...I hope you enjoy the holiday season as much as I do, because if all goes according to plan, I'll be featuring a seasonal recipes each day until Christmas actually arrives. The recipes I'll be sharing are associated with the Christmas season as it's celebrated in the United States and other countries that have strong holiday traditions that include special foods that are served with the Christmas feast. The first feature in the series is actually my second best eggnog cheesecake. It's the one I make for meetings or communal gatherings where what is served is not as important as the socialization the affair provides. This is a near effortless cake that is made seasonal by including eggnog in the mix. The cake also contains a small amount of rum which gives it a bit of additional flavor. While many cooks like to use rum extract in recipes such as this, I prefer to use the real thing. I find the taste of the extract to be off-putting and it lingers unpleasantly on my tongue, so I avoid its use whenever I can. This cake is super simple to make and it can be prepared and frozen weeks before you need it. I like to serve this with rum flavored whipped cream which adds a festive air and helps to mask the simplicity of this lovely cheesecake. Here is how it is made.

Eggnog Cheesecake...from the kitchen of One Perfect Bite inspired by Taste of Home

Ingredients:
Crust
1 cup graham cracker crumbs
2 tablespoons sugar
3 tablespoons butter, melted
Filling
3 packages (8 ounces each) cream cheese, softened
1 cup sugar
3 tablespoons all-purpose flour
2 large eggs, lightly beaten
3/4 cup commercial eggnog
1 tablespoon dark rum
Dash ground nutmeg

Directions:

1) Place a greased 9-inch springform pan on a double thickness of heavy-duty foil. Securely wrap foil around pan. Preheat oven to 325 degrees F.
2) In a small bowl, combine cracker crumbs, sugar and butter. Press onto bottom of pan. Place on a baking sheet. Bake for 10 minutes. Cool on a wire rack.
3) In a large bowl, beat cream cheese, sugar and flour until smooth. Add eggs and beat on low speed just until combined. Gradually stir in eggnog, rum and nutmeg. Pour filling over crust. Place springform pan in a large baking pan. Add 1 inch of hot water to larger pan.
4) Bake for 45-50 minutes or until center is just set and top appears dull. Remove springform pan from water bath. Cool on a wire rack for 10 minutes. Carefully run a knife around edge of pan to loosen. Cool 1 hour longer. Refrigerate overnight. Serve with a dollop of rum whipped cream. Yield: 12-16 servings.

Rum Whipped Cream

Ingredients:
1 cup heavy cream
3 tablespoons sugar
1/2 teaspoon vanilla
1 tablespoon dark rum

Directions:
Combine all ingredients and whip until soft peaks form.

Follow Me on Pinterest      

                                                    Older Posts


                  One Year Ago Today:                                                      Two Years Ago Today:
              Peruvian Pumpkin Soup                                                    Enchiladas con Huevos                  


           Three Years Ago Today:                                                                    Four Years Ago Today: 
        Southwestern Skillet Chicken                                                              Old-World Rye Bread

Sunday, November 17, 2013

Pumpkin Cheesecake


From the kitchen of One Perfect Bite...If you are planning a traditional holiday meal, but would like to present classic Thanksgiving desserts in a new light, this silky seasonal cheesecake is a perfect place to start. The gingersnap crust is a perfect foil to the creamy pumpkin custard and I'm happy to report that the combination of crust and custard is simply delicious. The cake keeps well and it can be made and frozen for up to a week a week before you plan to serve it. If you freeze the cake, it will need to sit a full day in the refrigerator to thaw. I found the recipe for the cheesecake in Taste of Home magazine and they recommend a variety of garnishes that can be used when you serve the cake. Among them were caramel and chocolate syrup, as well as whipped cream and a dusting of crushed gingersnaps. I personally think the syrups are unnecessary and in the future I'll stick to a dollop of cream and let it go at that. The cake, obviously, is very rich, so small portions should suffice, especially if you plan to serve it at the end of a meal. While it is suggested the cake serves 12, it can be stretched to feed 16. This is a nice alternative to pumpkin pie and I do hope you'll give it a try. Here is how it is made.


Pumpkin Cheesecake...from the kitchen of One Perfect Bite courtesy of Taste of Home magazine

Ingredients:
1 cup crushed gingersnap cookies (about 20 cookies)
1/3 cup finely Diamond of California Chopped Pecans
1/4 cup butter, melted
4 packages (8 ounces each) cream cheese, softened, divided
1-1/2 cups sugar, divided
2 tablespoons cornstarch
2 teaspoons vanilla extract
4 eggs
1 cup canned pumpkin
2 teaspoons ground cinnamon
1-1/2 teaspoons ground nutmeg

Directions:
1) Place a greased 9-inch springform pan on a double thickness of heavy-duty foil (about 18-inches square). Securely wrap foil around pan. Preheat oven to 350 degrees F.
2) In a small bowl, combine the cookie crumbs, pecans and butter. Press onto the bottom of prepared pan. Place on a baking sheet. Bake 8-10 minutes or until set. Cool on a wire rack.
3) For filling, in a large bowl, beat 1 package of cream cheese, 1/2 cup sugar and cornstarch until smooth, about 2 minutes. Beat in remaining cream cheese, one package at a time until smooth. Add remaining sugar and vanilla. Add eggs; beat on low speed just until combined.
4) Place 2 cups filling in a small bowl; stir in the pumpkin, cinnamon, and nutmeg. Remove 3/4 cup pumpkin filling; set aside. Pour remaining pumpkin filling over crust; top with remaining plain filling. Cut through with a knife to swirl. Drop reserved pumpkin filling by spoonfuls over cheesecake; cut through with a knife to swirl.
5) Place springform pan in a large baking pan; add 1 inch of hot water to larger pan. Bake for 55-65 minutes or until center is just set and top appears dull. Remove springform pan from water bath. Cool on a wire rack for 10 minutes. Carefully run a knife around edge of pan to loosen; cool 1 hour longer. Refrigerate overnight.
6) To serve, garnish if desired with whipped cream and crushed gingersnaps. Yield: 12 servings.


Follow Me on Pinterest      

                                                    Older Posts


                  One Year Ago Today:                                                     Two Years Ago Today:
     Cheese and Cornmeal Batter Buns                                     Julia's Curried Turkey Soup


               Three Years Ago Today:                                                     Four Years Ago Today: 
                         Alu Ki Tikki                                                                           Anadama Rolls


Sunday, November 10, 2013

Butterscotch Cheesecake


From the kitchen of One Perfect Bite...I've been searching for a new dessert to serve for the holidays and I finally found one that makes my socks go up and down. I can't wait to share it with my family and friends and I think that those of you love the flavor of butterscotch and the creamy texture of cheesecake are in for a real treat. This cake is really special. While it is very rich, when served in small portions it's a wonderful way to end a special meal. The recipe is straightforward, and, like all cheesecakes, this one is very easy to make. The only caution I have to share with you regards its propensity to stick to the pan. The springform pan you use must be well-greased and the cake itself should be released from the sides of the pan with a knife about ten minutes after it is taken from the oven. The trick here is releasing the sides of the cake without removing the springform ring. The soft cake needs a thorough chilling to firm, so I leave it in the pan to assure it keeps its shape and is not unduly nicked or gouged while in the refrigerator. This cake freezes well and can be made a week or so before it is to be served. That's always good news for the holiday hostess. For best results, the frozen cake should be allowed to thaw overnight in the refrigerator. I really hope you'll give this recipe a try. I'd love to have your feedback on this one. Here is how the cake is made.


Butterscotch Cheesecake...from the kitchen of One Perfect Bite courtesy of Taste of Home magazine

Ingredients:
1-1/2 cups graham cracker crumbs
1/3 cup packed brown sugar
1/3 cup butter, melted
1 can (14 ounces) sweetened condensed milk
3/4 cup cold 2% milk
1 package (3.4 ounces) instant butterscotch pudding mix
3 packages (8 ounces each) cream cheese, softened
1 teaspoon vanilla extract
3 eggs, lightly beaten
Optional garnish: whipped cream and crushed butterscotch candies

Directions:
1) Preheat oven to 325 degrees F. Place a well-greased greased 9-in. springform pan on a double thickness of heavy-duty foil (about 18-in. square). Securely wrap foil around pan.
2)  In a small bowl, combine cracker crumbs and sugar; stir in butter. Press onto bottom of prepared pan. Place pan on a baking  sheet  and bake for 10 minutes. Cool on a wire rack.
3) In a small bowl, whisk both milks and pudding mix for 2 minutes. Let stand for 2 minutes or until soft-set.
4) Meanwhile, in a large bowl, beat cream cheese until smooth. Beat in pudding and vanilla. Add eggs and beat on low speed just until combined. Pour over crust. Place springform pan in a large roasting pan. Add 1-inch  of hot water to larger pan.
5) Bake  for 65-75 minutes or until center is almost set and top appears dull. Remove springform pan from water bath. Cool on a wire rack for 10 minutes. Carefully run a knife around edge of pan to loosen; cool 1 hour longer. Remove ring and refrigerate overnight. Garnish with whipped cream and
butterscotch candies if desired. Yield: 12 servings.

Follow Me on Pinterest      

                                                    Older Posts


                  One Year Ago Today:                                                 Two Years Ago Today:
                Peruivian Causa Rellena                                               Oven Roasted Cauliflower
                  

               Three Years Ago Today:                                                     Four Years Ago Today: 
                Manhattan Clam Chowder                                    Polpettone - Tuscan Stove-Top Meatloaf

Sunday, July 7, 2013

Chocolate Truffle Cheesecake


From the kitchen of One Perfect Bite...I love cheesecakes and over the years I've amassed an embarrassing number of recipes for them. As a young cook, I instantly recognized how easy they were to make, so they appeared with great regularity at my table. With the passage of time, however, my metabolism slowed, calories became a concern and I served them less frequently. That being said, I probably should fess up and tell you, that despite that, there is almost always a cheesecake in my freezer. It's my fail safe for feeding unexpected guests or supplying refreshments for last minute meeting requests. I'm always on the lookout for new cheesecakes and while browsing through recipe blogs, I came across one for a chocolate truffle cheesecake on a blog called Moogie and Pap. The recipe first appeared on the Hershey's website, so I knew that the cake would  have intense chocolate flavor that I hoped would meld into the creaminess that is associated with cheesecake.  I made the cake immediately and it has been in my files ever since. There are a couple of tricks that will help to make this cake as pretty as it is tasty. To prevent cracking, you'll want to put a pan of boiling water on the floor of your oven. If the cake, particularly the brownie layer, is allowed to overcook, it can be difficult to slice. I make it a point to use the lower time limit suggested for baking this cake because we like it moist. You'll probably have to experiment to see how well-done you want the cake to be. If you like chocolate and are also a cheesecake addict, you'll love the creamy richness of this cake. Here is how it is made.

Chocolate Truffle Cheesecake...from the kitchen of One Perfect Bite courtesy of Hershey's Kitchen

Ingredients:
Brownie Layer
6 tablespoons melted butter or margarine
1-1/4 cups sugar
1 teaspoon vanilla extract
2 eggs
1 cup plus 2 tablespoons all-purpose flour
1/3 cup Hershey's cocoa
1/2 teaspoon baking powder
1/2 teaspoon salt
Cheesecake Layer
3 packages (8 ounces each) cream cheese, softened
3/4 cup sugar
4 eggs
1/4 cup heavy cream
2 teaspoons vanilla extract
1/4 teaspoon salt
2 cups (12 ounce package) Hershey's Special Dark Chocolate Chips, divided
1/2 teaspoon shortening (do not use butter, margarine, spread or oil)

Directions:
1)  Heat oven to 350 degrees. Grease 9-inch springform pan.
2)  To make brownie layer: Stir butter, sugar, and vanilla together in a large bowl.. Add eggs and stir until blended.  Stir in flour, cocoa, baking powder and salt. Mix well. Spread mixture in prepared pan.
Bake for 25 to 30 minutes , or until brownie layer pulls away from sides of pan.
3) While brownie layer bakes make cheesecake layer. Beat cream cheese and  sugar with an electric mixer
3. Meanwhile for Truffle Cheesecake Layer: In a bowl of an electric mixer, beat cream cheese and sugar on medium speed until smooth. Gradually beat in eggs, heavy cream, vanilla and salt until well blended. Set aside 2 tablespoons chocolate chips. Microwave remaining chocolate chips on Medium temperature for 1-1/2 minutes, or until chips  are melted and smooth when stirred. Gradually blend melted chocolate into cheesecake batter.
3) When brownie layer is done, remove it from oven and immediately spoon cheesecake mixture over it. Return to oven and continue  baking for 45 to 50 minutes or until center is almost set. Remove from oven to wire rack. With knife, loosen cake from side of pan. Cool to room temperature. Remove side of pan. 
4) Place remaining 2 tablespoons chocolate chips and shortening in small microwave-safe bowl. Microwave at Medium for 30 seconds or until chips are melted and mixture is smooth when stirred. Drizzle over top of cheesecake. Cover; refrigerate several hours until cold. Garnish as desired. Cover and refrigerate leftover cheesecake. Yield: 8 to 10 servings.


If you have enjoyed your visit here, I hope you'll take a minute to...

Follow Me on Pinterest      


One Year Ago Today: Tortilla Pie


Two Years Ago Today: Sour Cherry Crumb Cake


Three Years Ago Today: Rosemary Aioli


Four Years Ago Today: Shrimp Toast

Tuesday, May 7, 2013

Layered Mocha Cheesecake


My Thought for the Day can be found, here. If you like it, please let us know with an official  thumbs up.

From the kitchen of One Perfect Bite...I've been testing new recipes for Mother's Day and I've found a handful that I think are good enough to share with you. The cheesecake I'm featuring tonight is truly a keeper, but I must warn you that it is extraordinarily rich. The cake is not hard to make, but it is time consuming and, as these things go, expensive to make. That being said, if you have time and money, and weigh in between 100 to 110 pounds, you owe it to yourself to give this recipe a try. The cake is absolutely delicious. Normally, I send test recipe results down the hill to our teenage neighbors. The Silver Fox, who can put squirrels to shame when it comes to hoarding, nixed that plan and commandeered the cake for God,  country and himself. It's best not to ask about order of preference. At any rate,  he has frozen the cake, and convinced himself that it is for sustenance.  He'll be able to live for months off the girth that "sustenance"  adds to his midsection.  Calories aside, if you enjoy the coffee and chocolate combo. you'll really love this cheesecake.. Here is how it's made.


Layered Mocha Cheesecake...from the kitchen of One Perfect Bite courtesy of taste of Home Baking Cookbook

Ingredients:
Crust
1-1/2 cups Oreo cookie crumbs
1/4 cup butter, melted
Filling
2 tablespoons + 1-1/2 teaspoons instant coffee granules
1 tablespoon hot water
1/4 teaspoon ground cinnamon
4 packages (8 ounces each) cream chesse, softened
1-1/2 cups sugar
1/4 cup all-purpose flour
2 teaspoons vanilla extract
4 eggs, lightly beaten
2 cups (12 ounces) semisweet chocolate chips, melted and cooled
Glaze
1/2 cup semisweet chocolate chips
3 tablespoons butter
Chocolate-covered coffee beans, optional

Directions:
1) Preheat oven to 325 degrees F. Grease a 9-inch springform pan. Place it on a double thickness of heavy-duty  foil (about 18-inches square). Carefully wrap foil around pan.
2) Mix cookie crumbs and melted butter together in a small bowl.  Press crumbs onto bottom of prepared pan.
3) Mix  coffee granules, hot water and cinnamon in another small bowl. Set aside.
4) Combine cream cheese, sugar, flour and vanilla in the bowl of an electric stand mixer. Beat until smooth. Add eggs and beat on low speed just until combined.
5) Divide batter in half. Stir melted chocolate into one portion and pour over crust.  Stir coffee mixture into remaining batter and spoon it over chocolate layer.
6) Place springform pan in a large baking pan. Transfer to oven rack. Add 1-inch of hot water to larger pan. Bake for 60 to 65 minutes or until center is just set and top appears dull. Remove springform from water bath to a wire cooling rack. Carefully remove foil and let cake sit for 10 minutes. Loosen sides of cake  with a knife, but do not release spring or remove cake from pan. Let cool for  1 hour longer. Refrigerate overnight.
7) Just before serving, melt chocolate chips and butter in microwave and stir until smooth. Release sides of pan and remove ring. Spread glaze over top of cake. Decorate rim with coffee beans if desired. Yield: 16 servings.  


Two Years Ago Today: Hot Browns and Devonshire Sandwiches


Three Years Ago Today: Grilled Asian Eggplant wit Soy-Ginger Glaze


Four Years Ago Today: Yogurt Cheesecake

Sunday, August 5, 2012

Crock-Pot Cheesecake


From the kitchen of One Perfect Bite...If men climb mountains because they're there, is it fair to say that cooks try new recipes for the same reason? I suspect so. You all know I have a special weakness for cheesecake. It's been featured here over a dozen times and I'm still not ready to let it rest. When the recipe for this one appeared on my radar, my curiosity was piqued. I've used a slow cooker for many things, but never dreamed of using it to make a real dessert. This cheesecake sounded like a perfect dish with which to begin my experiments. The recipe was developed by Beth Hensberger for Food and Wine magazine. Beth creates wonderful recipes and the magazine keeps me current and connected to the cooking mainstream, so I knew the recipe would, at the very least, be sound. The cheesecake looked delicious and a quick scan of the ingredient list confirmed just how easy it would be to make. I decided to use low-fat dairy products in the cake, and, because too much of it can be harsh, I cut the quantity of almond extract in half. I replaced the missing portion with a teaspoon of good vanilla. The recipe featured below does not reflect the changes that I made. I was pleasantly surprised by this cheesecake. While the top of the cake forms a caldera, it can be filled with berries and the finished product is quite attractive and guest-worthy. I know that those of you who try this recipe will be really pleased with the results. Its size makes it perfect for today's smaller families and the use of low-fat dairy products keeps calories reasonably under control. I hope you, too, will give this cheesecake a try. Here's how it is made.

Crock-Pot Cheesecake...from the kitchen of One Perfect Bite courtesy of Beth Hensberger and Food and Wine Magazine

Ingredients:
3/4 cup graham cracker crumbs
2 1/2 tablespoons unsalted butter, melted
1/4 teaspoon cinnamon
2/3 cup plus 1 tablespoon sugar
Salt
12 ounces cream cheese, at room temperature
1 tablespoon all-purpose flour
2 large eggs
1 teaspoon pure almond extract
1 cup sour cream

Directions:
1) Mix graham cracker crumbs with melted butter, cinnamon, 1 tablespoon of the sugar and a pinch of salt in a medium bowl. Press crumbs over the bottom and 1 inch up the side of a 6-inch springform pan that's 3 inches deep. I used an 8-inch springform pan.
2) In a standing mixer fitted with a paddle, combine cream cheese, flour, remaining 2/3 cup of sugar and 1/4 teaspoon of salt. Beat at medium-high speed until smooth, about 2 minutes. Scrape down sides of bowl, add eggs and almond extract. I used a combination of 1/2 teaspoon almond and 1 teaspoon vanilla extract. Beat at medium speed until blended. Add sour cream and beat until smooth. Pour batter into springform pan.
3) Fill a 6- to 7-quart round or oval slow cooker with 1/2 inch of water and position a rack in bottom. I used boiling water and jury rigged a rack with wads of aluminum foil. Set cheesecake on rack. Cover slow cooker with a triple layer of paper towels, then cover towels with lid. Turn cooker to high and cook for 2 hours without peeking. DO NOT PEEK. Turn off heat and let stand until slow cooker has cooled, 1 hour.
4) Remove lid and paper towels and transfer cheesecake to a rack to cool to room temperature, about 1 hour. Cover cheesecake with plastic wrap and refrigerate until chilled, at least 4 hours.
5) Heat a sharp, thin-bladed knife under hot water; dry knife. Carefully run the knife around edge of the cheesecake. Release the spring and lift cheesecake out of the mold. Cut into wedges and serve decorated with berries, if desired. Yield: 6 to 8 servings.


One Year Ago Today: Shrimp and Grapefruit Cocktail


Two Years Ago Today: Broccoli and Cauliflower Gratin


Three Years Ago Today: Onion and Fennel Bisque

Thursday, May 24, 2012

Rhubarb Cheesecake Squares


From the kitchen of One Perfect Bite...This is a nice dessert to make when rhubarb and the tart berries of early summer come to market. These bars are not terribly sweet, so if you have a demanding sweet tooth,  you'll probably want to increase the amount of sugar used in the cream cheese filling.  I like to vary the fruit that's used to flavor these bars, and I  freely swap  raspberries or cherries for the rhubarb that is typically used to make them. I have a real weakness for cheesecake, so I'm especially appreciative of recipes that allow the cake to be served in smaller, more figure friendly portions. It's my hope that one day I'll  actually  develop the  discipline needed to stop at one piece. I really think you'll enjoy these. They are easy to make and they can be made a day or two before you plan to serve them.  I hope you'll give them a try. Here's the recipe.

Rhubarb Cheesecake Squares...from the kitchen of One Perfect Bite courtesy of Betty Crocker

Ingredients:
Crumb Crust
2-1/2 cups all-purpose flour
2 cups quick-cooking or old-fashioned oats
1 cup packed brown sugar
1 cup butter or margarine, softened
1/2 teaspoon salt
1/2 teaspoon baking soda
Filling
3 packages (8 ounces each) cream cheese, softened
3 eggs
3/4 cup granulated sugar 
1 teaspoon vanilla
2 cups chopped fresh rhubarb, raspberries or sour cherries

Directions:

1) Heat oven to 350 degrees F. Grease bottom and sides of jelly roll pan, 15-1/2 x 10-1/2 x 1 inch, with shortening, or spray with cooking spray.
2) Beat flour, oats, brown sugar, butter, salt and baking soda in large bowl with electric mixer on medium speed until crumbly, or mix with spoon. Press about 4 cups of the mixture in pan. Reserve remaining crumbs.
3) Beat cream cheese, eggs, sugar and vanilla in a large bowl with electric mixer on medium speed until blended. Stir in rhubarb. Spread over crust. Sprinkle with remaining crumb mixture. Press lightly.
4) Bake 40 to 50 minutes or until center is set. Transfer pan to a wire cooling and let sit for 30 minutes. Cover and refrigerate at least 3 hours but no longer than 48 hours. For bars, cut into 10 rows by 6 rows. Yield: 60 bars. Store covered in refrigerator.


One Year Ago Today: Stir-Fried Asparagus with Salted Cashews and Ginger


Two Years Ago Today: Creamy Onion and Blue Cheese Soup


Three Years Ago Today: Blueberry Salsa


Tuesday, April 3, 2012

Lemon and Cream Cheese Pie


From the kitchen of One Perfect Bite...I wanted to share this lovely cheese pie with those of you who have not yet settled on a holiday dessert. It is smooth and creamy and tart enough to please the most demanding lemon lover who might sit at your table. It has the added advantage of being really fast and really easy to prepare. The recipe was developed by Maida Heatter, so you know it will be good enough for your most discriminating taster. I have included her recipe for a crumb crust as well, and while I encourage you to use it, if you are short of time a prepared crust can be substituted. If you have all the filling ingredients at room temperature the pie can be oven ready in 10 minutes. It has a soft, creamy filling that needs to be thoroughly chilled before serving. I suggest you make the pie the day before you plan to serve it. This pie also freezes well, so it can be made days before you actually need it. If you have not yet tasted this tart and creamy treat, I hope you will give it a try. Here's the recipe.

Graham Cracker Crust...from the kitchen of One Perfect Bite courtesy of One Perfect Bite

Ingredients:
1-1/4 cups graham cracker crumbs
1 tablespoon sugar
1 teaspoon cinnamon
1/2 teaspoon nutmeg
1/2 teaspoon ground ginger
Pinch of allspice
3 ounces ( 3/4 stick) unsalted butter, melted

Directions:
Mix together ingredients until moistened. Press into a 9-inch pie plate. Bake at 325 degrees for 10 minutes to set the crust.


Lemon and Cream Cheese Pie...from the kitchen of One Perfect Bite courtesy of Maida Heatter

Ingredients:
Finely grated zest of 1 lemon
3 tablespoons lemon juice
3/4 cup ricotta cheese
8 ounces cream cheese, at room temperature
3/4 cup sugar
1/2 teaspoon vanilla extract
2 eggs
Graham cracker crust (recipe above)
Fresh berries for garnish

Directions:
1) Adjust a rack to middle of the oven and preheat oven to 350 degrees F.
2) Mix zest and juice and set aside. In a processor fitted with the metal chopping blade, blend ricotta cheese until it is perfectly smooth, about 1 minute.
3) In bowl of an electric mixer beat cream cheese until it is perfectly smooth. Add ricotta cheese and beat to mix. Then add sugar, vanilla and eggs one at a time, scraping bowl with a rubber spatula and beating until smooth after each addition.
4) When filling is perfectly smooth, stir in the lemon rind and juice, and pour into prepared graham cracker crust.
5) Bake 30 minutes, or until set. Remove from oven. Allow to cool to room temperature. Refrigerate for 8 to 24 hours. Garnish with fresh berries for serving. Yield: 1 9-inch pie.


One Year Ago Today: Peanut Butter Snack Cake with Banana Buttercream Frosting


Two Years Ago Today: Apricot Souffle


Sunday, February 26, 2012

White Chocolate and Raspberry Cheesecake


From the kitchen of One Perfect Bite...The combination of tangy cream cheese and raspberries is enough to make the angels sing. Add white chocolate to the mix and watch the gods descend Mt. Olympus to search for that mortal ambrosia called cheesecake. To understand my exuberance you have to taste the cake. I know, I know. You are absolutely right. It is ridiculously expensive and time consuming to make. While I can argue its merits, I can't deny it's a near perfect example of wretched excess. That being said, I still hope you will try this when you have some time. Plan to make this a full 24 hours before you plan to serve it. This is a very creamy cake and it is difficult to cut if not properly chilled. The cake can be frozen weeks ahead of time but the glaze should be applied just before serving. I cut the cake in these picture while it was frozen to assure neat slices. Forgive my cheat. Here's the recipe for one of the best cheesecakes I've ever tasted. I know you'll enjoy it.

White Chocolate Raspberry Cheesecake...from the kitchen of One Perfect Bite inspired by The Baking Pan

Ingredients:
Vanilla Cookie Crust:
1 cup vanilla wafer cookie crumbs
1/2 cup toasted almonds, finely chopped
4 tablespoons melted butter, divided use
White Chocolate Raspberry Filling:
12 ounces (about 2 cups) white chocolate chips
4 (8 ounce) packages cream cheese, room temperature
1 cup granulated sugar
1 cup sour cream, room temperature
1 tablespoon pure vanilla extract
1/4 teaspoon salt
4 large eggs
2 tablespoons all-purpose flour
2-1/2 cups (about 12 ounces) fresh raspberries
Sour Cream Topping:
1-1/2 cups sour cream, room temperature
3 tablespoons granulated sugar
1/2 teaspoon pure vanilla extract
Raspberry Sauce:
1 teaspoon cornstarch
2 teaspoons freshly squeezed lemon juice
1/2 cup seedless raspberry jam
1 tablespoon raspberry liqueur or cranberry or orange juice
Garnish:
About 1/2 cup fresh raspberries

Directions:
1) Preheat oven to 350 degrees F. Brush bottom and sides of a 9 x 3-inch round springform pan with 1 tablespoon melted butter.
2) To make vanilla cookie crust: Combine vanilla cookie crumbs, toasted almonds and remaining 3 tablespoons melted butter in a medium-sized mixing bowl. Stir until thoroughly mixed and mixture is crumbly. Pour crumb mixture into prepared springform pan. Press crumb mixture firmly into bottom of pan. Place pan on a cookie sheet and transfer to oven. Bake for 10 minutes. Remove pan and cool on a wire rack. When pan is cool to touch, wrap bottom and sides of pan with a double layer of heavy-duty cooking foil. Reduce oven heat to 325 degrees F.
3) To make white chocolate and raspberry filling: Melt white chocolate in a double boiler set over hot water. Set aside to cool slightly. Place cream cheese and sugar in the bowl of an electric stand mixer. Mix at medium-slow temperature, scraping sides of bowl as necessary, until mixture is smooth and creamy, about 2 minutes. Add sour cream, vanilla and salt and beat until mixed. Add melted chocolate and beat until thoroughly combined, about 1 minute. Add the eggs 2 at a time, beating until thoroughly combined, about 1 minute, scraping sides of bowl bowl between additions. Do not over beat. Combine raspberries and flour in a separate bowl and toss gently. Fold into batter with a light hand. Let rest for 5 minutes. Bring a kettle of water to a boil. Meanwhile, pour filling into springform pan and set it in a large roasting pan. Transfer roasting pan to an oven rack. Carefully pour boiling water halfway up sides of springform pan. Bake for 70 to 80 minutes, or until edges are set but center of cake is still jiggly. Remove from oven and place on a wire rack to cool. Immediately run a thin knife around edge of pan, being careful not to gouge sides of cake. This helps prevent cracking. Let sit for one hour.
4) To make sour cream topping: Preheat oven to 425 degrees F. Combine sour cream, sugar and vanilla in a small bowl. Mix well. Spread it over surface of cheesecake. Return cake to oven and bake for about 5 minutes to set topping. Remove cake and cool completely on a wire rack. When completely cool, cover with plastic and refrigerate for 24 hours.
5) To make raspberry sauce: Combine cornstarch and lemon juice in a small saucepan. Add raspberry jam and stir until combined. Cook over medium-low heat, stirring constantly, until mixture is bubbly. Cook and stir for 1 minute longer. Remove from heat. Cover tightly and refrigerate for at least 2 hours.
6) To serve: Spoon raspberry sauce over center of cheesecake, then spread almost to edges of cake. Garnish with fresh raspberries if desired. Yield: 12 to 16 servings.


One Year Ago Today: Lemon Chicken with Capers or Olives and Penne


Two Years Ago Today: French Breakfast Puffs
Related Posts with Thumbnails

Printfriendly