Showing posts with label maple syrup. Show all posts

Friday, August 2, 2013

Frugal Foodie Friday - Maple and Molasses Baked Beans


From the kitchen of One Perfect Bite...No trip to the Cape Cod would be complete without sampling the baked beans for which New England is famous. There are two types served in this region of the country and the identification of either can be muddy. Fortunately, I had some help. I got to spend some time with an oysterman - actually a woman - who was also a guide at one of the local museums. Now oysters and beans have little in common, but in the course of our conversation, changes in the American diet came into play. She noted that there was a time when dishes like oyster stew, baked beans and mac n' cheese were the meal rather than part of it. While oysters dominated the conversation, we kept returning to what was once a staple of the island locals, suppers of baked beans and brown bread. There are two types of beans served here. Classically, Boston baked beans are made with molasses, while the New England variety is made with maple syrup. The muddy part of this comes when ingredients are mixed and the bean pot contain elements of both. The beans we ate on the island contained both syrup and molasses and were much sweeter than those we normally ate at home. They were also cooked in a different manner than any I had prepared before. The beans were delicious, but I must admit, that to my taste anyway, they were a bit too sweet. The next time I make these I'll cut back on the amount of molasses that I use. Other than that, this is a near perfect recipe and I recommend it to those of you who are trying to contain your food costs. These beans are a perfect feature for Frugal Friday and I think you will enjoy them. Here is how they are made.

Boston Baked Beans...from the kitchen of One Perfect Bite inspired by Heather and Martha Zschock

Ingredients:

2 cups dried navy beans, rinsed
8 cups water
2 teaspoons salt, divided use
1 teaspoon chopped garlic
1/4 cup maple syrup
1/2 cup light molasses
1-1/2 teaspoons dry mustard
1/4 cup salt pork
1 onion quartered

Directions:
1) Place beans, water and 1 teaspoon of salt in a large ovenproof kettle. Bring to a boil, than reduce heat and simmer, covered for 1-1/2 hours.
2) Preheat oven to 325 degrees F. Drain beans, reserving liquid. Return beans to kettle.
3) Combine garlic, maple syrup, molasses, mustard and reserved 1 teaspoon salt in a bowl and mix well. pour mixture over beans. Addjust enough bean cooking liquid to cover beans. Score salt pork. Poke pork and quartered onion into middle of beans.
4) Cover pot and place in oven. Bake for 3 hours, checking every 45 minutes to make sure beans are covered with liquid. If needed, add more reserved cooking liquid to cover beans. Yield: 6 servings.

If you have enjoyed your visit here, I hope you'll take a minute to...

Follow Me on Pinterest      


One Year Ago Today: Savory Cheese and Chive Bread


Two Years Ago Today: Stovetop Barbecued Chicken "Ribs"


Three Years Ago Today: Schnecken

Saturday, June 29, 2013

Maple-Cinnamon Breakfast Biscuits


Follow Me on Pinterest      

From the kitchen of One Perfect Bite...Left to my own devices, this is something I never would have thought to make. On those rare occasions when I start my day with a biscuit, it is the standard variety and I spread maple syrup or honey on it, rather than in it. A neighbor led me to the recipe and despite my initial reservations , it seemed so simple that I decided to give it a try. The biscuits are not at all bad. While they will never replace a good bagel or Danish, I must admit they are a tasty way to start the day. The recipe is straightforward and easy to follow and you'll need only minimal equipment to mix and bake them off. There is one small pitfall in this recipe that brought back memories of Julia Child. Julia was famous for tucking finished sauces into her ingredient lists. The call for a cup of veloute halfway through the assembly of a recipe taught many of us just how important it was to read a recipe before actually starting to work on it. Here the thing that might slow you down, is the call for a ready-mixed cinnamon sugar. I rarely keep cinnamon sugar on hand, so I mix it up just before I start to work on my recipes. I use this INSTRUCTABLE to make the sugar I need for these biscuits. If you are looking for something new to start your family's day I hope you will gibe this recipe a try. They are light and  flavorful and I think you'll enjoy them.  Here is how the biscuits are made.

Maple-Cinnamon Breakfast Biscuits...from the kitchen of One Perfect Bite courtesy of Taste of Home magazine

Ingredients:
2-1/2 cups all-purpose flour
3 tablespoons cinnamon-sugar, divided
1 tablespoon baking powder
1/2 teaspoon baking soda
1/2 teaspoon salt
1/2 cup cold butter, cubed
1/2 cup buttermilk
1/2 cup maple syrup
1/2 cup finely chopped pecans
2 tablespoons 2% milk

Directions:

1) Preheat oven to 400 degrees F.
2) Combine flour, 2 tablespoons cinnamon-sugar, baking powder, baking soda and salt in a large bowl. Cut in butter until mixture resembles coarse crumbs. Stir in buttermilk and syrup just until moistened. Fold in pecans.
2) Turn onto a floured surface; knead 8-10 times. Roll out to 1/2-inch thickness. Cut with a floured 2-1/2-inch biscuit cutter.
Place 2 inches apart on an ungreased baking sheet. Brush with milk; sprinkle with remaining cinnamon-sugar. Bake for 12-15 minutes or until golden brown. Serve warm. Yield: 1 dozen.


One Year Ago Today: Stir-Fried Asparagus with Pork


Two Years Ago Today: Crusty Farm-Style Fried Chicken


Three years Ago Today: Lemon Coleslaw


Four Years Ago Today: Red-Cooked Pork

Wednesday, February 13, 2013

Homemade Granola


From the kitchen of One Perfect Bite...I usually don't keep granola in the pantry, but I do make it when we have house guests and during Lent when it helps the Silver Fox keep his sugar cravings in check. This very simple version is easy to make and while it is high in calories, portion control and will power help keep love handles under control and make it possible for me to keep it on hand. This recipe was developed by Sara Quessenberry who co-authored The Good Neighbor Cookbook while living on the 46th floor of a high-rise in New York City. While that irony always makes me smile, her recipes are spot on and I'm really comfortable in recommending her book and the recipes she developed while working at Real Simple magazine to you. The great advantage to making your own granola is that you can control what goes into it. I like this version because it uses maple syrup rather than sugar to sweeten the oat and nut mixture. I think you'll like it, too. It will keep for up to a month if stored in an air-tight container. Here's how it is made.

Homemade Granola ...from the kitchen of One Perfect Bite inspired by Sara Quessenberry

Ingredients:
4 cups old-fashioned rolled oats
1 cup sliced almonds
1/2 cup shredded coconut (preferably unsweetened)
1/4 cup shelled sunflower seeds
1/2 cup pure maple syrup
2 tablespoons canola oil
1/2 teaspoon kosher salt
1 cup dried fruit (such as cherries, cranberries, raisins, or currants)

Directions:

Heat oven to 350 degrees F. Toss oats, almonds, coconut, and sunflower seeds together with maple syrup, oil, and salt on a rimmed baking Sheet. Bake, tossing once, until golden and crisp, 25 to 30 minutes. Add the dried fruit and toss to combine. Let cool. Yield: 6 cups.


One Year Ago Today: Cherry Berry Fudge


Two Years Ago Today: Turkey Meatballs with Lemon Yogurt Sauce


Three Years Ago Today: Marbled Sweetheart Sugar Cookies

Wednesday, January 30, 2013

Citrus Salad with Poppy Seed Dressing


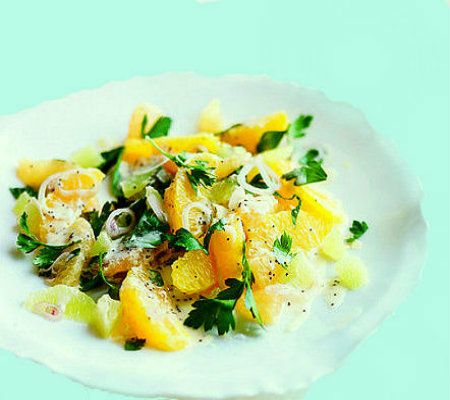
From the kitchen of One Perfect Bite...We had a really drab day today. The fog lingered until early afternoon and the sun never did poke through the clouds. I decided to create internal sunshine using some of our Christmas bounty. We receive fruit-of-the-month baskets throughout the year, and while I puzzle over what to do with all the pears and tropical fruit we receive, I never worry about the boxes of citrus. This recipe is one of many that I have for simple citrus salads, and while the limes may make it too tart for some, it has a lovely pucker quality that I know many of you will enjoy. If you are a trumpet player, the limes can be replaced with additional orange and grapefruit segments. This is the type of recipe whose ingredients need not be set in stone, so let common sense guide any additions or substitutions you make to it. It is, however, important not to stray too far from the recipe for the salad dressing. It is special, but it comes with a caution. Dress the salad just before it is served. It loses its visual appeal quickly and you don't want to serve your family a cold hot mess. The recipe was developed by Grace Parisi for Food and Wine magazine and the salad she created is delicious. Here is how it is made.

Citrus Salad with Creamy Poppy Seed Dressing...from the kitchen of One Perfect Bite courtesy of Food and Wine magazine

Ingredients:
6 oranges
2 red grapefruits
2 limes
1 large shallot, very thinly sliced
1/2 cup coarsely chopped flat-leaf parsley
1 teaspoon finely grated lemon zest
2 tablespoons freshly squeezed lemon juice
1/4 cup crème fraîche or sour cream
2 tablespoons pure maple syrup
1 teaspoon poppy seeds
Salt

Directions:
1) Using a sharp knife, carefully peel oranges, red grapefruits and limes, removing all bitter white pith. Working over a small bowl to catch fruit juices, cut in between membranes to release sections. Cut lime and grapefruit sections into thirds and leave orange sections whole. Transfer all citrus to a serving bowl and add sliced shallot and chopped parsley. Reserve citrus juice for another use.
2) In another small bowl, whisk lemon zest with lemon juice, crème fraîche, maple syrup and poppy seeds. Season dressing lightly with salt. Pour the dressing over fruit, toss salad gently and serve right away. Yield: 6 servings.

Make Ahead The poppy seed dressing can be refrigerated overnight. Whisk gently before tossing with the citrus.


One Year Ago Today: Chicken Cutlets Pojarski


Two Years Ago Today: Chocolate Cheesecake Squares


Three Years Ago Today: Raspberry Streusel Muffins

Tuesday, November 27, 2012

Maple Flavored Cranberry and Cornmeal Quick Bread


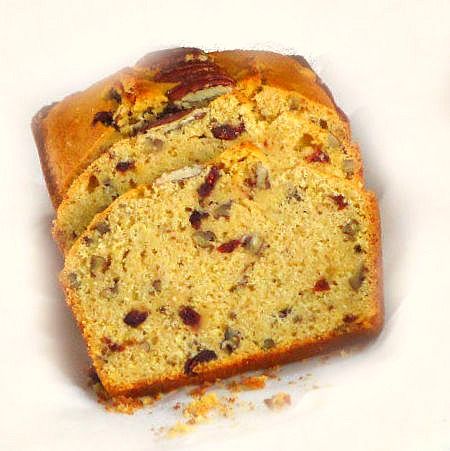
From the kitchen of One Perfect Bite...This is a nice recipe to have on hand when you're responsible for providing meeting sweets and treats. The recipe can be made with a bowl and wooden spoon if need be, and while it comes together quickly, I've found that the flavor of the bread vastly improves if it is made the day before you plan to serve it. The original recipe, which can be found here, was developed by Susan Reid for Bon Appetit magazine and the cranberries make it a perfect quick bread to serve at this time of year. The addition of cornmeal adds a nice, slightly grainy texture to the bread and gives the crust wonderful color. This is one of those recipes that will neither make nor break your reputation as a cook. It is a filler. The bread is easy to make and it's nice to have a loaf for those unplanned eventualities that seem to occur at this time of year. Here's how it is made.

Maple Flavored Cranberry and Cornmeal Quick Bread...from the kitchen of One Perfect Bite courtesy of Bon Appetit magazine

Ingredients:
Nonstick vegetable oil spray
1 cup unbleached all purpose flour
1 cup white whole wheat flour or regular whole wheat flour
1 cup medium-grind whole grain cornmeal or regular cornmeal
1/2 cup sugar
1-1/2 teaspoons salt
1-1/2 teaspoons baking powder
1-1/4 cups buttermilk
1/2 cup (1 stick) unsalted butter, melted
1/2 cup pure maple syrup
2 large eggs
1/2 teaspoon maple extract
3/4 cup chopped pecans plus 10 pecan halves for garnish
3/4 cup dried cranberries (about 4 ounces)

Directions:

1) Position rack in center of oven and preheat to 350 degrees F. Spray a 9 x 5 x 3-inch metal loaf pan with nonstick spray.
2) Whisk both flours, cornmeal, sugar, salt, and baking powder in large bowl. Whisk buttermilk, melted butter, maple syrup, eggs, and extract in medium bowl. Add buttermilk mixture to flour mixture, stirring to blend. Fold in chopped pecans and cranberries. Spoon batter into pan. Arrange pecan halves in row down center of batter.
3) Bake bread until top is golden brown and paring knife inserted into center of bread comes out clean, about 1 hour 10 minutes. Tent bread loosely with foil if browning too quickly. Cool in pan on rack 20 minutes. Turn out onto rack; cool. Yield 1 loaf.


One Year Ago Today: Quick-Fix Orange Ginger Chicken


Two Years Ago Today: Marionberry Muffins


Three Years Ago Today: Braised Brussels Sprouts with Bacon and Golden Raisin

Wednesday, November 7, 2012

Roasted Brussels Sprouts with Maple Syrup and Toasted Hazelnuts


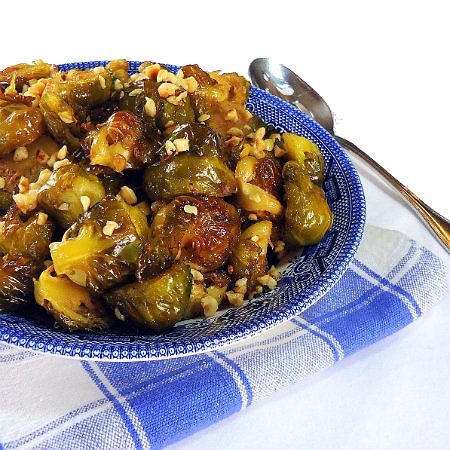
From the kitchen of One Perfect Bite...Were I to personify Brussels sprouts, the active disdain they usually receive would quickly put them into therapy. Ten years ago, if asked to rate them, most folks would put sprouts into a nose-up, thumbs-down category. The problem was never with the sprouts, it was with the way in which they were prepared. The popularity of this pungent cabbage has grown, due largely to creative cooks whose recipes have changed the way we handle them. I also have a sneaking suspicion that milder, more appealing varieties of sprouts now reach our markets. The Silver Fox happens to love them, so they have always had a spot on our Thanksgiving table. I served them several weeks ago as part of our early celebration, using a new recipe that I chose because it was so easy to make. They were also very good. I found the recipe when I stumbled on the website of Chloe Coscarelli, a vegan chef and food writer whose recipes can be found here. These sprouts are roasted at high heat and their natural sugars caramelize as they bake. A final toss with maple syrup and hazelnuts takes them to a level that makes them worthy of a place on your holiday table. If you are looking for a new way to prepare Brussels sprouts I hope you'll give this very easy recipe a try. Here's how they are made.

Roasted Brussels Sprouts With Maple Syrup and Toasted Hazelnuts...from the kitchen of One Perfect Bite courtesy of Chloe Coscarelli

Ingredients:
1-1/2 pounds brussels sprouts
1/4 cup olive oil
3/4 teaspoon kosher salt
1/4 teaspoon (or 10 grinds) black pepper
2 tablespoons maple syrup
1/4 to 1/3 cup toasted hazelnuts, coarsely chopped (optional)

Directions:
1) Preheat the oven to 375 degrees.
2) Remove any yellow or brown leaves from brussels sprouts. Remove stems and cut them in half.
3) In a large bowl, toss brussels sprouts, olive oil, salt and pepper together. Once all of the brussels sprouts are coated in oil, spread them into a 9- by 13-inch (or larger) baking dish or sheet tray to roast.
4) Roast for 15 minutes. After 15 minutes, stir brussels sprouts with a spatula or large spoon to assure even browning. Continue to roast for another 30 minutes. Stir in maple syrup. (Steps 1 through 4 can be done a day in advance; store covered in the refrigerator. Continue with Steps 5 and 6 right before serving.)
5) Continue to roast brussels sprouts for about 15 more minutes, or until they are fork tender.
6) Toss roasted brussels sprouts with hazelnuts and serve. Yield: 6 servings.


One Year Ago Today: Oatmeal Cookies with Cherries and Chocolate Chips


Two Years Ago Today: Crustless Onion Quiche


Three Years Ago Today: Cranberry Chambord Sorbet

Sunday, September 2, 2012

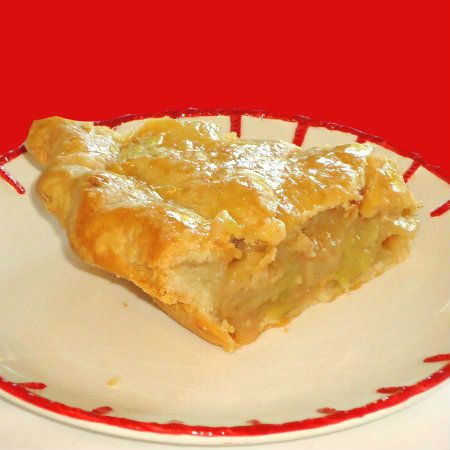
Maple, Apple and Cheddar Pie


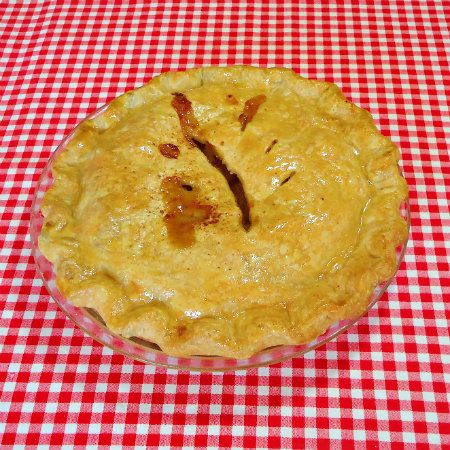
From the kitchen of One Perfect Bite...While we are not entertaining this weekend, I was asked to bring dessert to a couple of the parties we will be attending. I'm happy to oblige because it gives me an opportunity to test a few  recipes I've been wanting to try. I'm quite an adventurous eater and have a reputation for eating anything that does not bite back. There are, however, certain food pairings that have managed to escape my ravenous pursuit of dishes that might provide the one perfect bite to which my blog is dedicated. While I've seen apple pie served with cheddar cheese, it never struck me as being a particularly Lucullean combination, so I simply never tried it. I did, however, become more curious when I saw this recipe in several publications owned by Meredith Corporation. Their version of the pie combines  apples and cheese and uses both to make a sweet, yet savory, filling for the pastry shell.  I knew that sooner or later their pie would grace my table. Today was the day. Despite the chopping that is involved, the pie is easy to make and its savory goodness makes it a delightfully different dessert. The apples and the cheese blend nicely together and their flavor is enhanced by the judicious use of maple syrup. If you are in a rush, use a commercial pie crust, but do not stint on the type or quality of cheese that you use. This pie surprised me and I must admit I liked it a lot. It will never replace our standard apple pie, but this was really nice for a change and it was well received. I do hope you'll give this recipe a try. Here's how the pie is made.

Maple, Apple and Cheddar Pie...from the kitchen of One Perfect Bite courtesy of Meredith Corporation

Ingredients:
Pastry for a Double-Crust Pie (see below)
1/2 cup sugar
2 tablespoons all-purpose flour
1/2 teaspoon ground cinnamon
1/4 teaspoon salt
5 cups thinly sliced peeled apples (such as Jonathan or Macintosh) (5 medium)
1-1/2 cups shredded white cheddar cheese (6 ounces)
1/4 cup maple syrup
1 tablespoon whipping cream
2 tablespoons maple syrup
1/4 cup toasted chopped pecans (optional)

Directions:

1) Preheat oven to 375 degrees F. Prepare pastry for a double-crust pie as directed below. On a lightly floured surface, slightly flatten one portion of dough. Roll dough from center to edge into a 12-inch circle. Wrap pastry circle around rolling pin; unroll into a 9-inch pie pan or plate. Ease pastry into pie pan without stretching it; set aside.
2) For filling, stir sugar, flour, cinnamon, and salt together in a large bowl. Add apples and toss gently to coat. Add cheese and the 1/4 cup maple syrup; toss gently to combine. Transfer filling to pastry-lined pie pan. Drizzle with cream.
3) Trim pastry even with edge of pie pan. Roll remaining dough into a 12-inch circle. Cut slits in pastry to allow steam to escape. Place pastry circle on filling; trim pastry to 1/2 inch beyond edge of pie pan. Fold top pastry edge under bottom pastry. Crimp edge as desired. Cover edge of pie with foil to prevent overbrowning.
4) Bake for 40 minutes. Remove foil. Bake about 20 minutes more or until apples are tender and pastry is golden brown. Transfer to a wire rack. Brush with the 2 tablespoons maple syrup. If desired, sprinkle with pecans. Cool for 1 hour. Serve slightly warm. Makes 8 servings.

 Pastry for a Double-Crust Pie

Ingredients:
2-1/2 cups all-purpose flour
1 teaspoon salt
1/2 cup shortening
1/4 cup butter, cut up, or shortening
1/2 - 2/3 cup ice water

Directions:
Stir flour and salt together in a large bowlt. Using a pastry blender, cut in shortening and butter until pieces are pea size. Sprinkle 1 tablespoon of the ice water over part of the flour mixture; toss gently with a fork. Push moistened pastry to the side of the bowl. Repeat moistening flour mixture, using 1 tablespoon of the ice water at a time, until all of the flour mixture is moistened. Gather flour mixture into a ball, kneading gently until it holds together. Divide pastry in half; form halves into balls.


One Year Ago Today: Mexican Lasagna


Two Years Ago Today: Pear Flognarde


Three Years Ago Today: Salmon Burgers with Chipotle Aioli and Pineapple Salsa

Thursday, December 15, 2011

Mulled Cranberry and Cider Punch


From the kitchen of One Perfect Bite...This is a simple, but festive, holiday sipper for those occasions when you want to provide a non-alcoholic alternative for children and guests who are teetotalers. It is really simple to make, and while it was first prepared for a large gathering, you can reduce the quantity of ingredients and serve it for a family holiday brunch. This is best prepared several hours before serving. While it can be poured immediately, time gives the ingredients a chance to blend and mellow, and greatly improves the flavor of the finished punch when it is warmed. You can add spices to taste, but be careful to limit the amount of cloves you use. They can add a bitter taste and will spoil the punch if you use them too freely. I think those of you who try this will enjoy it. It would be a perfect drink to serve at a tree trimming party. The recipe appears below. Before I close, I wanted to thank the very special folks who are responsible for the photo blog, Knapkins. They have created a beautiful site and taken away the need for participating blogs to submit photos for publication. They do the hard work and free us to concentrate on our own blogs and recipe creation. It's like having a second pair of hands to help with the work. I really hope you pay them a visit and see how tastefully they do what they do. You can visit their site, here.

Mulled Cranberry and Cider Punch...from the kitchen of One Perfect Bite

Ingredients:
3 cups apple cider
6 cups cranberry juice
3 cups orange juice
3/4 cup pure maple syrup
1-1/2 teaspoons ground cinnamon
1/8 teaspoon ground cloves
3/4 teaspoon ground nutmeg
2 teaspoons confectioners' sugar
Optional: red food coloring

Directions:
Several hours before serving, combine all ingredients in a large heavy pot. Bring to a boil, reduce heat and simmer for several minutes. Remove from heat and allow to sit at room temperature for several hours. Reheat before serving. Yield: 20 to 24 servings.


One Year Ago Today: Miso Soup


Two Years Ago Today: Rosettes

Tuesday, December 13, 2011

Bacon Wrapped Pork Tenderloin Bites + Small Plate Giveaway


From the kitchen of One Perfect Bite...This is the second of three Sponsored posts written by me on behalf of the National Pork Board. They recently conducted a survey to identify food trends that are appealing to American cooks this holiday season. They found six recurring themes for their 2011 Pork's Perfect Paring's guide and asked cookbook author Jill Silverman Hough to develop a pork recipe to go with each of them. They also asked some members of the blogging community to provide recipes and holiday ideas for each of the themes they were highlighting. I focused my attention on the Smitten with Small Plates category and for the next two days I'll be featuring pork dishes that work well as appetizers or small plate meals.

I think you'll all enjoy the recipes I'm featuring and the National Pork Board has a Small Plates gift set waiting for one of you. The gift set includes: $25 worth of pork coupons; Jill Silverman Hough cookbooks, including 100 Perfect Pairings: Main Dishes to Enjoy with the Wines You Love and 100 Perfect Pairings: Small Plates to Enjoy with the Wines You Love; an instant-read digital thermometer; tapas-style small plates and decorative skewers for holiday appetizers. If you'd like a chance to win, simply comment on one, or all three, of the recipes that are part of this promotion. Everyone can enter up to three entries to the drawing. The winner, chosen by a random number drawing, will be announced on Saturday, December 17th. Good luck! While I have received a similar gift package, the opinions in this post are 100% mine.

Small families have long appreciated the ease with which pork tenderloin moves from the refrigerator to the table. While it packs a protein punch, it is low in fat and calories and makes for healthy, as well as fast and delicious, family meals. It's amazingly versatile and lends itself to many types of cuisines. That versatility is one of the reasons I knew it would be perfect for the small plate dishes I wanted to prepare for this Pork Board promotion. The recipe I'm featuring today is enormously flavorful. Cubes of tenderloin are dipped in a maple mustard sauce and then wrapped in a limp, but cooked, bacon before being charbroiled. All elements of the dish can be made well in advance of serving, so this is an easy appetizer to prepare for entertaining. Tenderloins vary in weight, so I can't give you truly exact quantities for the ingredients used in the recipe and you'll have to be a bit flexible. You should be able to get 24 1-inch cubes from a 12-ounce tenderloin. You will need half a slice of bacon for each cube you plan to serve. This is another appetizer that is very easy to make and I think those of you who try these pork and bacon bites will love them. Here's the recipe.

Bacon Wrapped Pork Tenderloin Bites with Maple-Mustard Dipping Sauce...from the kitchen of One Perfect Bite

Ingredients:
Maple Mustard Sauce
3/4 cup pure maple syrup
3 tablespoons Dijon mustard
1/4 cup sour cream or Greek yogurt
Pork Tenderloin Bites
12 to 18 pieces thick cut maple smoked bacon
1 (12 to 16-oz.) pork tenderloin
Salt and pepper
24 to 36 toothpicks soaked in water for 30 minutes

Directions:
1) Preheat oven broiler.
2) Combine maple syrup and mustard in a small bowl. Mix well. Pour 1/4 cup of syrup mixture into a separate small bowl. Set aside. Add sour cream or yogurt to original mixture. Set aside.
3) Cut bacon slices in half. Cook just until limp. Bacon should be pliable but cooked. Drain on paper toweling.
4) Trim pork tenderloin and remove silver skin. Sprinkle with salt and pepper. Cut tenderloin into 1-inch cubes. Dip cubes in maple-mustard mixture. Wrap each cube with bacon and secure with a toothpick.
5) Broil 5-inches from broiler element for 6 to 7 minutes, basting with maple-mustard sauce and turning once. Serve immediately with dipping sauce. Yield: 24 to 36 pork tenderloin bites.

Cook's Note. I used hollowed lime halves to hold individual portions of dipping sauce. Any small dish can be used.


One Year Ago Today: Christmas Cranberry Conserve


Two Years Ago Today: St. Lucia Buns

Friday, September 30, 2011

50 Women Game Changers in Food - #17 Dorothy Hamilton - Maple Syrup + Thai Chicken Thighs with Garlic and Lime

From the kitchen of One Perfect Bite...Dorothy Hamilton is an educator and entrepreneur who many consider to be a gastronomic visionary. She attended Newcastle University in England in the late 60's, and following graduation joined the Peace Corp. She spent the next three years in Thailand where she was first introduced to French and Thai cuisine. She returned to New York City during the recession of 1974 and her English major and volunteer experience made it difficult for her to find employment. By default, she went to work for her father who ran a trade school in the city, and learned she loved working with students. She also loved cooking, and following visits to European culinary schools, convinced her father to open a culinary trade school. In 1984 she started a small cooking school called The French Culinary Institute. It, along with The School of Italian Studies, came to be housed under the umbrella of The International Culinary Centers which she also founded. As CEO of this prestigious institution, she became one of the most influential forces in the American culinary scene. The awards she has won while in that position are simply too numerous to mention here. She has been recognized by Gourmet Live and holds position #17 on their list of the 50 Most Influential Women in Food.

She has, however, presented a problem for those of us who participate in the weekly challenge that recognizes these women. While she writes with authority about food, she does not write cookbooks. After considerable searching, I found only one recipe that came from her hand. It is for maple syrup that she made with her daughter, Olivia. I found the recipe buried in an article she had written for her own blog, "Love What You Do!" which you can be found here. I'm including a snippet that actually has instruction for cooking down the sap. Here it is.

Maple Syrup

"Cooking down the sap is the easy part until the end. It takes approximately 10 gallons of sap to make one pint of syrup. I start my syrup outside because of all the steam. The only other technique you need to employ other than boiling is filtering. As I said, insects love the sap too, so before your initial boil run the sap through 4 layers of cheesecloth. I pour the sap through a large colander into a huge lobster pot and let it boil most of the day over a propane flame outside. Once it boils down to a size that will fit in a stock pot in the house I filter it again through 4 layers of cheesecloth and bring it inside to the stove. Syrup boils at 7 degrees above the boiling point of water (212 degrees). I use a candy thermometer to watch how it goes. The syrup starts off either clear or cloudy white. As it boils down it gets a rusty hue. In the pot on the stove the color deepens and deepens. Then all at once it bubbles like crazy into a caramel color and you smell the syrup almost on the point of burning. Fast,fast, fast get it off the heat. Filter again while it is at least 160 degrees and put in sterilized glass, tin or heavy plastic containers. Seal and then turn upside down to lock the seal."

Now, I am uncomfortable leaving you with a non-recipe recipe, so I did some more digging. I was able to find a series of recipes that were developed for Dorothy Hamilton by Chef Bobo, the public persona of Robert Surless, who I believe is an instructor at the ICC. She apparently cooks for her family several times a week and wanted recipes that were fast and easy to prepare. Because she was dieting, the recipes also had to be low in calories. I found his recipe and accompanying photo on the Food and Wine site, which you can find here. The dish has the sweet, salty, sour and spicy flavors we've come to associate with good Thai Cooking.

Thai Chicken Thighs with Garlic and Lime

Ingredients:

1 1/2 lbs. skinless, boneless chicken thighs
freshly ground black pepper
2 large garlic cloves, minced
2 1/2 tablespoons minced cilantro
1 1/2 tablespoons Asian fish sauce
1 teaspoon brown sugar
1/2 teaspoon chili powder
1 1/2 teaspoons finely chopped basil
1 1/2 teaspoons finely chopped mint
2 tablespoons vegetable oil
lime wedges, for serving

Directions:
1) Season chicken with pepper. In a bowl, mix garlic with 2 tablespoons of cilantro, fish sauce, brown sugar and chili powder. Rub over chicken and let stand for up to 1 hour.
2) In a small bowl, toss remaining cilantro with basil and mint.
3) In a large nonstick skillet, heat oil until simmering. Add chicken and cook over high heat, turning once until cooked through, 6 to 7 minutes. Cut each thigh into 3 or 4 pieces. Transfer the chicken to a platter and scatter the herbs all over. Serve with the lime wedges and brown rice. Makes 4 servings.

The following bloggers are also featuring the work of Dorothy Hamilton today. I hope you'll visit all of them. They are all great cooks who have wonderful blogs.

Val - More Than Burnt Toast
Joanne - Eats Well With Others
Taryn - Have Kitchen Will Feed
Susan - The Spice Garden
Claudia - A Seasonal Cook in Turkey
Heather - girlichef
Miranda - Mangoes and Chutney
Jeanette - Healthy Living
April - Abby Sweets
Katie - Making Michael Pollan Proud
Mary - One Perfect Bite
Kathleen -Bake Away with Me
Viola - The Life is Good Kitchen
Sue - The View from Great Island
Barbara - Movable Feasts
Kathleen - Gonna Want Seconds
Amy - Beloved Green
Jeanette - Healthy Living
Linda - Ciao Chow Linda
Linda A - There and Back Again
Martha - Lines from Linderhof
Nancy - Picadillo


Next week we will highlight the career and recipes of Clotilde Dusoulier. It will be really interesting to see what everyone comes up with. If you'd like to join us please email me for additional information no later than Saturday, October 1st.

Sunday, April 10, 2011

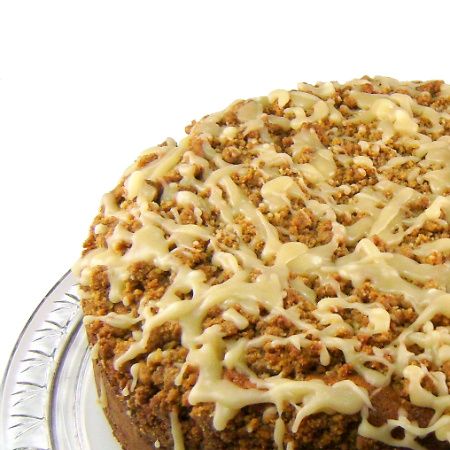
Maple Sour Cream Coffee Cake with Walnut Streusel and Maple Glaze


From the kitchen of One Perfect Bite...I spent some time last evening baking for friends we were going to visit today. I made three coffee cakes, all of which will be featured here over the course of the next few days. All the cakes are delicious, but the one I'm focusing on tonight is a bit different than most you've encountered. It is a sour cream cake and, as such, is wonderfully moist, but what makes it unusual is its lovely maple flavor. That flavor is neither easy nor cheap to come by. Under no circumstances can maple-flavored or pancake syrup be used to make this cake. You need the genuine article and to extract the best flavor you are going to want to use Grade B syrup. In the United States maple syrup is divided into two major grades: Grade A and Grade B. Detailed information about the various grades of syrup, here and in other countries, can be found on Wikipedia. For our purposes, all you need to know that Grade B syrup is darker and more flavorful than Grade A. Not surprisingly, it is more expensive. I first saw this cake on the blog the Bookcooker. The recipe for this cake originally appeared in Gourmet magazine and can be found on the Epicurious website. The recipe for the maple glaze is from a recipe developed by Martha Stewart and it can be found on her site. I used my infamous cut and paste technique to make the cake you see above. I do have a few tips to share with you. Be sure to use a paper lined spring form pan and follow directions for releasing and cooling the cake. If you plan to glaze the cake, drizzle the glaze over the cake before it has a chance to cool and set up. You may have to play with the timing as well. My cake took 70 minutes to bake. If you enjoy maple flavor I suspect you'll like this coffee cake. If not, stay tuned , I have others coming. Here's the recipe for today's cake.

Maple Sour Cream Coffee Cake with Walnut Streusel and Maple Glaze...from the kitchen of One Perfect Bite courtesy of Gourmet Magazine and Martha Stewart

Ingredients:
Streusel
1-1/2 cups all-purpose flour
1 cup toasted walnuts
2 /3 cup firmly packed light brown sugar
3/4 stick (6 tablespoons) unsalted butter, softened
1-1/2 teaspoons cinnamon
1/4 teaspoon salt
1 /4 cup pure maple syrup
1/4 teaspoon maple extract
Cake
2 cups all-purpose flour
1-1/4 teaspoons double-acting baking powder
3/4 teaspoon baking soda
1 teaspoon salt
1 stick (1/2 cup) unsalted butter, softened
2/3 cup firmly packed light brown sugar
1/4 cup pure maple syrup
1-1/2 teaspoons maple extract
1/2 teaspoon vanilla extract
2 large eggs
3/4 cup sour cream
Glaze
1 tablespoon unsalted butter
2 tablespoons Grade B maple syrup
1/2 cup confectioners' sugar

Directions:
1) To make the streusel: In a food processor blend flour, walnuts, brown sugar, butter, cinnamon, and salt until nuts are ground and mixture is crumbly. Stir maple extract into syrup, then add syrup to mixture in processor bowl and pulse until combined. Set aside.
2) To make cake: Preheat the oven to 350 degrees F. Butter a 9-inch springform pan. Line bottom with parchment paper. Butter paper. Dust pan with flour, tapping out excess. Whisk flour, baking powder, baking soda and salt together in a large bowl. Place butter and brown sugar in bowl of an electric stand mixer. Cream until mixture is light and fluffy. Beat in maple syrup, maple extract and vanilla. Add eggs, one at a time, beating well after each addition. Add flour mixture to butter mixture alternately with sour cream, beginning and ending with sour cream. Beat batter after each addition just until combined. Spoon 1/2 of batter into prepared pan. Top with half of streusel mixture. Cover with remaining batter and spread with reserved streusel. Bake in middle of oven for 50 to 60 minutes, or until tester comes out clean. Cool in pan for 5 minutes. Remove sides of spring form. Carefully invert cake on a cooling rack and remove bottom of pan and parchment paper. Turn cake right-side up onto another rack and cool completely.
3) To prepare glaze: In a small saucepan, melt butter and syrup together over medium heat. Whisk confectioners' sugar into hot mixture until smooth, and immediately drizzle over cooled cake. Yield: 8 to 10 servings.


One Year Ago Today : Kedgeree


Two Years Ago Today: Swiss Onion Tart


You might also like these recipes:
Strawberry Coffee Cake - Shih's Cooking
Lemon Blueberry Coffee Cake -Real Mom Kitchen
Raspberry Coffee Nib Coffee Cake - Dessert First
Wishes and Yogurt Coffee Cake - Whisk
Cherry Crunch Coffee Cake - Sprinkled with Flour
Orange Raisin Coffee Cake - Diethood
Blueberry Lemon Coffee Cake - Kitchen Runway
Meyer Lemon Coffee Cake - Sugar N' Flour
Sour Cream and Cherry Coffee Cake - Mommy's Kitchen
Starbuck's Classic Coffee Cake - Buttercream Barbie
Cranberry Kuchen - Amanda's Cookin'

This post is being linked to Sunday Spotlight at You Made That?

Monday, January 3, 2011

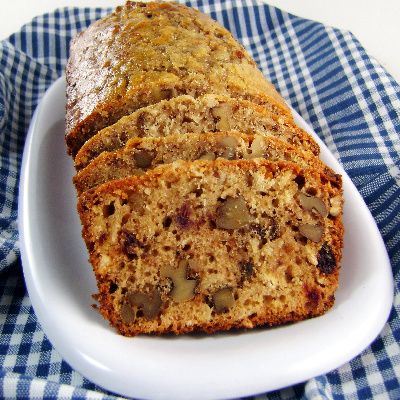
Maple, Walnut and Fig Bread


From the kitchen of One Perfect Bite...Continuing with the theme of something old, something new, something borrowed and something blue, I've selected a quick bread to represent the "new" portion of my quartet today. The bread, which comes from a newly revised edition of the cookbook, Amy's Bread, is made with maple syrup, walnuts and figs. The book and the bread are both new to me and thus met the criteria I'd established for classifying a recipe as new. For better or worse, I've developed the habit of perusing cookbooks at the library before buying them. If a book has at least 10 recipes that I find interesting, I'll bring it home and test 2 or 3 of the selections I've made. If they work to my satisfaction, I'll buy the book. Otherwise, I return the book and move on to greener pastures. The approach has saved me a fortune in cookbook costs, and I highly recommend the practice to those who share my love of cooking and the books that expand our horizons. As it happens, while I really liked this bread, I didn't buy the book. It is much like other books already available in a saturated market and it didn't open new doors for me. I'm also beginning to sense that the bread craze, like the cupcake craze before it, may be coming to an end. There is only so much variation possible with flour, yeast and water and there are a lot of angels dancing on the head of the proverbial pin right now. Save for lining the pan with parchment paper to prevent the loaves from sticking, there are no tricks to making this quick bread. It is easy to make and delicious, though the cost of its ingredients quickly mount up and that expense may be off-putting to some. Those of you who like nut breads will love this one. Here's the recipe.

Maple Walnut and Fig Bread...from the kitchen of One Perfect Bite courtesy of Amy Scherber, Toy Kim Dupree and Aimee Herring

Ingredients:
2 cups dried figs, diced
1/2 cup warm water (85Âş to 90ÂşF)
2-2/3 cups unbleached all-purpose flour
1-2/3 cups cake flour
1-3/4 cups old-fashioned rolled oats
2 tablespoons baking powder
1/2 teaspoon kosher salt
1-2/3 cups maple syrup, divided use
1-1/3 cups whole milk
4 large eggs, lightly beaten
2 egg yolks
3/4 cup canola oil
2 cups toasted walnut pieces

Directions:
1) Position a rack in the center of the oven and preheat the oven to 350 degrees F. Generously grease two 9x 5-inch loaf pans. Line bottom of each pan with parchment paper. Set aside.
2) Place diced figs in a medium bowl. Add warm water and let soak until softened.
3) Whisk all-purpose flour, cake flour, oats, baking powder, and salt together in a large bowl. Set aside.
4) Combine maple syrup, milk, eggs, egg yolks, and oil in a medium bowl, stirring until combined.
5) Add liquid mixture to dry ingredients, stirring with a spoon just until all of the flour is moistened. This should be a wet batter. Oats will absorb a lot of moisture during baking.
6) Fold walnuts and figs into the batter (figs need not be drained). Divide the batter evenly between two prepared pans. Bake for about 1 hour, until a toothpick inserted in center of loaves comes out clean. (If your oven bakes unevenly, rotate the pans about halfway through the baking time.)
7) Remove the pans from oven and use a pastry brush to glaze tops of the loaves generously with reservered 1/3 cup maple syrup. Set pans on a rack to cool for about 10 minutes. Turn the loaves out of the pans and set them on the rack to cool completely before serving.
8) Wrap any leftovers tightly in plastic wrap and store at room temperature. They may also be frozen, wrapped first in aluminum foil and then in plastic wrap or a heavy-duty freezer bag. Yield: 2 loaves.

You might also like these recipes:
Vanilla Bean Banana Bread - Baking Bites
Cardamom Crumb Cake - A Whisk and A Spoon
Best Apple Bread - You Made That?
Apple Cinnamon Bread - Two Peas and Their Pod
Black Walnut Pumpkin Bread - Never Enough Thyme
Quick Bread Round-Up - One Perfect Bite
5 Quick Breads for Holiday Food Gifts - What's Cookin Chicago?

This post is being linked to:
Smiling Sally - Blue Monday

Sunday, November 22, 2009

Maple Butter - Made Two Ways


Maple butter made without a candy thermometer.


Maple butter made with boiling syrup.


From the kitchen of One Perfect Bite...
There are small things that can make a meal memorable. Maple butter is one of them. Its most obvious use is on pancakes or waffles, but biscuits and cornbread, even dinner rolls, are taken to another level when spread with either of the butters we are featuring today. Both are easy to do, though one requires a boiled syrup. I know that some of you are uncomfortable working with sugar syrup, so a second recipe that requires no boiling is also being provided. In one of those contradictions that drive good cooks wild, the butter made with boiled syrup is the most flavorful but it's quite plain to look at. The easier recipe looks like a beauty queen. Whichever version you try, use real maple syrup. The imitation syrup will produce a butter that's not worthy of your time. Once you try maple butter I suspect it will become a staple in your home. I'm starting to use it as a butter replacement in coffee cakes and frostings. It is that good. Here are the two recipes.

Maple Butter I...from the kitchen of One Perfect Bite

Ingredients:
1 cup pure maple syrup
3/4 cup butter

Directions:
1) Using a heavy bottomed saucepan, heat maple syrup until it reaches 240 degrees F on a candy thermometer, about 15 minutes. Stir in butter.
2) Pour mixture into the bowl of a stand mixer and beat with the paddle attachment until it is thick and creamy, about 8 to 10 minutes.
3) Pour into glass containers and refrigerate until required. Yield: 1-1/2 cups.

Maple Butter II...from the kitchen of One Perfect Bite

Ingredients:

1/2 cup softened butter
1/4 cup pure maple syrup

Directions:
1) Combine butter and maple syrup in the bowl of an electric stand mixer. Beat with paddle attachment until light and fluffy.
2) Spoon into jars, cover, and refrigerate. Yield: 3/4 cup.

Recipes courtesy of OSU Extension Service.
Related Posts with Thumbnails

Printfriendly