Showing posts with label peanut. Show all posts

Monday, September 2, 2013

Goody Goody Bars - A Simple No-Bake Confection


From the kitchen of One Perfect Bite...A used copy of America's Test Kitchen Quick Family Cookbook came my way while I was vacationing this summer. It, of course, became my beach read for a couple of days, and while I was paging through it, I came across the recipe I'm featuring today. The name grabbed me and I knew I'd have to try the recipe before the seasons changed. As you can see, I'm sneaking in just under the wire. While the Goody Goody Bars are categorized as a cookie, I liken them to a candy-like confection because of their texture and richness. Whatever, you decide to call them, this treat is nearly effortless to make and the recipe uses ingredients that have universal appeal. I love the marriage of chocolate and peanuts, and, if you share my weakness, I think you'll enjoy these bars. Do give them a try. Here is how they are made.

Goody Goody Bars...from the kitchen of One Perfect Bite courtesy of America's Test Kitchen Quick Family Cookbook

Ingredients:
1 cup packed light brown sugar
1 cup light corn syrup
1 cup peanut butter
1 cup salted dry-roasted peanuts, very coarsely chopped
6 cups cornflakes
2 cups (12-oz.)semisweet chocolate chips, melted
1 tablespoons vegetable oil

Directions:

1) Line a 9x13-inch baking dish with foil, allowing excess to overhang pan edges. Spray foil with nonstick cooking spray.
2) Bring sugar and corn syrup to simmer in a large pan set over medium heat. Remove pan from heat. Add peanut butter and chopped peanuts, stirring until smooth. Add corn flakes and stir until well-coated. This mixture is very hot and capable of burning, so do not use your hands for the final mixing.
3) Working quickly, scrape mixture into prepared pan. Using a greased spatula, press mixture into bottom and corners of the pan.
4) Microwave chocolate chips and oil together in a covered bowl, stirring often, until melted, about 2 minutes. Spread evenly over cornflake mixture. Freeze, uncovered, until filling is firm and chocolate has hardened, about 15 minutes.
5) Using foil overhang, lift bars from pan and transfer to a cutting board. Cut into squares. Serve immediately or store at room temperature in an airtight container for up to 2 days. Yield: 24 bars.

If you have enjoyed your visit here, I hope you'll take a minute to...

Follow Me on Pinterest      


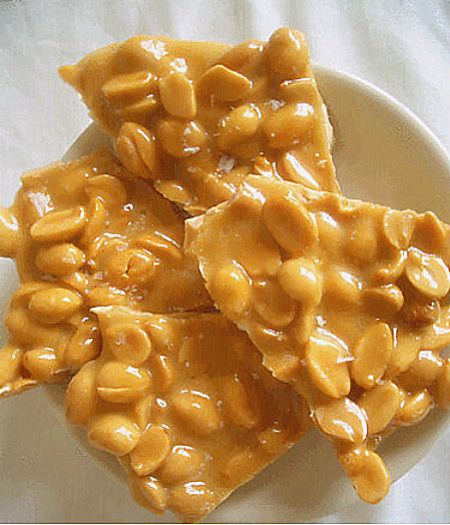
One Year Ago Today: Maple Apple and Cheddar Pie


Two Years Ago Today: Mexican Lasagna


Three Years Ago Today: Pear Flognarde


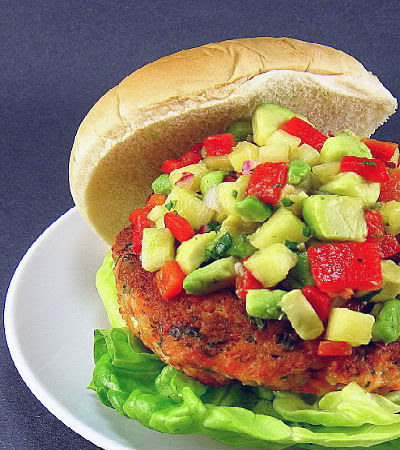
Four Years Ago Today: Fresh Salmon Burger with Chipotle Aioli and Pineapple-Avocado Salsa

Tuesday, January 24, 2012

West African Peanut Soup - Groundnut Stew


From the kitchen of One Perfect Bite...This rich and delicious soup is quite thick and often used as a sauce for rice or chicken. I came across the dish while searching for foods that would typically be served at celebrations held during the African harvest festival, Kwanzaa. The soup is protein-packed and, with a base of peanuts and tomatoes, it makes a great vegetarian entrée that is perfect for Meatless Mondays. Throughout most of the world, peanuts are called groundnuts. They were brought to Africa by the Spanish and Portuguese and to the United States by African slaves, who called them goobers or pindars. They were an integral part of the slave diet. Milk and dairy products were unusual in the countries from which they came because the tsetse fly made cattle rearing impossible. Ground nuts, puréed vegetables and certain fruits were used in their stead to make rich, creamy and filling soups and stews. Peanuts were a perfect choice because they were easily grown. The soup is always made with peanut butter, tomatoes, hot peppers, and onions. In Africa it would be served with plantains and cassava dumplings or with rice balls. Here in the United States, boiled potatoes, rice or whole-grain bread are the usual accompaniments. I like to serve it as a simple first course. This is a rich soup and if you find it too thick, it can be thinned to your liking. I like to add lemon juice to the soup once it is pureed. I find it really brightens the flavor. This is an unusual soup, but I think those of you who try it will find it to be very pleasant. Here's the recipe.

West African Peanut Soup ...from the kitchen of One Perfect Bit adapted from a recipe by Allison Liefer and Kate Leahy via Relish.com

Ingredients:

1 tablespoon olive oil
1 medium yellow onion, chopped (about 1 cup)
1 medium carrot, peeled and chopped (about 3/4 cup)
1 to 2 teaspoons peeled, minced fresh ginger
1 pinch cayenne pepper
1 sweet potato peeled and chopped (about 1 cup)
3-1/2 cups water, divided
1/2 cup tomato juice
1/4 teaspoon salt
1/4 teaspoon black pepper
1/2 cup creamy peanut butter
1 teaspoon lemon juice
5 scallions, chopped

Directions:
1) Heat olive oil in a large saucepan. Stir in yellow onions and carrots and cook, stirring often, until onions are soft, about 3 minutes. Add ginger and cayenne; cook 1 minute.
2) Add sweet potato, 3 cups water, tomato juice, salt and pepper. Bring to a boil; reduce heat and simmer, stirring often, until potatoes are soft, about 15 minutes. Let cool slightly.
3) Ladle soup into bowl of a food processor. Add peanut butter. Cover and process until smooth. Pour into a clean pan.
4) Heat soup over low heat. Add remaining 1/2 cup water to thin if desired. Stir in lemon juice. Ladle into soup bowls and top each serving with green onions. Yield: 4 to 5 servings.


One Year Ago Today: Conchas - Mexican Shell-Shaped Pastry


Two Years Ago Today: Drop Biscuits with Cheddar Cheese and Garlic Butter


Monday, December 19, 2011

Peanut Brittle


From the kitchen of One Perfect Bite...It took two attempts, but I finally got this lovely recipe right. While it didn't burn first time through, I was distracted and let the brittle get ahead of me. It turned a dark and unappealing color that looked burned and would prevent folks from trying it, despite its lovely taste. Rather than waste the batch, I put it into the blender and made a praline-type powder to use for flavoring and decorating other pastries.Then I took the phone off the hook and set to work again. The Silver Fox loves brittle, and when I saw the candy Dave and Sarah Eickelberg made using a treasured family recipe, I was determined to duplicate their results. They have a step by step tutorial that will make easy work of this, should you decide to give their recipe a try. The tutorial can be found here and I'm happy to report that second time through was a charm. This is a lovely brittle and candy lovers will be delighted with the results. You will, however, need a candy thermometer to make this properly. I used salted peanuts, so I ended up with a sweet and salty combination that is almost irresistible. Those of you who love sweet things will love this recipe. Here's how the brittle is made.


Peanut Brittle
...from the kitchen of One Perfect Bite courtesy of Dave and Sarah Eickelberg

Ingredients:
2 cups sugar
1 cup light corn syrup (i.e.Karo)
1/2 cup water
2 sticks (1 cup) of butter
3 cups roasted peanuts
1 teaspoon vanilla extract
1 teaspoon baking soda

Directions:

1) Combine sugar, corn syrup and water in a 3 quart saucepan. Cook and stir on medium to medium-high heat until sugar dissolves. When syrup begins to boil, blend in butter.
2) Stir frequently after mixture reaches the syrup stage (230 degrees F).
3) Add nuts when temperature reaches soft-crack stage (280 degrees F).
4) Stir constantly until temperature reaches hard-crack stage (305 degrees F).
5) Remove pan from heat. Quickly stir in baking soda and vanilla, mixing thoroughly. Pour onto two cookie sheets, sprayed with cooking spray. Stretch mixture evenly across pan using the back of a metal spoon, sprayed with cooking spray.
6) After brittle cools (30-45 minutes), remove from pan and break into pieces.


One year Ago Today: Quick Bread Round-Up


Two Years Ago Today: Moravian Spice Cookies

Friday, March 25, 2011

Peanut Crusted Chicken Breasts with Sweet Onion Sauce


From the kitchen of One Perfect Bite...This is a nice recipe to have on hand for a family meal. It's easy to prepare and while it's great for a weeknight, it lacks the finesse needed to elevate it to company fare. The chicken is breaded with a peanut crust and baked rather than sauteed. It's served with a sweet yogurt sauce that's flavored with peanut butter and a Vidalia onion dressing. While I prefer to make my own dressing, I've tested this recipe using one that is commercially available. The commercial variety does nicely and makes quick work of meal preparation. For those of you who are purists and prefer the "from scratch" route, I'll post my recipe for sweet onion dressing within the next few days. If you like heat, you might want to add a bit of sriracha to the finished peanut sauce which can, by the way, be made with natural peanut butter. The chicken will be more flavorful if you use salted roasted peanuts in the crumb coating. I like to serve this over lightly dressed bitter greens such as arugula or watercress. It is quite filling and you won't need a lot of sides to fill out the meal. If you're looking for a nice family meal that's a bit out of the ordinary, you like this one. Here's the recipe.

Peanut Crusted Chicken Breasts with A Nutty Sweet Onion Sauce
...from the kitchen of One Perfect Bite

Ingredients:
Chicken
4 (6-oz. each) boneless skinless chicken breasts, pounded to 1/2-inch
1 cup flour
2 beaten egg whites or 1/4 cup egg substitute (i.e. egg beaters)
4 teaspoons creamy peanut putter
2 tablespoons Vidalia onion salad dressing (commercial product is O.K.)
1 cup panko bread crumbs
1 cup finely chopped salted peanuts, toasted
3/4 teaspoon chili powder
Peanut Onion Sauce
3 tablespoons creamy peanut butter
1/3 cup Vidalia onion salad dressing
1/2 teaspoon soy sauce
1 tablespoon finely chopped parsley
1/2 cup Greek-style yogurt

Directions:
1) To prepare chicken: Preheat oven to 400 degrees. Dredge chicken strips in flour, dip in a mixture of egg white, peanut butter and Vidalia onion salad dressing, then coat with a mixture of bread crumbs, peanuts and chili powder. Place on a greased rack set over a cookie sheet and bake until cooked through 20-30 minutes.
2) To make sauce: Mix peanut butter and dressing until smooth. Stir in soy sauce, parsley and yogurt. Mix well. If very thick, thin with milk. Chill until serving time.
3) To serve: Serve with sauce on plates lined with bitter greens and topped with chicken. If desired, garnish with strands of lemon zest and parsley. Yield: 4 servings.

You might also enjoy these recipes:
Oven Fried Chicken Tenders - Taste and Tell
Spicy Oven Fried Chicken for Two - 101 Cooking For Two
Buttermilk Oven Fried Chicken - Living the Gourmet
Panko and Chili Crusted Oven Fried Chicken Fingers - The Hungry Mouse
Crispy Oven Fried
Chicken - Barley Edible

Pecan Oven-Fried Chicken - Foodista
Oven-Fried Coconut Chicken - Yummly Nibbles and Bits
Oven-Fried Chicken - Culinary in the Country
Oven Fried Chicken Parmesan - Guiding Stars
Cornflake Family Recipe: Oven Fried Chicken - Ultimate Foodie
Buttermilk Oven Fried Chicken - Nook and Pantry
Lemon Pepper Oven Fried Chicken Fingers - Food for Thought

Wednesday, March 23, 2011

Thai-Style Honey Peanut Chicken


From the kitchen of One Perfect Bite...This is a quick meal that's perfect for a weeknight dinner. While it may not light your fire, it will quench your hunger and leave folks at your table happy to have tried and survived something new. I chose this version of peanut chicken because it's easy, inexpensive and all the ingredients needed to prepare it can be found in your neighborhood grocery store. I've made very minor changes to the original recipe that was, as nearly as I can tell, first posted by spygirl, at The Tasty Kitchen. Pam Anderson and her daughters, who together blog at Three Many Cooks, have included a tutorial that you might also enjoy. I don't marinate the chicken and I've increased the amount of peanut butter that's used to make it. I've also used chicken thighs because I think they stay moister than breasts which can dry and toughen quickly. This is not a dish that will appeal to younger children. The heat from the chili paste and curry powder will lead to locked-lip syndrome despite the fact that it is very mild. You can, by the by, eliminate the sriracha. I think it would be a mistake because it adds wonderful flavor to the chicken, but it's done all the time. I like to serve this with cilantro or scallion rice. It can be table ready in 30 minutes and that makes it great weeknight fare. Here's the recipe.

Thai-Style Honey Peanut Chicken...from the kitchen of One Perfect Bite inspired by a recipe originally developed by spygirl

Ingredients:
1/2 cups soy sauce
1/4 cup honey
2 tablespoons lime juice
2 teaspoons minced garlic
3 tablespoons creamy peanut butter
1 teaspoon curry powder
2 teaspoons Sriracha or other Asian-style hot chili sauce
6 to 8 boneless skinless chicken thighs, each cut into 4 chunks

Directions:

1) Add soy sauce, honey, lime juice, garlic, peanut butter, curry powder and sriracha to a large skillet. Bring to a simmer, stirring until mixture is smooth.
2) Add chicken, turning to coat all sides with sauce. Cook chicken in simmering liquid for 8 to 10 minutes, or until chicken is done. Transfer to a bowl.
3) Boil liquid in pan until it begins to thicken and syrup bubbles form. Return chicken to pan, turning to coat pieces in sauce. Transfer to a serving platter. Garnish with chopped peanuts and cilantro if desired. Serve with steamed rice. Yield: 4 servings.

You might also enjoy these recipes:
Peanut Butter Thai Chicken - Being Healthier
Spicy Thai Peanut Chicken - Laura's Recipe Collection
Thai Spicy Chicken Enchiladas - Closet Cooking
Ginger Peanut Chicken Salad Wrap - What's Cookin Chicago?
Thai Chicken Peanut Panini - The Sweet's Life
Thai Chicken Thighs (Slow Cooker) - The Cottage Kitchen
Thai Chicken Burgers - Cook, Eat and Relax
Spicy Thai Chicken Saute - Vazhayila
Thai Peanut Quesadillas - Barbara Bakes
Thai Chicken Curry Wraps - Jenn Cuisine
Thai Chicken Mole - Closet Cooking
Thai Chicken with Basil and Black Pepper - My Gourmet Connection
Thai Chicken Red Curry - Deb Cooks

Tuesday, March 22, 2011

Peanutty Ice-Box Cake


Featured on Amuse Bouche the blog for the magazine Where Women Cook
.


From the kitchen of One Perfect Bite...Albert Einstein is attributed with saying, "Insanity is doing the same thing over and over again and expecting different results." Sometimes. Maybe. Confused might be a better word for the robin who spends all day, every day, diving into the large bank of windows that front our home. This has gone on for days now, and while we've done everything we can think of to ward him off, he'll keep at it until nesting season is over or he is concussed and falls from the sky. This happens every year and I'm always amazed these confused souls make it through mating season with their small brains intact. I mention this only because I can no longer deny my own recidivist tendencies. The delivery of locally raised meat forced me to access the contents of my auxiliary freezer. A quick inventory revealed that it was packed to the rafters and there was no room for the meat. This, too, happens every year and it's a good thing that Albert isn't around 'cause we all know what he'd say. After some mild cursing, deep digging and inventory analysis, I made space for the meat. The only bizarre aspect of the episode was my freezer wasn't jam-packed with meat or vegetables or survival staples. It was packed to the rafters with bread, berries and nuts. If ever there is a shortage of freezer jam stop by. I have enough of it to feed a small country. At any rate, tucked among the nuts was an embarrassingly large stash of peanuts. So, as you probably have already guessed, I'll be exploring recipes for peanuts for the next few days, and think I'll call the exercise Nuts to You Week in honor of Albert Einstein.

While many would call this a refrigerator cheesecake, I think it's more like an old-fashioned Charlotte or an ice-box cake. While it contains cream cheese, its texture is mousse-like and completely different than that of a cheesecake. The recipe, which comes from The Peanut Institute, is one of the easiest I've ever come across and even beginning cooks will be able to make it successfully. The Silver Fox made the cake that I photographed for this post. I've made no changes to the original recipe, but I do have a couple of suggestions should you decide to make it. I freeze the cake and slice it while it is frozen. This mousse-like cake is very soft, and in a perfect world it would benefit from the infusion of a bit of gelatin. The use of gelatin would, however, move the cake from its super easy status, so freezing it is the way to go if you want clean slices. Once it's cut, it has enough substance to stand on its own without drooping. I let the frozen slices sit in the refrigerator for an hour or so before serving. If I'm in a real rush 30 minutes at room temperature will also do the trick. This obviously is not gourmet fare, but it's a really nice dessert that's suitable for guests as well as family. If you like peanut butter desserts, you'll love this one. Here's the recipe.

Peanutty Ice-Box Cake...from the kitchen of One Perfect Bite courtesy of The Peanut Institute

Ingredients:
3/4 cup chopped roasted peanuts
1 cup graham cracker crumbs
1/3 cup butter, melted
2/3 cup creamy peanut butter
4 packages (3 oz. each) cream cheese, softened
1 can (14 oz.) sweetened condensed milk
1/3 cup lemon juice
1 teaspoon vanilla
1 container (4 oz.) frozen whipped topping, thawed
1/2 to 3/4 cup chopped roasted peanuts for garnish

Directions:
1) Combine peanuts, graham cracker crumbs and melted butter. Press crumb mixture into 9-inch spring form pan. Chill crust for 20 minutes.
2) Using an electric mixer, cream softened cream cheese and peanut butter until fluffy. Gradually add condensed milk and mix well. Add lemon juice and vanilla and blend well. Fold in whipped topping.
3) Pour mixture into prepared crust. Garnish with chopped peanuts. Chill 2-3 hours or freeze. Makes 12 servings.

You might also enjoy these recipes:
No-Bake Cheesecake with Green Apple Syrup - Anncoo Journal
Chocolate Strawberry Refrigerator Cheesecake - Passionate About Baking
Irish Cream Cheesecake - Drick's Rambling Cafe
No-Bake Cheesecake - Closet Cooking
No Bake Mini Cheesecakes - Gigi Cakes
Mini No-Bake Cheesecake - Felice in the Kitchen
Lemon Myrtle No-Bake Cheesecake - The Three Cheeses
No-Bake Low-fat Yogurt Cheesecake - My Wok Life
No Bake Vanilla Cheesecake with Thin Mint Crust - Baking Bites
Mini Oreo Cheesecakes (No Bake) - Made with Love
No-Bake Cheesecake - Diner's Journal New York Times
No-Bake Creme de Menthe Cheesecake - Delicate Flavors
No-Bake Bailey's Cheesecake - Ping Mouse
Blueberry Cheesecake - Pinoy Food

Monday, March 21, 2011

Pumpkin-Peanut Risotto


From the kitchen of One Perfect Bite...This lovely risotto is really a perfect dish for Meatless Mondays. It has wonderful color and a flavor profile that is sure to please. The recipe was developed at the Culinary Institute of America and it is nearly foolproof to make. You must, however, be careful not to over cook the arborio rice, and make sure that the risotto is served while it is piping hot. The rice gets gummy as it cools and it does not reheat well. If you do have leftovers, plan to use them to make risotto cakes or use them as a binder in chopped or ground meat. I use canned, unseasoned puree to make this, though I'm sure the risotto would be even better made with fresh pumpkin or squash. I made no changes to the recipe, save for the addition of salt and a pinch of nutmeg. I like this well enough to incorporate it into our Easter dinner. I have yet to decide if I'll serve it as a separate course or use it as a side along with other dishes. All the ingredients needed to make the risotto can be found in any well-stocked grocery store. Here's the recipe which I first found at The Peanut Institute.

Pumpkin-Peanut Risotto...from the kitchen of One Perfect Bite, courtesy of the Culinary Institute of America

Ingredients:
2 tablespoons unsalted butter
1 tablespoons peanut oil
1/3 cup onion, finely minced
1-1/2 cups arborio rice
5-1/2 cups chicken or vegetable broth
1 cup canned unsweetened pumpkin puree
1 tablespoon lemon juice
1 tablespoon fresh parsley, chopped
1 tablespoon unsalted butter
1/4 cup parmesan cheese, grated
1/2 cup peanuts, toasted
Pinch of nutmeg
Salt to taste

Directions:

1) Heat butter and peanut oil in a heavy 4-quart casserole over moderate heat. Add onion and sauté for 1 to 2 minutes, until it begins to soften, being careful not to brown it.
2) Add rice to onions and stir for 1 minute, using a wooden spoon to make sure all grains are well coated. Bring the broth to a steady simmer in a saucepan on top of stove. Begin to add simmering broth, 1/2 cup at a time, stirring frequently. Wait until each addition is almost completely absorbed before adding next 1/2 cup, reserving about 1/4 cup to add at end. Stir frequently to prevent sticking.
3) When rice is tender but still firm, about 18 minutes, add reserved broth, pumpkin, lemon juice and parsley. Turn off heat and immediately add butter and Parmesan and stir vigorously to combine with rice. Garnish with peanuts. Serve immediately. Yield: 4 servings.

You might also enjoy these recipes:
Shrimp Risotto - One Perfect Bite
Asparagus and Lemon Grass Risotto - One Perfect Bite
Risotto with Smoked Salmon Spinach and Peas - One Perfect Bite
.
Risotto all Milanese(2) - Love through the Stomach
Farro Risotto - Christine's Cuisine
Brown Rice Risotto with Roasted Tomatoes - Deliciously Organic
Lobster Risotto - In Danny's Kitchen
Mushroom Risotto - Closet Cooking
Sausage and Mushroom Risotto - Sugar Crafter
Roasted Garlic Risotto - Handle the Heat
Asparagus and Mushroom Risotto - Life's Ambrosia
Mexican Risotto - What's Cooking, Mexico
Salmon and Pea Risotto - Coconut and Lime
Mushroom and Leek Risotto - Sweet Salty Spicy
Lemon and Roasted Red Pepper Risotto - Food is Love
Tomato Risotto - Phem Fatale
Butternut Squash Risotto - So Easy, So Tasty
Turkey Mushroom Risotto - Simply Recipes
Fresh Corn Risotto - Culinary in the Desert
Barley Risotto with Mushrooms and Thyme - Kalyn's Kitchen

This post is being linked to:
Smiling Sally - Blue Monday

Friday, February 4, 2011

Chocolate Peanut Clusters - Pink Saturday


From the kitchen of One Perfect Bite...I wanted to include the recipe for peanut clusters in this week's Chocolate Extravaganza, anticipating that some of you might want to make something like this for Valentine's Day. When my children were still quite young, we established a tradition for gift giving. Purchased gifts were, of course, fine, but there was an expectation that each of those gifts would be accompanied by one that was handmade. My children adored Bob's mother, and over the years they made some outrageous and unintentionally humorous gifts for her. My favorite among them was an elaborately decorated cane, that looked for all the world like a totem pole. She had no need for it at the time, but as they explained it, someday she would and in the meantime she could practice. Another of their favorite gifts for her were these peanut clusters which I suspect she liked these a lot more than the cane. I know my children loved to make them for her. The recipe was a simple "cuppa" creation that they really could make by themselves. Unobtrusive supervision was necessary because there's a point when the chocolate could burn small fingers, but once that stage had passed they could truly work on their own. If you decide to have your children make these, brace yourself for a mess. Old clothes, or as few clothes as your sense of modesty dictates, and plastic gloves will help contain the mess, but you'll want to be around to supervise a clean-up that can be smudgy. I'm embarrassed to call this a recipe. It's more an accumulation of stuff that tastes really good when melted together. The classic and most popular version of the clusters includes a combination of chocolate and butterscotch chips. I actually prefer them made with a mix of bittersweet and semisweet chips and really well-salted peanuts. Fortunately, this is one of those recipes that you can play with. I'm going to give you the classic recipe, but I hope you won't remain tied to it. The big surprise here is that these really are delicious. Here's the recipe.

Chocolate Peanut Clusters...from the kitchen of One Perfect Bite

Ingredients:
1 cup semi-sweet chocolate chips
1 cup butterscotch chips
1 cup peanuts

Directions:
1) Line a cookie sheet with parchment paper.
2) Melt chocolate and butterscotch chips in top of a double boiler set over simmering water until creamy. Remove from heat. Stir in peanuts and coat well.
3) Drop onto parchment paper using a soup spoon. Place in a cool place to harden for about an hour. Store in a cool room or refrigerator. Yield: 2 dozen peanut clusters.

You might also enjoy these recipes:
Chocolate Truffles - Confections of a Foodie Bride
Easy Homemade Candy Bars - Amanda's Cookin'
Peanut Butter and Jelly Truffles - A Mingling of Tastes
Salted Peanut Caramel Clusters - All Day I Dream About Food
Sponge Candy - Christine's Cuisine
Spicy Peanut Brittle - Vanilla Sugar
Chocolate-Pecan Turtles and Salted Caramels - Island Eat

This post is being linked to:
Pink Saturday, sponsored by Beverly at How Sweet the Sound.

Friday, October 29, 2010

Chocolate Peanut Crinkles


From the kitchen of One Perfect Bite...This cookie recipe kept making the rounds and each time I saw it I became "curiouser and curiouser." Chocolate crinkles, I call them snowballs, are a favorite of mine, so it was only a matter of time before I actually tried the recipe. It was developed by Bill Yosses, a White House pastry chef, and I wanted to see how his cookies differed from the old classic I've grown to love. They are, indeed, different. Their texture is far more cakelike than what I'm familiar with. They are also huge in size. Whether that's good or bad is a subjective call. The nuts add a subtle taste to the finished cookie, but they don't overpower the chocolate, and the bit of added texture they provide is not unpleasant. I'm glad I made these cookies, though I don't plan on making them them again. They are delicious to be sure, but delicious comes on a sliding scale. The classic recipe I use can be found here. I think it makes a better cookie. I don't want to dissuade you from trying Chocolate Peanut Crinkles. Your opinion my differ from mine. Here's the recipe.

Chocolate Peanut Crinkles...from the kitchen of One Perfect Bite, courtesy of Bill Yosses and Melissa Clark

Ingredients:
2/3 cup toasted, skinned unsalted peanuts
2 tablespoons granulated sugar
6 ounces bittersweet chocolate, coarsely chopped
2-3/4 cup all-purpose flour
2 tablespoons Dutch-processed unsweetened cocoa powder
2 teaspoons baking soda
3/4 teaspoon salt
1-1/2 cups light brown sugar
8 tablespoons unsalted butter, softened
2 large eggs, room temperature
1/4 cup whole milk
1 teaspoon pure vanilla extract
3/4 cup confectioners’ sugar

Directions:

1) Place nuts and granulated sugar in bowl of a food processor fitted with a blade attachment. Pulse to finely chop.
2) Melt chocolate in the top of a double boiler set over a pot of simmering water.
3) Sift flour, cocoa powder, baking soda and salt together in a large bowl. Place butter and brown sugar in bowl of an electric mixer fitted with a paddle attachment. Cream until light and fluffy. Add eggs, one at a time, until incorporated. Beat in the melted chocolate, stopping mixer to scrape down sides before beating again. Mix in milk and vanilla. Add flour mixture in three additions, and mix until just combined. Fold in nuts.
4) Form dough into a ball and cover tightly with plastic wrap. Refrigerate dough for 3 hours or overnight.
5) When you are ready to bake, preheat oven to 350°F. Line two baking sheets with parchment paper, or lightly butter them, and set aside.
6) Place confectioners’ sugar in a wide, shallow bowl. Scoop out a heaping tablespoon of dough and roll into a ball. Coat generously with sugar and transfer to a baking sheet, placing them at least 2-inches apart. Repeat with remaining dough and sugar.
7) Bake cookies, turning sheets from back to front and swapping racks halfway through, until cracked but not completely firm, 12-15 minutes. Cool cookies on the sheets for about 2 minutes, then use a spatula to transfer to wire racks to cool further. They may be stored airtight at room temperature for up to 2 days. Yield: 3-1/2 dozen.

You might also enjoy these recipes:
Chocolate Cookies n' Cream Cookies - Baking Bites
Dark and Bitter Orange Chocolate Cookies - The Technicolor Kitchen
Flourless Peanut Chocolate Cookies - Culinary in the Country
Double Chocolate Dream Cookies - Cookie Madness
Chocolate Sables: World Peace Cookies - Deep South Dish
Triple Chocolate Cookies - Une Gamine dans la Cuisine
Totally Chocolate Chocolate Chip Cookies - Sweet and Savory Tooth
Thick and Chewy Triple Chocolate Cookies - Brown Eyed Baker
Related Posts with Thumbnails

Printfriendly