Showing posts with label yeast rolls. Show all posts
Tuesday, March 8, 2016
Lemon Sticky Buns
From the kitchen of One Perfect Bite...Easter will be here before we know it and my plans for the holiday are already underway. I tested this recipe a couple of weeks ago and I was so pleased with the results that I wanted to share it with you. My version of these lemon sticky buns is a compilation that comes from many sources. I owe Alton Brown kudos for his interpretation of overnight cinnamon buns. It is a fabulous recipe and I used it as a base for my lemon version of the buns. His recipe is not hard to follow, but you can stumble if you are not aware of time constraints the recipe places on the cook. The dough for these rolls needs to rise slowly in the refrigerator for at least 8 hours. The slow rise adds great flavor to the rolls, as well as easing the work required to pull off a holiday brunch. The lemon version is quite sticky, so be sure to grease your pans well or you will not be able to remove them from the pan. I let mine cool on a rack for about 10 minutes before I turn them out for a final cooling. While the rolls can be frozen in their unbaked state, they are best if served the day they are made. If you are a lemon lover, these rolls have your name on them. They are fancy enough for a company breakfast and I know you will love them. Here is how they are made.
Labels:
cream cheese
,
lemon
,
sticky buns
,
yeast bread recipes
,
yeast rolls
Friday, April 10, 2015
Whole Wheat Dinner Rolls

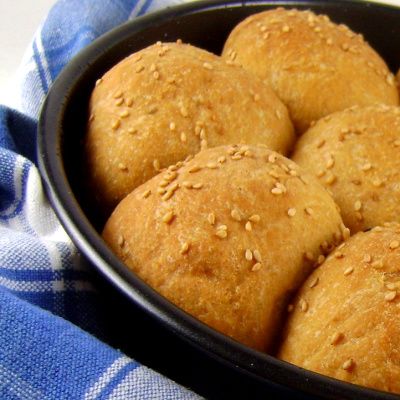
From the kitchen of One Perfect Bite...This is the recipe I use when I want to serve whole wheat rolls for dinner and I don't have a lot of time to be creative. The recipe is great for a couple of reasons, the first and most important is that it makes a very nice dinner roll. The second is that the dough can be used the day it is made or refrigerated overnight and used over the course of the next several days. If you have an electric stand mixer, this recipe falls into the beginner's category because the mixer does most of the work. You can shape the dough as you wish and I think you will be pleased with the result. My only complaint about these rolls is that it is difficult to get then to brown nicely. I've gotten around that problem by using an egg wash to give at least the tops of the rolls some color. If you like to make your own rolls, I hope you'll keep this recipe in mind. It is fast, easy and darn near fail proof. Here is how the rolls are made.
Labels:
easy
,
refrigerator rolls
,
whole wheat rolls
,
yeast rolls
Thursday, April 2, 2015
Seeded Buttermilk Yeast Rolls
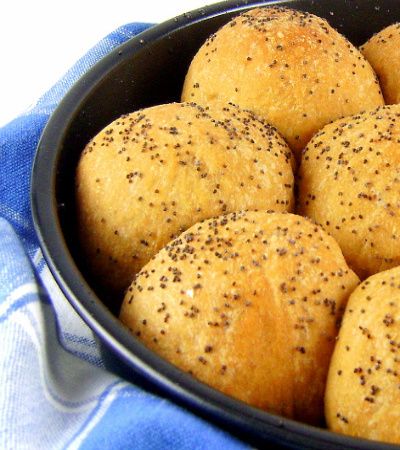
From the kitchen of One Perfect Bite...I'm starting to put together the final menu for our Easter dinner, and wherever I can, I'm baking and freezing courses ahead of time. I decided to make molasses yeast rolls, as well as these buttermilk rolls, to accompany our meal. Both rolls are delicious and just as handsome as they can be, but the buttermilk rolls have a color that makes them the sirens of the bread kingdom. Would that I could, my Easter dinner would be a salad and as many of these rolls as my poor stomach could hold. I also made and froze the soup that I'll be serving as our starter course. That means I have to be more cautious with my make-ahead preparations from this point on, because the freezer is now as crowded as Tokyo subways at rush hour. If I'm really clever and carefully stack, I can squeeze one of the cakes I plan to serve in there as well. More about that tomorrow. These rolls are simple to make and they freeze well. I use poppy seeds for sprinkling because there is an old-world quality about them that I love. If you make and freeze the rolls, bring them to room temperature, wrap them in foil, warm in a 350 degree oven for about 20 minutes and they'll be as good as new. I do hope you'll give this recipe a try. I know your friends and family will love them. Here is how the rolls are made.
Labels:
buttermilk rolls
,
easter dinner
,
easy
,
poppy seeds
,
yeast bread
,
yeast rolls
Sunday, March 29, 2015
Hollywood-Style Hot Cross Buns
From the kitchen of One Perfect Bite...There is no truth to the rumor that I'm on a quest to find the world's greatest Hot Cross Bun. It may, however, be true that I'm infirm of purpose when I find a new recipe for them that looks better than my current favorite. I think that's what happened here. I was lured by a gorgeous photo and then roped and tied by the name, Hollywood's Hot Cross Buns. My first thought was California but I quickly learned I was way off base. As it turns out, Paul Hollywood is an English baker and celebrity chef, who best known for being a judge on the BBC One's The Great British Bake Off. Pictures of his Hot Cross Buns are all over the internet and while his buns, which require 3 rises, are more time consuming than most to make, I can tell you they are delicious and worth every second they take to assemble. They are my favorite, at least for this year. I'm not going to repeat the history of the buns tonight, but if you are curious, I included it in my first post about them and you can find that information, here. I hope you will give tonight's recipe a try. The buns have a decidedly fluffy texture and the dried fruit and spices give them a well-developed flavor. The dough is quite damp, so you will want to oil the surface on which you knead it to prevent sticking. Rest assured, if you keep at it, the dough will come together and you will have lovely fragrant buns to serve your family and friends. Here is how the buns are made.
Labels:
easter pastry
,
lenten buns
,
mixed peel
,
raisins
,
spices
,
yeast bread
,
yeast rolls
Monday, April 14, 2014
Overnight Refrigerator Rolls
From the kitchen of One Perfect Bite...The holidays have a way of sneaking up on us and it seems there is never enough time to accomplish all that needs to be done. When it comes to my holiday kitchen and what goes on my table, the recipes I use are a strange mix of the very hard and the very easy. The very easy ones are, of course, the result of the speed with which the clock ticks and the need to keep me sane while I get dinner on the table. My family loves fresh bread that's served warm from the oven and it has become a feature of our holiday meals. I love to bake and over the years I've collected a gazillion recipes for bread and rolls, but this is one I fall back on when I know I'm losing the race with time. These refrigerator rolls are especially simple to make because an electric mixer does all the work and no kneading is involved. The finished rolls have a soft yeasty interior and while the crust is slightly resistant to the tooth, they are not classic hard rolls. I've also found they make wonderful sandwich rolls when formed into six rather than twelve pieces of dough. This is a great recipe to keep on hand when you want to serve fresh bread to your family but are pressed for time. Here is how they're made.
Labels:
bread
,
easy
,
no-knead
,
refrigerator rolls
,
yeast rolls
Friday, February 7, 2014
Frugal Foodie Friday - Savory Sandwich Buns
From the kitchen of One Perfect Bite...Weather kept me inside today, so dinner had to be made with pantry and refrigerator items. I decided to make a huge batch of pulled pork and it was not until the pork was simmering away, that I realized I no rolls in the freezer. Yeast and flour are never in short supply here, so I decided to make the savory sandwich buns that I'm featuring here tonight. As it happens, the rolls are very inexpensive to make and it dawned on me that they would be perfect to share with you as part of my Frugal Friday series. If you have a stand mixer, you can have these rolls on the table in about 2 hours. The dough is easy to work with and it can be shaped into any form you choose. The addition of garlic salt and minced onions set them apart from most sandwich rolls and I think you'll enjoy their savory difference. Here is how they are made.
Labels:
easy
,
frugal foodie friday
,
garlic
,
savory rolls
,
scallions
,
yeast rolls
Monday, December 2, 2013
Countdown to Christmas - Danish Cinnamon Crisps
From the kitchen of One Perfect Bite...This is a nice recipe to have on hand for the Christmas holidays. These butter-rich crisps make a wonderful addition to a holiday breakfast or tea table, and while I'm not sure they actually come from Denmark, their preparation is similar to that of a Danish pastry. Hence the name. These saucer-sized sweet rolls crisp because they are flattened when they start to rise. They are not shatteringly brittle if made according to recipe specifications, but they will become crisper the longer they are baked. If you decide to increase baking time, keep an eye on the rolls because that cinnamon sugar topping burns quite easily. It is is also important to remove the rolls from the baking sheets as soon as they come from the oven. Given half a chance, they will become one with the pan and you'll have a mess to deal with. I actually use a nonstick spray on my cooling racks to assure the crisps can be transferred easily. If you enjoy sweet breakfast rolls I think you will love the crisps. They would be a perfect addition to a holiday brunch menu. Here is how they are made.
Danish Cinnamon Crisps...from the kitchen of One Perfect Bite courtesy of Taste of Home magazine
Ingredients:
2-1/4 teaspoons active dry yeast
1/4 cup warm water
1 cup warm 2% milk
2 cups sugar, divided use
1/2 cup plus 6 tablespoons butter, softened, divided
1-1/2 teaspoons grated lemon peel
1 teaspoon salt
1/2 teaspoon ground mace
2 large eggs
5-1/2 to 6 cups all-purpose flour
3 teaspoons ground cinnamon
Directions:
1) In a large bowl, dissolve yeast in warm water. Add milk, 1/2 cup sugar, 1/2 cup butter, lemon peel, salt, mace, eggs and 2 cups flour. Beat well. Stir in enough remaining flour to form a soft dough. Turn onto a floured surface and knead until smooth and elastic, about 6 to 8 minutes. Place in a greased bowl, turning once to grease top. Cover and rise in a warm place until doubled, about 1 hour.
2) Punch dough down. On a lightly floured surface, roll out dough into a large rectangle, about 1/4 inch thick. Spread with 2 tablespoons butter. Sprinkle with 1/3 cup sugar. Fold in half lengthwise. Roll again to 1/4 inch thickness. Spread with 2 tablespoons butter and sprinkle with another 1/3 cup sugar. Fold in half widthwise and roll to an 18 x 10-inch rectangle. Spread with remaining butter. Combine the cinnamon and remaining sugar. Sprinkle half over dough to within 1/4 inch of edges. Roll up tightly, starting with a short side and pinch to seal. Cut into 1/2-inch slices.
3) Place on greased baking sheets (four to six slices per sheet). Cover with waxed paper and flatten with palm of hand. Sprinkle with remaining cinnamon-sugar. Let stand in a warm place for 30 minutes.
4) Meanwhile, preheat oven to 400 degrees F. Bake crisps for 12-15 minutes. Immediately remove from pans to wire racks. Yield: about 1-1/2 dozen.
Cook's Note: I crisp these in a toaster oven for about 5 minutes before serving them. This allows the topping sugar to caramelize and makes the rolls really special.
Older Posts


One Year Ago Today: Two Years Ago Today:
Savory Brown Butter Soda Bread Spaghetti al Limone 

Three Years Ago Today: Four Years Ago Today:
Pumpkin Pancakes with Caramel-Orange Lamb Shanks with Wine Sauce
Labels:
cinnamon
,
countdown to christmas
,
crisps
,
sweet rolls
,
yeast rolls
Wednesday, November 20, 2013
Remains of the Day - Cranberry Kolaches
From the kitchen of One Perfect Bite...If you have some time and your holiday leftovers include a cup or so of cranberry sauce, you might want to give this recipe for cranberry kolaches a try. It comes from Taste of Home magazine and the rolls are quite easy to make. While the recipe below is fine, I do have one suggestion for those of you who plan to try them. Finely chop or dice, rather than grate, the apples. The grated apples have a porcupine like mien that I think spoils the appearance of the kolaches. While I often dispense with a glaze on this type of roll, the cranberry sauce is tart enough to warrant its use here. The rolls can be table ready in a bit less than two hours and I think you will enjoy them. Here is how they are made.
Cranberry Kolaches...from the kitchen of One Perfect Bite courtesy of Taste of Home magazine
Ingredients:
Buns
4 to 4-1/2 cups all-purpose flour
1/4 cup sugar
2-1/4 teaspoons active dry yeast
1 teaspoon salt
3/4 cup milk
1/2 cup water
1/4 cup butter, cubed
1 large egg
Filling
1 cup whole-berry cranberry sauce
1 cup grated peeled tart apple
1/2 teaspoon ground cinnamon
Glaze
1 cup confectioners' sugar
1/4 teaspoon orange extract
1 to 2 tablespoons milk
Directions:
1) In a large bowl, combine 2 cups flour, sugar, yeast and salt.
2) In a saucepan, heat milk, water and butter to 120 - 130 degrees F. Add to dry ingredients beating just until moistened. Add egg and beat until smooth.
3) Stir in enough remaining flour to form a soft dough (dough will be sticky). Do not knead. Cover and let rest for 20 minutes. Turn dough onto a floured surface. Roll to 1/2-inch thickness. Cut with a floured 2-1/2-inch biscuit cutter. Place 2 inches apart on lightly greased baking sheets. Cover and let rise in a warm place until doubled, about 1 hour.
4) Preheat oven to 350 degrees F.
5) Using back of a spoon, make a 1-1/2-inch wide well in center of each roll.
6) Combine cranberry sauce, grated apple and cinnamon and spoon into each well.
7) Bake for 15-20 minutes or until golden brown. Remove from pans to wire racks to cool.
8) Combine confectioners' sugar, extract and enough milk to achieve drizzling consistency. Drizzle over rolls. Store in refrigerator. Yield: 18 buns.
Older Posts


One Year Ago Today: Two Years Ago Today:
Sweet Potato Pie Cider Brined Pork Loin 

Three Years Ago Today: Four Years Ago Today:
Nankhatai - Diwali Cookies Portuguese-Style Turkey Soup
Labels:
apple
,
cranberry
,
kolaches
,
leftovers
,
remains of the day
,
yeast rolls
Monday, November 11, 2013
Make Your Own Brown and Serve Rolls
From the kitchen of One Perfect Bite...Back in the day, if you did not make your own bread, rolls like these were the only game in town. Nowadays, choices for bread and rolls abound, and the brown n' serve rolls, once so frequently served with special meals, are rapidly disappearing from our holiday tables. I suspect their demise began with tubed biscuits and rolls and was further hastened by the presence of the microwave and its quick ability to warm and refresh bakery goods. I had never made twice baked rolls and this seemed as good a time as any to give them a try. Hey, if men can climb mountains simply because they are there, cooks certainly should be given the same prerogative when it comes to untried techniques and recipes. For good or ill, the day for brown n' serve rolls had arrived in my kitchen. The recipe I decided to use as my guide came from Taste of Home magazine. It was simple and straightforward and I found that rolls made with it were perfectly acceptable. Acceptable, however, is not great. I found these rolls to be heavier than most I've made in the past, but I like the twice baked technique described in the recipe and will probably test it with some of my other favorite dinner rolls. If you are looking for a sturdy dinner roll, I think you'll find this recipe useful and I suspect you'll also find the twice-baked technique it illustrates interesting. Here is how the rolls are made.
Brown and Serve Rolls...from the kitchen of One Perfect Bite inspired by Taste of Home magazine
Ingredients:
2-1/4 teaspoons active dry yeast
1/2 cup warm water
1/2 teaspoon + 2 tablespoons sugar, divided
1 cup warm 2% milk
1/2 cup shortening
2-1/2 teaspoons salt
5 cups all-purpose flour
Directions:
1) In a large bowl, dissolve yeast in warm water. Add 1/2 teaspoon sugar and let stand for 5 minutes. Add milk, shortening, salt, 1 cup flour and remaining sugar. Using an electric mixer, beat until smooth. Stir in enough remaining flour to form a stiff dough.
2) Turn onto a floured surface and knead until smooth and elastic, about 6-8 minutes. Place in a greased bowl, turning once to grease top. Cover and let rise in a warm place until doubled, about 1-1/2 hours.
3) Punch dough down. Turn onto a lightly floured surface; divide into two pieces. Cover second with plastic wrap. Divide remaining piece into 12 pieces. Shape into balls. Place 2-inches apart on greased baking sheets. Repeat with remaining dough. Cover and let rise until doubled, about 20 minutes.
4) To serve immediately, bake at 375 degrees F. for 12-15 minutes or until golden brown.
5) To freeze for later use, partially bake at 300 degrees F for 15 minutes. Allow to cool., then freeze. To use frozen rolls: Bake at 375 degrees F for 12-15 minutes or until golden brown. Yield: 2 dozen rolls.
Older Posts


One Year Ago Today: Two Years Ago Today:
Lemon and Sour Cherry Tea Cake Butterscotch Budino

Three Years Ago Today: Four Years Ago Today:
Cheese Straws Sugar Crusted Nut Bread
Labels:
bread
,
easy
,
rolls
,
twice baked
,
yeast rolls
Saturday, November 17, 2012
Cheese and Cornmeal Batter Buns

From the kitchen of One Perfect Bite...These buns are a nice accompaniment to the heavier soups of fall and winter. They are easy to make and they freeze well, so there's no reason to be put off by the quantity of buns the recipe produces. The recipe comes from the test kitchen of Better Homes and Gardens magazine and I've used it for years. I like the buns well enough to share the recipe with you. While they are made with yeast, the buns qualify as a batter bread because the dough used to form them is beaten rather than kneaded. I think those of you try this recipe will be pleased with the results. The buns are moist and delicious and perfect to serve with a bowl of steaming tomato soup. I hope you'll give the recipe a try. Here's how the buns are made.
Cheese and Cornmeal Batter Buns...from the kitchen of One Perfect Bite courtesy of Better Homes and Gardens magazine
Ingredients:
3-1/2 cups all-purpose flour
1 package active dry yeast
1-3/4 cups milk
1/4 cup sugar
2 tablespoons shortening
1-1/4 teaspoons salt
1 beaten egg
4 ounces sliced sharp American cheese, chopped
1/2 cup cornmeal
Directions:
1) Combine 2 cups of flour and yeast in a large mixing bowl; set aside. In a medium saucepan heat and stir milk, sugar, shortening, and salt just until warm (120 degree F to 130 degree F) and shortening is almost melted. Add milk mixture to flour mixture; add egg.
2) Beat with an electric mixer on low to medium speed for 30 seconds, scraping sides of bowl constantly. Beat on high speed for 3 minutes. Using a wooden spoon, stir in cheese, cornmeal, and remaining flour. Spoon batter into a lightly greased bowl. Cover and let rise in a warm place until double in size (50 to 60 minutes).
3) Generously grease twenty-four 2-1/2-inch nonstick muffin cups. Stir dough down. Spoon into prepared muffin cups, filling each about 3/4 full. Cover and let rise in a warm place until nearly double in size (30 to 40 minutes).
4) Bake in a 375 degree F oven for 15 to 20 minutes or until golden brown. Cool in pans on wire racks for 5 minutes. Remove from muffin cups. Serve warm or cool rolls on wire racks. Makes 24 rolls.
One Year Ago Today: Julia Child's Curried Turkey Soup
Two Years Ago Today: Alu Ki Tikki (Potato Patties)
Three Years Ago Today: Anadama Rolls
Labels:
batter bread
,
bread
,
cheese
,
corn meal
,
easy
,
rolls
,
side dish
,
yeast rolls
Tuesday, June 28, 2011
Cottage Cheese Rolls

From the kitchen of One Perfect Bite...I always tuck bread or rolls into my picnic hamper. I love the way the yeasty aroma permeates the basket and leaves no doubt that buried treasure lies within. I have a real weakness for good bread and can't imagine a proper picnic without a soft or crusty loaf as part of the meal. I first had these rolls at a block party when I was a child. They came from Hannie's German kitchen and they were still warm when she put them on the table. The rolls, obviously, created a taste memory that is not easily forgotten. I've since done some research, and learned that the rolls are much like those made in Central Europe in the days before World War II. I wanted to know why cottage cheese was used in the buns, and, unfortunately, came up with no good answers. While Hannie used cottage cheese to add protein to the bread, I was unable to discover why it was first used in those European kitchens. Chances are it was an afterthought, used to prevent the waste of cheese on the verge of spoiling. That is purely a guess on my part, but the history of the region suggests it is probably close to the mark. The cheese helps produces light rolls that have a vaguely sour taste. They are extremely good, but the dough, which rises quickly, is difficult to work with. It is very sticky. It will be hard to resist the temptation to add more flour than the recipe actually calls for. Resist with all your might. Some suggest using floured hands to knead the dough. I prefer to keep my hands wet. While, I know it seems counterintuitive, damp hands will do the trick and prevent too much flour from being added to the dough. Save for the stickiness, these rolls are easy to make. While, I think they are best from the oven, they keep well for several days if properly wrapped. The recipe can be doubled, and herbs such as dill or chives make a nice addition if you want to add additional flavor to the rolls. Here's the recipe.
Cottage Cheese Rolls... from the kitchen of One Perfect Bite
Ingredients:
2-1/4 teaspoons active dry yeast
1/4 cup warm water (110° to 115°)
1 cup (8 ounces) 4% cottage cheese
1 large egg
2 tablespoons granulated sugar
1 teaspoons salt
1/4 teaspoon baking soda
2-1/4 cups all-purpose flour
Directions:
1) Combine yeast and water in a large mixing bowl. Set aside.
2) Heat cottage cheese in a small saucepan set over medium heat until it registers a temperature of 110 to 115 degrees F.
3) Add cottage cheese, egg, sugar, salt, baking soda and 1 cup flour to yeast mixture. Beat until perfectly smooth. Stir in remaining flour to form a firm dough (dough will be sticky).
Turn onto a floured surface; knead until smooth and elastic, about 6-8 minutes. Place in a greased bowl, turning once to grease top. Cover and let rise in a warm place until doubled, about 1 hour.
4) Punch dough down. Turn onto a lightly floured surface; divide into 15 pieces. Shape each piece into a roll. Place 2 in. apart on greased baking sheets. Cover and let rise until doubled, about 30 minutes.
5) Bake at 350 degrees F for 10-12 minutes or until golden brown. Remove to wire racks. Yield: 15 rolls.

One Year Ago Today: Baba Ganoush

Two Years Ago Today: Blue Corn Muffins
You might also enjoy these recipes:
Homemade Hamburger Rolls - Food is Love
Multigrain Rolls - Annie's Eats
Warm and Buttery Olive Oil and Rosemary Rolls - The Recipe Girl
Sour Cream Yeast Rolls - Real Mom Kitchen
Honey Yeast Rolls - Plain Chicken
Labels:
bread
,
cottage cheese
,
easy
,
yeast rolls
Friday, August 27, 2010
Buttermilk Buns, Barbecue Sauce and the Remains of the Day


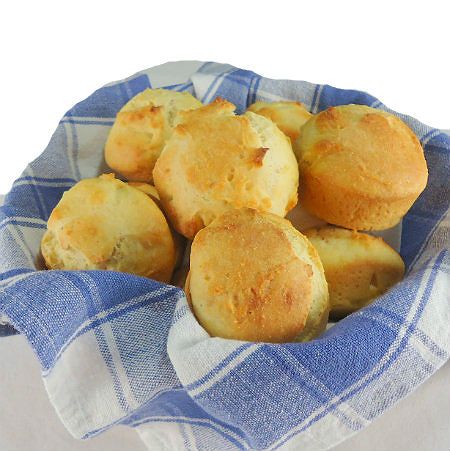
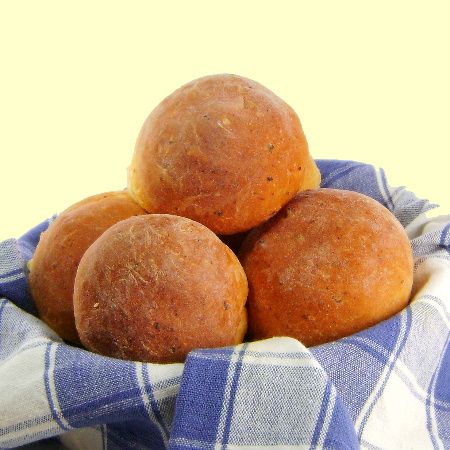
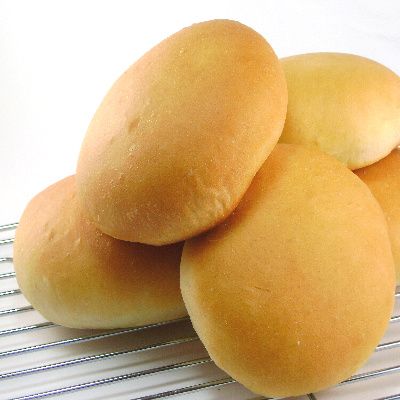
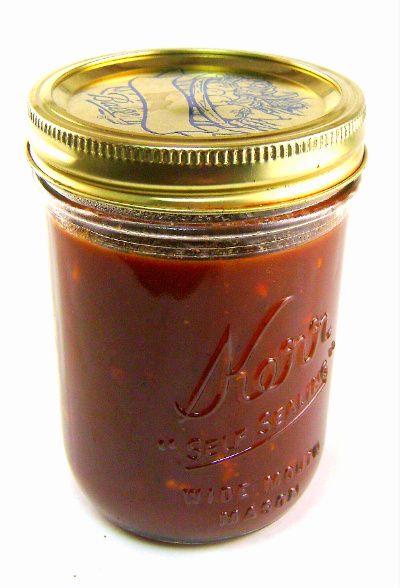
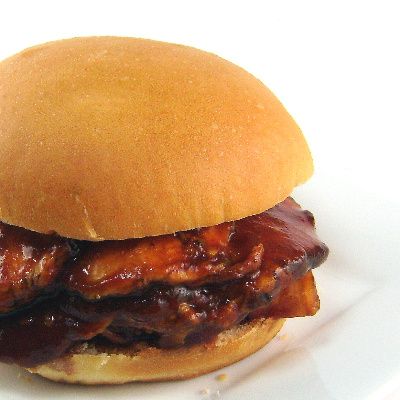
From the kitchen of One Perfect Bite...Try though I might, I can't ignore the siren's song that screams, "Eat me!", each time the refrigerator door is opened. My leftovers are demanding attention. Given the number of meals that have been made lately, the status of the remains is really not too bad. The problem is that I'm not fond of leftovers and dislike repetition in my meals. Like it or not, those remains must be dealt with or tossed and I don't toss food. I had a goodly sized piece of roast pork that was sliced and warmed in a thick, but quick barbecue sauce. I made this everyday sauce from a few simple ingredients and served some of the warmed pork on homemade sandwich buns. The unused portion of the sauced pork and sandwich buns have been frozen to use for lunch on other days. Neither the sauce nor the buns are fancy and aren't meant for those seeking designer fare, but if you're looking for a fast and easy way to deal with leftover pork or beef, stay right where you are. This quick homemade barbecue sauce is my way of waging war on the condiments that clutter my refrigerator shelves. Bottles of sauce and salad dressings tend to gang up on me - much as cereal boxes do in the pantry - and to prevent that from happening I prefer to make as many of my own condiments and dressings as I can. While it sounds very dramatic, I also make my own sandwich buns. This is not a big deal. I can't find decent ones, so I prefer to make and freeze my own. I usually make three dozen at a time and that one-time effort holds us for several months. The recipe is super-simple but produces delicious rolls that you can shape as you please. Today's feature is a twofer that I think you'll enjoy. Here are the recipes for buttermilk buns and barbecue sauce.
Buttermilk Sandwich Buns...from the kitchen of One Perfect Bite
Ingredients:
1 cup warm water
2-1/2 teaspoons active dry yeast
2 to 3 tablespoons sugar
2 tablespoons canola oil
1 large egg
3-1/4 cups all-purpose flour
1/4 cup buttermilk powder
1 teaspoon salt
Directions:
1) Combine water, yeast and sugar in the bowl of an electric stand mixer fitted with a dough hook. Whisk in canola oil and egg. Add flour, buttermilk powder and salt. Mix on low-speed until dough forms a ball and pulls away from side of bowl, about 6 to 8 minutes. Cover bowl with plastic wrap and let dough rise in a warm place until doubles in size, about 1 hour.
2) Grease one or two large baking sheets. Turn dough onto a floured surface. Divide dough into 8 portions. Slap or roll each piece into desired shape and place on prepared pan leaving enough space between them to allow them to rise. Cover with plastic wrap and allow to double in size, about 30 to 40 minutes.
3) While dough rises preheat oven to 375 degrees F. Bake rolls until golden, about 12 to 15 minutes. Transfer to a wire rack for cooling. Yield: 8 sandwich buns.
Everyday Barbecue Sauce...from the kitchen of One Perfect Bite
Ingredients:
1 cup ketchup
1 cup water
3 tablespoons cider vinegar
3 tablespoons Worcestershire sauce
1/4 cup brown sugar
1 teaspoon sweet smoked paprika
1 teaspoon chili powder
1/2 teaspoon freshly ground pepper
1/8 to 1/2 teaspoon cayenne pepper
1/2 teaspoon kosher salt
1 teaspoon minced garlic
Directions:
1) Combine ketchup, water, vinegar,Worcestershire sauce, sugar, paprika, chili powder, black pepper, cayenne pepper, salt and minced garlic in a saucepan.
2) Place saucepan over medium heat and bring contents of pan to a simmer. Cook until sauce thickens and is reduced by 1/4 in volume, about 5 minutes. Use immediately or allow to cool and refrigerate. Yield: 2 cups.
You might also enjoy these recipes:
Ellen's Famous Hamburger Buns - Home Cookin' from Ellen's Kitchen
Honey-Oatmeal Dinner Rolls - Salad in a Jar
Buttermilk Dinner Rolls - Michael Ruhlman
Honey Yeast Rolls - Plain Chicken
Kaiser Rolls - One Perfect Bite
Torpedo Rolls - One Perfect Bite
Labels:
barbecue
,
buttermilk
,
condiment
,
sandwich
,
sauce
,
yeast rolls
Thursday, May 6, 2010
Parker House Rolls

From the kitchen of One Perfect Bite...I was raised in an apartment that was in one of four buildings set around a central courtyard. The buildings each contained four duplex and two garden units. The complex had twelve courtyards that, when viewed from the air, resembled military housing, save for the extensive landscaping and oversized buildings that housed the large apartments. During the war years, a scant male presence created a community of women who, of necessity, learned to fend for themselves. They formed tightly knit groups and established support systems that I haven't seen the likes of since, and there were times that it was impossible to distinguish neighbors from family members. Holidays tended to be communal affairs. You've already met Hannie and Mrs. P. who lived in the duplexes to the left of ours. You have yet to meet Anita who lived across the hall in our half of the building. She was young, married, but childless, and was a mathematician working on a project at the University of Chicago. More interesting to me at the time was the Christmas tree she kept in her living room. It was put up the year her husband was sent to North Africa and remained there until his homecoming. The tree was by then an ornamented stick, but it stood watch like a sentinel connecting her to him while he was away. Anita was no match for the cooking of Hannie or Mrs. P., but she did her share of work for our parties which were held in the basement laundry room. It was an expanse of about 75 feet that separated the two garden apartments from each other. The basement was whitewashed and curtained and, under the eagle eye of Mrs. P., a deliberate effort was made to keep it immaculate. On special occasions, a wringer washer, shared by all the neighbors, was rolled away and wash tubs were boarded and draped to hold the evenings bounty. Fels Naptha and bleach competed with the wonderful aromas that wafted down the stairs to the basement. Anita usually brought her Parker House rolls. They were all the rage back then and considered to be quite stylish. The rolls were first served at the Parker House Hotel in downtown Boston in the mid 1870's. While the rolls were sold to other hotels and restaurants, the ingredients were kept secret until 1933 when the recipe was requested by President Roosevelt. Anita's rolls were delicious. They were light and fluffy and the aroma as they baked could drive you mad. While I suspect memory plays tricks with reason, I've never had rolls that tasted quite as good as hers. This recipe is the closest I've ever come to matching them. I hope you enjoy them.
Parker House Rolls...from the kitchen of One Perfect Bite
Ingredients:
2-1/4 teaspoons active dry yeast
2 tablespoons sugar, divided use
1/2 cup warm water
1-1/2 cups scalded milk, cooled to room temperature
1 tablespoon salt
1/2 cup melted butter, divided use
6 cups all-purpose flour
Directions:
1) Combine yeast, 1 tablespoon sugar and water in the bowl of an electric stand mixer. Let sit until frothy, about 5 minutes. Add milk, reserved 1 tablespoon sugar and 1/4 cup melted butter to yeast. Add 1-1/2 cups flour and beat at medium speed for 3 minutes. With mixer at low speed, add 4 cups of flour, a cup at a time, beating until a soft dough forms. Turn onto a lightly floured board and knead until smooth and elastic, 8 to 10 minutes. Transfer to a greased bowl, cover with plastic wrap and let double in volume, about 1 hour.
2) Punch down dough and turn onto a lightly floured board. Let rest for 5 minutes. Roll dough into a sheet 1/2-inch thick. Cut into 3-inch rounds. Crease each round in the middle with the back of a knife. Brush exposed surfaces with reserved butter. Fold dough over and press lightly to seal. Place rolls 2-inches apart on ungreased baking sheets. Cover lightly and allow to rise again until nearly double in volume,
about 35 minutes.
3) Meanwhile preheat oven to 425 degrees F. Bake until rolls are golden brown, about 12 to 15 minutes. Cool on racks. Yield: 36 rolls.
You might also enjoy these recipes:
Torpedo Rolls - One Perfect Bite
Kaiser Rolls - One Perfect Bite
Buttermilk Cluster with Blue Poppy Seeds - One Perfect Bite
This post is being linked to:
Wild Yeast - Yeast Spotting
Tuesday, November 17, 2009
Anadama Rolls


From the kitchen of One Perfect Bite...I don't know how or when it happened. After years of going "over the river and through the woods" there came a day when I, ready or not, like it or not, was the grandmother to whose home the revelers cometh. I know it's terribly unsophisticated to celebrate this meal, but I'll tell you up front that I love it, if for no other reason than the wonderful aromas that emanate from the kitchen as this dinner comes together. Christmas builds to a olfactory crescendo with aromas that are released over a period of days. Not so Thanksgiving. This is an all or nothing affair. The assault begins with breakfast bacon and continues through the day as the aroma of bread and pie and turkey and cider meld into a harmonious union that could put the orchestration of a symphony to shame. Thanksgiving is not a difficult meal to prepare; it's as easy to make for twenty as it is for two, but it does require a game plan and a bit or organization to pull it off. I do a great deal of the work ahead of time. Today I made our rolls, both Anadama and potato, and enough pie crust to last us through the Christmas holiday. Everything is in the freezer waiting to debut on the big day. The pie crusts will be rolled and filled on Thanksgiving morning. I pre-bake the rolls. We talked about Refrigerator Potato Rolls last year. Since then I've resurrected this wonderful recipe for Anadama Rolls. The recipe appeared in Bon Appetit over a decade ago. I really like these rolls. There is something especially fitting about rolls made with corn meal and molasses for Thanksgiving day. Symbolism aside, the rolls are really wonderful and they are not hard to make. I know you'll like them. Here's the recipe.
Anadama Rolls...from the kitchen of One Perfect Bite
Ingredients:
1 cup whole milk
1 cup water
2 teaspoons salt
1/2 cup yellow cornmeal
1/3 cup mild-flavored (light) molasses
2 tablespoons (1/4 stick) unsalted butter
1/2 cup warm water
1 envelope (2-1/4 teaspoons)dry yeast
4 to 4-1/2 cups all-purpose flour
1 egg, beaten to blend
2 teaspoons sesame or poppy seeds
Directions:
1) Bring milk, 1 cup water and salt to boil in heavy large saucepan over medium heat. Slowly whisk in cornmeal. Cook until mixture thickens and boils, whisking constantly, about 2 minutes. Remove from heat. Whisk in molasses and 2 tablespoons butter. Transfer mixture to large bowl. Cool until thermometer inserted into center of mixture registers 115°F, whisking often, about 15 minutes.
2) Pour 1/2 cup warm water into small bowl; sprinkle yeast over. Let stand until yeast dissolves and top looks spongy, about 10 minutes. Stir yeast mixture into cornmeal mixture. Gradually mix in 4 cups flour, about 1 cup at a time, to form soft dough that pulls away from sides of bowl. Sprinkle 1/4 cup flour onto work surface. Turn dough out onto floured surface; knead until smooth and elastic, sprinkling with more flour by tablespoonfuls if needed, about 10 minutes (dough will remain slightly sticky). Form dough into ball. Coat a large bowl with butter or shortening. Add dough to bowl and turn to coat dough with butter or shortening. Cover bowl with plastic wrap. Let dough rise in warm draft-free area until doubled in volume, about 1 hour 15 minutes.
3) Punch down dough. Cover with plastic wrap; let stand 10 minutes. Coat each of two 9-inch-diameter cake pans with butter or shortening. Roll dough into 18-inch-long log. Cut into 18 equal pieces. Using floured hands, form each dough piece into ball. Place 9 dough balls in each pan, spacing apart. Cover each pan loosely with towel. Let rolls stand in warm draft-free area until almost doubled in volume, about 30 minutes. Position rack in center of oven and preheat to 400 degrees F. Brush rolls with egg glaze. Sprinkle with seeds. Place rolls in oven and immediately reduce temperature to 350°F. Bake rolls until golden brown, about 30 minutes. (Can be made 1 day ahead. Cool completely. Store airtight at room temperature. Wrap rolls in foil and rewarm in 350°F oven 10 minutes.) Serve warm. Yield: 18 rolls.
You might also enjoy these recipes:
The Way the Cookie Crumbles - Cinnamon Rolls
Pinch My Salt - Sweet Potato Buttermilk Rolls
Cooking By the Seat of My Pants - Cloverleaf Dinner Rolls
This recipe is linked to:
Wild Yeast - Yeast Spotting
Friday, April 24, 2009
Garlic Herb Rolls
From the kitchen of One Perfect Bite...Oregon is a gorgeous state with pockets of beauty that will take your breathe away. Bob and I actively seek them out. It starts when one of us sees an obscure marker that veers off the beaten path. A glance, a nodding assent and then a sharp turn takes us onto the road less travelled. The hope is we'll find a place so beautiful that it will reveal the world as it should be. Naive? Perhaps, but we've found some transcendentally beautiful places. If you blink you'll miss the marker that points the way to Loon Lake. Fortunately, we didn't blink and found this rainbow at its end. It's an isolated, fir-fragrant, untouched piece of yesterday. Folks who know this spot are its caretakers. The grounds are beautifully kept and it's a family kind of place. We love to show it to the unsuspecting and it's become our favorite picnic spot. It's the place where we had our first picnic of the year. Rather than pack a finished hamper, we grilled ribs in the campground and served them with Asian noodles and these wonderful Italian herb rolls. We'll talk about the ribs in a few weeks. My recipe today is for the rolls. They are extremely easy to do and packed with flavor. They have the texture of a bread and won't crush or flatten, so they're perfect picnic fare. They also freeze well. This is a good recipe for beginners. Oh, about Loon Lake - I'd tell you but...Garlic Herb Rolls...from the kitchen of One Perfect Bite
Ingredients:
12 large garlic cloves, peeled
1-1/2 cups milk + milk for glazing
4 cups all-purpose flour
1 teaspoon table salt
2-1/2 teaspoons active dry yeast
1-1/2 teaspoons dried, crushed Italian herb seasoning
2 tablespoons canola oil
1 large egg, lightly beaten
Coarse sea salt
Directions:
1) Place garlic cloves and milk in a 2-quart saucepan. Bring to a boil, reduce heat and simmer for 15 minutes. Remove from heat and cool slightly. Place in a blender jar and pulse to puree garlic. Set aside.
2) Place flour, salt, yeast and herbs in a large bowl. Whisk to combine.
3) Add milk, oil and egg to dry ingredients. Mix with hands or a wooden spoon to form a dough.
4) Turn onto a lightly floured work surface and knead until soft and smooth, about 3 minutes.
5) Place dough in a greased bowl. Cover, let rise in a warm place until double in volume, about 1 hour.
6) Coat a baking sheet with nonstick cooking spray. Set aside. Preheat oven to 425 degrees F.
7) Turn dough onto a work surface. Knead gently for a minute or two. Form into 8 rolls. Place on prepared baking. Lightly score top of rolls with a knife. Cover and let rise for 15 to 30 minutes. Brush rolls with reserved milk. Sprinkle with sea salt.
8) Bake until rolls are golden brown, about 15 to 20 minutes. Transfer to a wire rack. Cool. Yield: 8 rolls.
I'm sending this recipe to Cindy Star who is hosting Bread Baking Day #19. BBD is a popular food-blog event that was started by Zorra of Kochtopf.
Wednesday, April 8, 2009
Hot Cross Buns - Up Close and Personal
Most folks associate hot cross buns with Good Friday and the Easter season. Actually, these small rolls predate Christianity and were associated with pagan ceremonies that celebrated the vernal equinox and the feast of Eostre, the goddess of spring. As Christianity gained a foothold in Britain, church leaders tried to ban symbols associated with the pagan festival. The ban proved to be untenable, so some of the symbols were adopted and woven into the fabric of Christian ritual and celebration. The cross on the buns, once a symbol of the equinox and phases of the moon, came to represent the crucifixion. The buns, as part of Christian tradition, can be dated to the 12th century when monks made them to distribute to the poor who visited their monasteries on Good Friday - also known as the Day of the Cross. The distribution of the buns became a tradition and the ingredients required to make them were standardized. Traditional hot cross buns contain flour, milk, sugar, butter, eggs, currants and spices such as cinnamon and nutmeg. The cross on the top may be cut into the bun, fashioned out of icing or made out of pastry strips. According to tradition, hot cross buns were made from the same dough used to make consecrated bread and they were the only food that could be eaten by the faithful on Good Friday. Fast forward to the court of the Tudor monarchs where the buns were seen as a dangerous reminder of Catholic Easter tradition. They attempted to ban their sale but that resulted in riots that caused Queen Elizabeth I to pass a law permitting bakeries to sell them, but only during the Easter and Christmas season. That's probably why we only see them at this time of year.
Moving forward yet again, the buns were carried by monks across the Irish Sea and then taken from Ireland by the converted heathens - my relatives - to America where they ended up on my family's table. My Mother was not a baker, but we were fortunate in having neighbors who were extraordinary cooks. Unfortunately, the kitchens - German and Swedish - were engaged in an on-going rivalry. Every Easter we would receive Hot Cross Buns from each, but the rivalry demanded diplomatic skills of the highest order. Neither kitchen produced the recipe I use today. This one comes from the Gourmet Cookbook and it produces absolutely delicious rolls. There is, however, a problem with the recipe. I think the baking time is understated by several minutes; I can't get the darn things to brown in the time specified by the recipe. The rolls you see in these photos were placed under a broiler to brown and they were glazed with a syrup that's not part of the recipe. The buns are great but the browning issue drives me crazy. Any ideas? They'd be appreciated. Also, this recipe calls for an uncooked pie crust that's included at the very end of the ingredients list. It's used to make the pastry crosses. It's no big deal, but I wanted to give you a heads up, so there'll be no scrambling when the rolls complete their second rise. These really are delicious and the aroma when they bake will drive you mad.Hot Cross Buns
Ingredients:
1 cup warm milk (105°–115°F.)
2 (1/4-ounce) packages (5 teaspoons) active dry yeast
1/2 cup plus 1 teaspoon granulated sugar
4 cups all-purpose flour
1 1/2 teaspoons ground allspice
1/2 teaspoon cinnamon
1/4 teaspoon cardamom
1 teaspoon salt
1 stick + 2 tablespoons (1/2 cup plus 2 tablespoons) cold unsalted butter
2 large eggs
1 large egg yolk
1/2 cup dried currants
1/3 cup golden raisins
2 teaspoons finely grated fresh orange zest
2 teaspoons finely grated fresh lemon zest
3 tablespoons superfine granulated sugar
1 uncooked pastry crust
Directions:
1) In a small bowl stir together milk, yeast, and 1 teaspoon granulated sugar. Let mixture stand 5 minutes, or until foamy.
2) Into a large bowl sift together flour, allspice, cinnamon, cardamom, salt, and remaining 1/2 cup granulated sugar. Cut butter into bits and with your fingertips or a pastry blender blend into flour mixture until mixture resembles coarse meal. Lightly beat 1 whole egg with egg yolk. Make a well in center of flour mixture and pour in yeast and egg mixtures, currants, raisins, and zests. Stir mixture until a dough is formed. Transfer dough to a floured surface and with floured hands knead until smooth and elastic, about 10 minutes. Transfer dough to an oiled large bowl and turn to coat. Let dough rise, covered with plastic wrap, in a warm place until doubled in bulk, about 1 1/2 hours.
3) Butter 2 large baking sheets.
4) On a floured surface with floured hands knead dough briefly and form into two 12-inch-long logs. Cut each log crosswise into 12 equal pieces. Form each piece into a ball and arrange about 1 1/2 inches apart on baking sheets. Let buns rise, covered, in a warm place until doubled in bulk, about 45 minutes.
5) Preheat oven to 400°F.
6) While buns are rising, lightly beat remaining egg with superfine sugar to make an egg glaze.
7) On a lightly floured surface with a floured rolling pin roll out pastry dough into a 20- by 6-inch rectangle (about 1/8 inch thick). With a sharp knife cut rectangle crosswise into 1/8-inch- wide strips.
8) Brush buns with egg glaze and arrange 2 pastry strips over center of each bun to form a cross. Trim ends of pastry strips flush with bottoms of buns. Bake buns in upper and lower thirds of oven, switching position of sheets halfway through baking, until golden, about 12 to 15 minutes. Transfer buns to a rack to cool slightly. Buns may be made 1 week ahead and frozen, wrapped in foil and put in a sealable plastic bag. Thaw buns and reheat before serving. Serve buns warm or at room temperature. Yield: 24 rolls.
Recipe courtesy of The Gourmet Cookbook
I'm sending this recipe to Susan at Wild Yeast for her weekly Yeast Spotting event.
Friday, April 3, 2009
Toscatårta and Swedish Coffee
I'm always hesitant to reply when people ask me to name my favorite dessert. My tastes run to the barely sweet, but within that category I have a dozen favorites. This petite cake is one of them. I learned to bake a version of it as a child. A neighbor was my teacher. Armed only with a wooden spoon, her massive arms beat butter and sugar to submission and produced cakes and pastries that, to this day, astound me. Coffee was always simmering on her stove but a fresh pot, complete with a raw egg, was always made to accompany this lovely almond-topped cake. That, too, was watched with fascination. My first cup of coffee - a café au lait much heavier on au lait than café - came as a reward for making my first tårta. The cake is simple to do but make sure you use an 8-inch cake pan. I actually use a cheesecake pan with fixed sides to make mine. Make sure to spread the topping on a still warm cake. Keep a careful eye on the cake once it goes into the broiler as it takes only seconds for the topping to burn. This tårta does not keep well, so plan on serving it the day it's made - it's best eaten warm. I really, really like this cake. I think you will, too. As a curiosity, I'm including a recipe for Swedish egg coffee in this post. Why an egg? It helps the grounds settle to the bottom on a pot. It's not a bad technique to have at your disposal if your coffee pot breaks. Toscatårta
Ingredients:
Cake:
2 teaspoons unsalted butter, softened
1 tablespoon dry bread crumbs
1 cup all-purpose flour
1 teaspoon double-acting baking powder
1/4 teaspoon salt
2 eggs
2/3 cup sugar
1/2 teaspoon vanilla
1/4 cup milk
4 tablespoons unsalted butter, melted
Almond Topping:
2 tablespoons unsalted butter, softened
1/4 cup sugar
1 tablespoon flour
2 tablespoons milk
1/3 cup sliced blanched almonds, toasted
1/2 teaspoon vanilla
Directions:
To make cake:
1) Preheat oven to 350 degrees F. Liberally coat bottom and sides of a high-sided 8-inch round pan with 2 teaspoons butter. Sprinkle with breadcrumbs or flour. Tap out excess.
2) Sift flour, baking powder and salt together in a mixing bowl. In the bowl of an electric mixer beat eggs until blended. Add sugar and vanilla and continue to beat until the mixture is pale yellow and forms a ribbon when the beater is lifted out.
3) Using a spatula, fold flour mixture and milk alternately into egg mixture by first adding about 1/3 of the flour, then a little milk, then another 1/3 of flour, and remaining milk. Finally, add butter and fold in remaining flour. Be careful not to overfold. Pour batter into prepared pan. Bang pan on table to remove air pockets.
4) Bake cake in the center of the oven for 30 to 40 minutes, or until cake is golden brown and is springy when touched lightly. A toothpick inserted into center of cake should come out dry and clean. Remove from oven. Let cool in pan for 10 minutes.
To make almond topping:
5) Meanwhile, combine butter, sugar and flour in a small pan and stir together briefly with a wooden spoon. Add milk and cook over low heat, stirring constantly, for 2 or 3 minutes, until mixture is smooth and thick. Remove from heat and stir in almonds and vanilla. Set aside.
Final assembly:
6) Preheat broiler. Run a knife around the edges of cake to loosen from pan. Invert onto a wire rack. Set another rack on top of cake and invert again. Spread topping over warm cake. Place cake, still on rack, under the broiler, about 3 inches from the heat. Broil 3 to 5 minutes, until top is golden brown and bubbling. Check constantly to be sure that topping does not burn. Serve while still warm. Yield: 1 8-inch cake.
Adapted from The Cooking of Scandinavia by Dale Brown
Swedish Egg Coffee
Ingredients:
10-12 cups of water
1 cup regular-grind coffee
1 egg
1 cup of ice cold water
Directions:
Bring water to a boil and remove from heat. In a small bowl, mix coffee and egg. Add a little hot water to coffee and egg mixture, then pour mixture into hot water. Stir and heat until it comes to a rolling boil. Remove from heat and pour in 1 cup of ice cold water. Let set for 10 minutes before serving. (The egg and grounds settle to the bottom, leaving the coffee a dark honey color.)
Friday, November 21, 2008
Refrigerator Potato Rolls
This is a great recipe to have at the ready for holiday meals. Once the dough is made it sits in the refrigerator for one to three days. It's removed from the refrigerator and shaped into rolls about two hours before baking. I love to put these in the oven just before guests arrive. The aroma drives them absolutely insane. The shape the rolls take is up to you. Here's a link with suggestions and instructions for shaping dinner rolls. I should point out that this dough can also be used to make cinnamon rolls, so the same batch can do double duty and be served for breakfast and dinner. This is really simple to do. Enjoy!
Refrigerator Potato Rolls
Ingredients:
1-1/2 cups warm water
2 packages active dry yeast
1/2 cup granulated sugar
1 tablespoon kosher salt
1/2 cup instant, reconstituted warm mashed potatoes, prepared without butter and salt
2 large eggs, room temperature
1/2 cup butter, softened
6-1/2 cups all-purpose flour
Glaze: melted butter or egg wash (1 egg beaten with 2 tablespoons water)
Poppy or sesame seeds (optional)
Directions:
1) Pour warm water into a medium size bowl. Sprinkle yeast over water; add sugar and salt; stir to combine. Let sit until mixture begins to bubble, about 5 minutes.
2) Add eggs, soft butter, warm mashed potatoes and 3 cups flour. Beat with a portable mixer until just smooth. Using a wooden spoon, beat in 2 additional cups of flour until just mixed into dough. Add remaining 1-1/2 cups flour, using hands to mix dough until it's smooth and leaves the sides of bowl. Brush top with oil or melted butter. Cover with plastic wrap and let rise in refrigerator until doubled in bulk, about 2 hours. Punch down. Cover and return to refrigerator for one to three days, punching down once each day.
3) Remove dough from refrigerator 2 hours before serving. Punch down and shape rolls on a lightly floured board - clover leaf, fan-tans and pan rolls are the easiest to do, but you can use any shape you wish. Cover rolls with a towel; let rise until double in bulk, about 1 hour. Preheat oven to 400 degrees F. Brush with butter or egg wash and seeds. Bake until golden, about 12 minutes. Serve warm if possible. Yield: 36 rolls.
Subscribe to:
Posts
(
Atom
)